
Do you want to know how to use Firebase Crashlytics? You’ve come to the right place.

You know that the impact of crush and crash in your life is almost identical when you first come across — to bring you in a state of shock. 😂
The crash in your app doesn’t let you sleep since you have to fix it before your boss notices, and having a crush doesn’t let you sleep. Sad Life! 🤪
Of course, this article isn’t about ways to get your crush but to solve technical issues.
It’s where the Firebase Crashlytics comes in handy.
It helps you to make your app stable since you can see a complete picture of crashes.
Moreover, you can reach the root cause of the crashes like an FBI tracks a hacker. 😂
A good developer knows happy users stay on your app longer, recommend your app to friends, which ultimately helps in ranking on Google Play Store.
Quick Jumps
What is Firebase Crashlytics? (Skip If You Already Know)
Firebase Crashlytics is a Firebase product that helps in spontaneously collecting, analyzing, and organizing your app crash reports.
It also assists you to understand which issue is most important so that you can prioritize and fix them before it becomes a headache for your users.
The best part is to provide you a great interactive real-time dashboard that alerts you to keep you aware of the newest issues, no matter how small or big.
Moreover, crashes are intelligently grouped across different versions of your app with a separate stack trace which is easily explored in the dashboard.
With the help of logs and key-value pairs in Crashlytics, you can add some context in each of the stack traces and understand what your app was experiencing before the crash.
So when a crash occurs in your app, this extra information is sent to the Crashlytics which is visible on the dashboard and gives you the context you need to help pinpoint the exact reason for the crash.
Similarly, non-fatal errors are also reported in the dashboard. If your app is built with NDK on Android Crashlytics will capture native stack trace as well.
In simple words, yes, you can rely on Crashlytics for the stability of your app.
Now you can spend less time troubleshooting and more time doing what you love.
How Does It Work? (Video)
As you can in the video, we just created an artificial crash to capture the information in Firebase Crashlytics to validate the authenticity of the tool.
Now stop reading theory and start practicing.
How to Use Firebase Crashlytics [Step by Step]
Before the starting of the tutorial make sure that your app already registers and configures with Firebase.
For example: If your app already uses any of the Firebase products then it means the app is already registered with Firebase.
If not then go ahead, start a new project and integrate your app with Firebase.
Well after implementing Firebase to your app, you can implement Crashlytics in four steps.
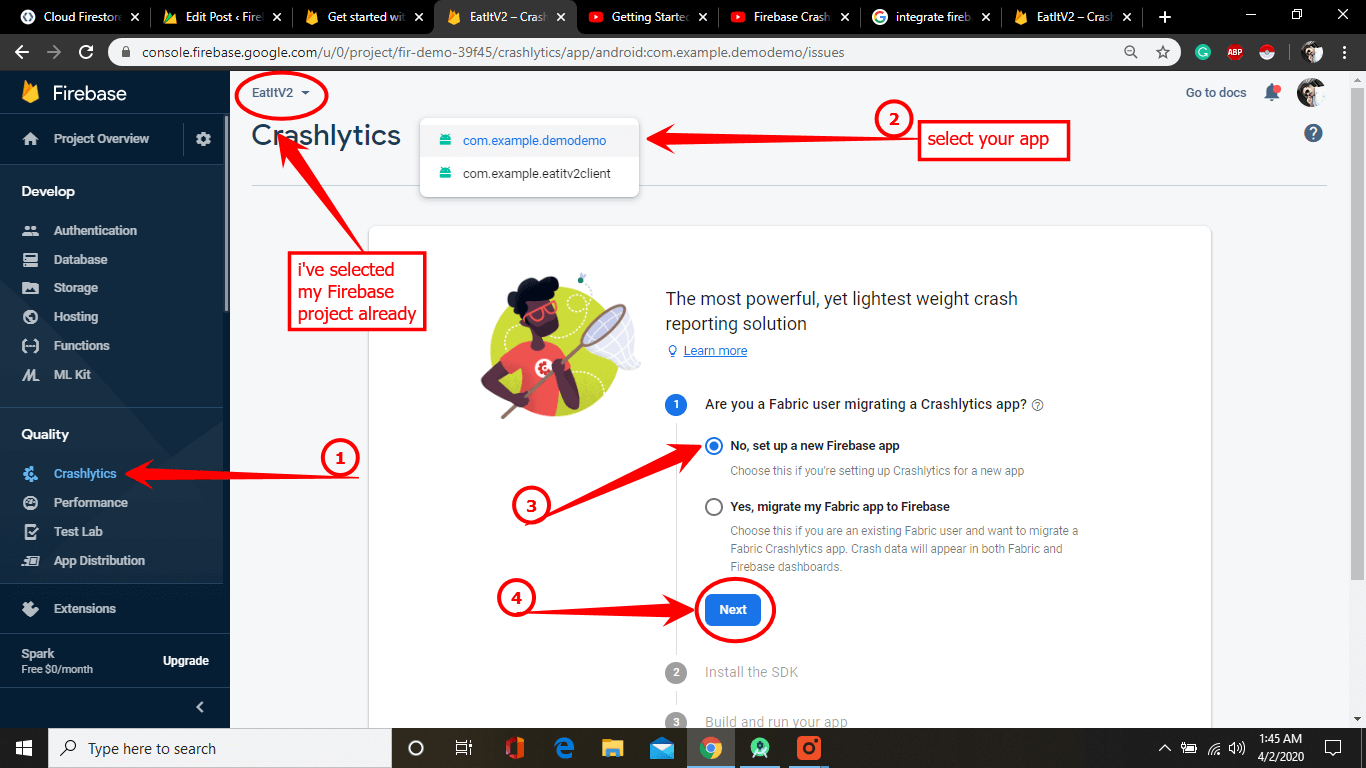
Step 1 – Set up Crashlytics in the Console
- Go to the Console and select your project.
- Afterward, click Crashlytics which is available on the left side of the navbar.
- If you have more then one app registered with your Firebase project, then select your app from the top dropdown menu.
- In my case, I am setting up new Crashlytics to my app, that’s why I select “No setup a Firebase app” and click Next.
Step 2 – Add the Crashlytics SDK in Android project
1. Setting in Build.Gradle(Project level)
- Now open your Android Studio project and Go to build.Gradle(project level) file and add Google maven’s repository inside the build script -> repositories.
- 2. Then add Google Services and Fabric Crashlytics inside build.Gradle(project level) file and sync now.
Here is my complete build.Gradle (Project level) file If you face any error you can check my setting.
2. Setting in Build.Gradle(App level)
- Add Crashlytics dependencies in Build.Gradle (app level) and click Sync Now which is at the top right corner
Here is my complete Build.Gradle(app level) file.
Note: You don’t need to initialize; Crashlytics it will initialize automatically when it is added in the app.
Step 3 – Do Some Code.
Now just to make this tutorial simple I am adding a simple button in the XML layout
below is the activity_main.xml file
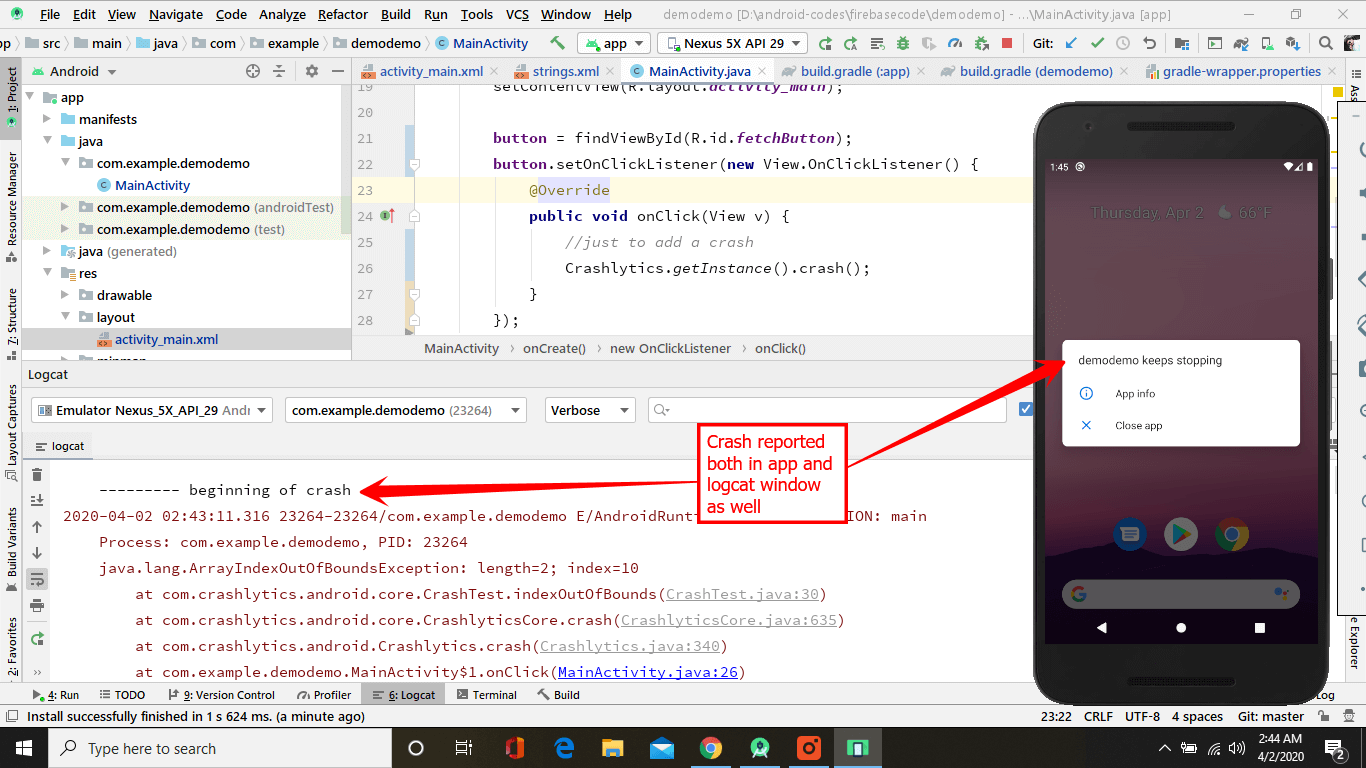
Now in order to test the crash result, I’m adding a few lines of code to check a crash. Just copy below code and paste inside MainActivity.java OnCreate() method. For the sake of testing, I am adding this line. Otherwise, in the real app, you don’t need to add these lines of code because whenever a crash occurs. It will be recorded in the Firebase console.
Below is the complete MainActivity.java code
Step 4 – Run & Build your Project
Now run the app.
Afterward, when you run the app and click on the button. A crash occurs in both the app & Logcat window of the android studio.
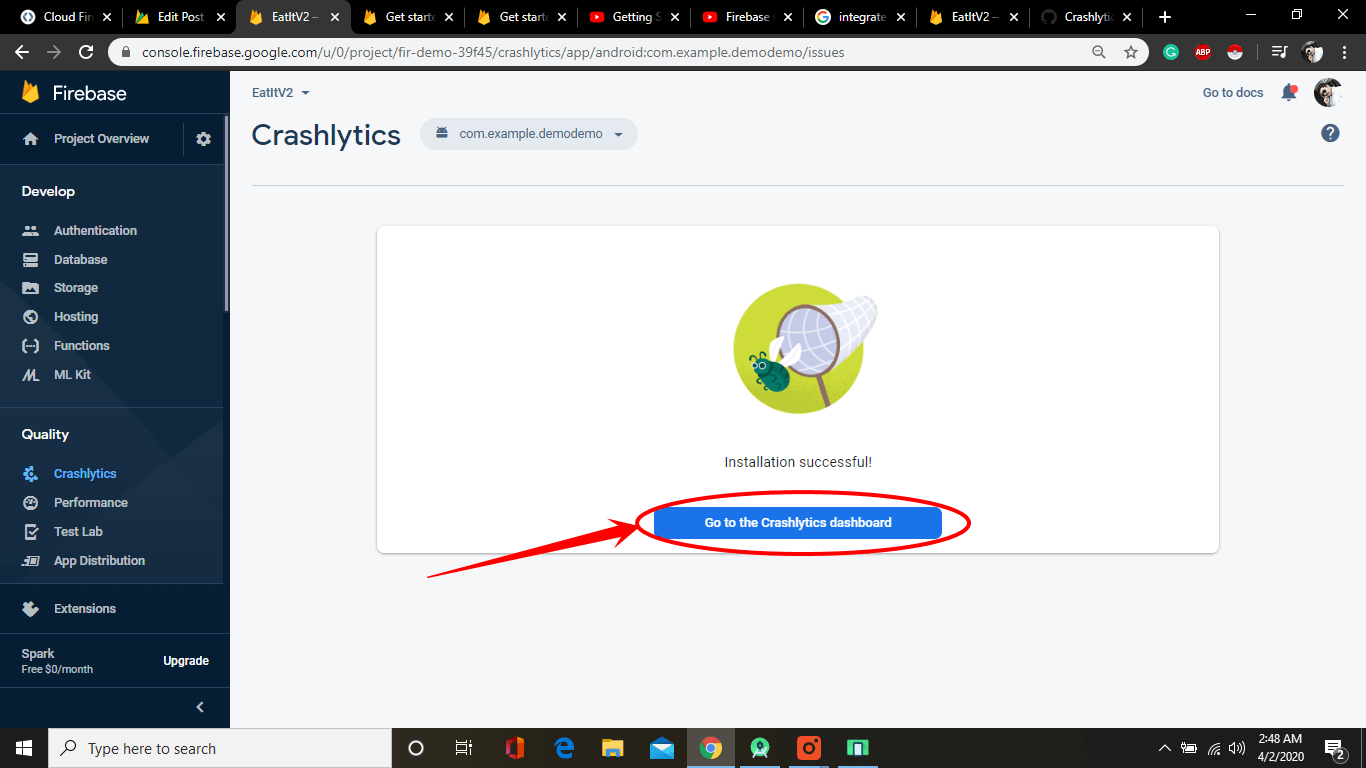
Now go to the Firebase Console, now you can see the installation is successful.
Afterward, click on “Go to Crashlytics dashboard”
Now when you go to the Crashlytics dashboard you can see the crashes immediately. When you land on the Crashlytics dashboard from the top you can filter it by version.
Now scroll down and click on one of your crashes.
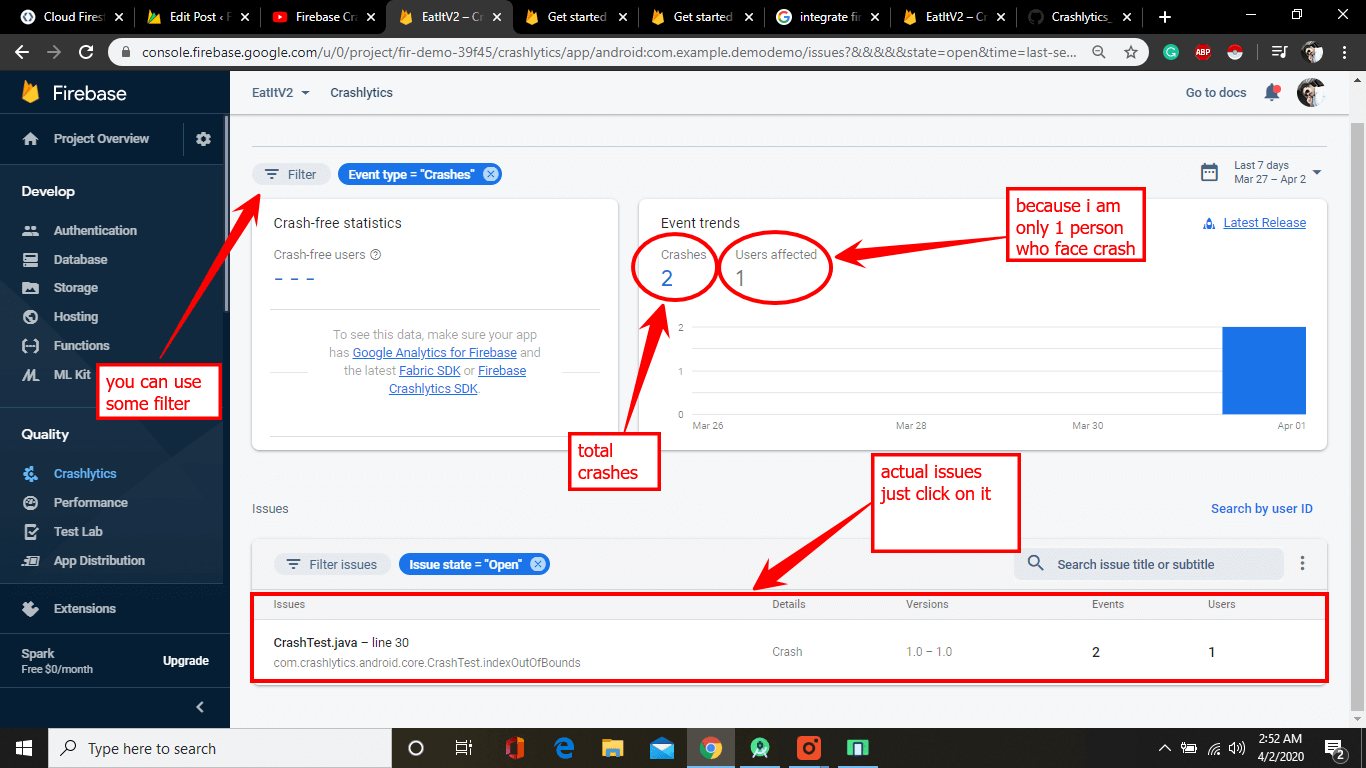
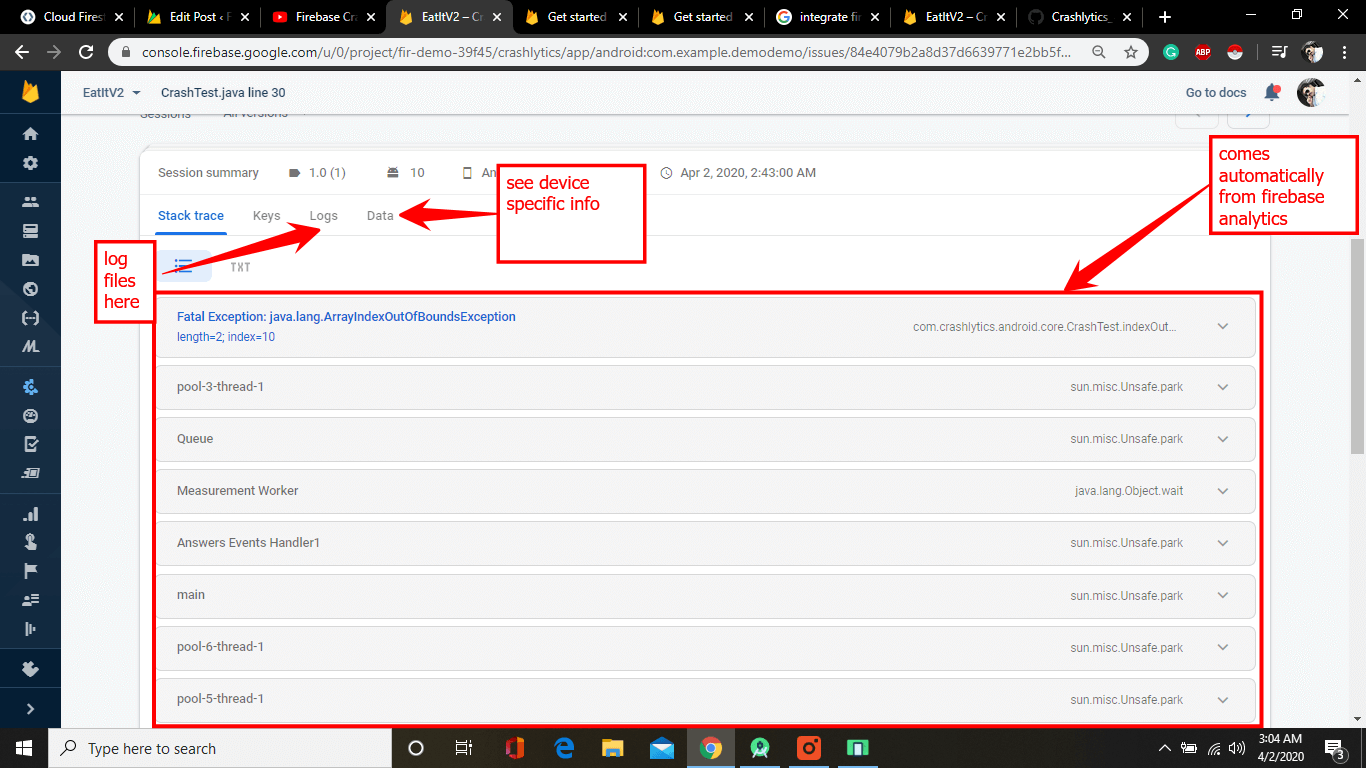
When you click on the crash you can see a full stack trace. You can see a full detailed graph, devices, device operating system, device status, log file, data, key, etc.
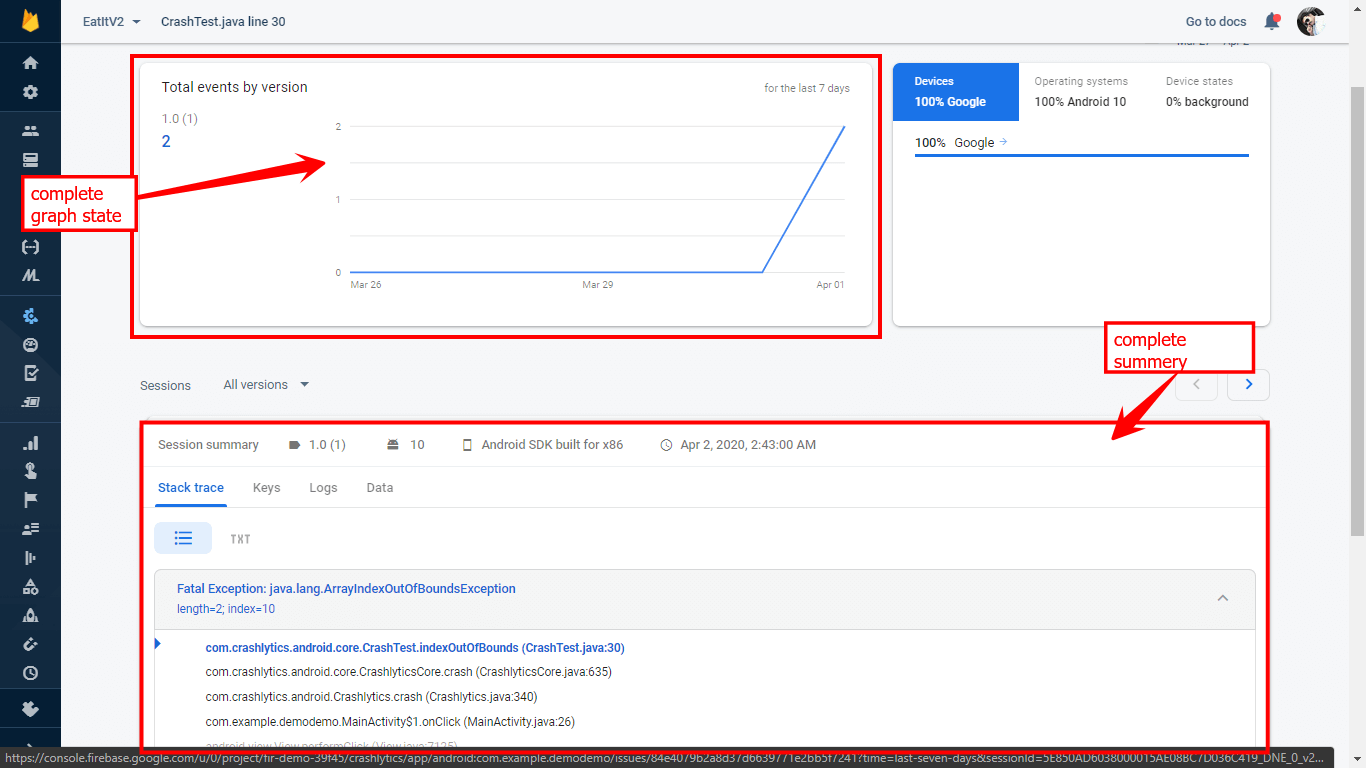
You can see a lot of information that is generated by analytics automatically.
Well if you want to learn more about Crashlytics you can check this Codelab
For better understanding just watch the video.
Let me know if you have any questions, our team will be extremely happy to answer your question.
5 thoughts on “How to Use Firebase Crashlytics (Step by Step Tutorial)”
Comments are closed.