Creating the Firebase Realtime Database is essential for most apps.
Suppose if you’re creating an app that requires storing and sharing data from a server, you have to memorize a lot of things like creating and maintaining a database is a tough job, isn’t it?
And in case you need your data to be synchronized in realtime, or you need the offline support functionality, then that might be taking a lot of time. Yes, you can save your time by using Firebase Realtime Database.
A real-time database allows you to store the data and sync automatically among the users in realtime. It lets you or the users cooperate. This makes it simpler for users to obtain their own data from any device (mobile, web).
Whenever you update or upload any data in the Firebase servers, it will automatically update to the user’s device in just a few milliseconds. Isn’t it amazing?
Also, it gives you a facility for offline support. For example, if a person loses their data connection, the Realtime Database SDK uses device local cache to serve the users, and whenever the user is online again, then data is automatically synchronized.
Quick Jumps
Choose Your Database Wisely
One important thing that will come in the developer mind is that Firebase offers two types of Database
- Realtime database
- Firestore database
So which database we should try.
Well, that’s the topic of another Firebasetutorials. Don’t worry. I’ve already written a tutorial for you guys. Check out: Major differences between Firebase Realtime Database and Cloud Firestore.
Now let’s go ahead and start the tutorial.
Creating Firebase Realtime Database Step by Step
First of all, you need to create a new android studio project or open a new existing project.
Add Firebase Database SDK to Your App
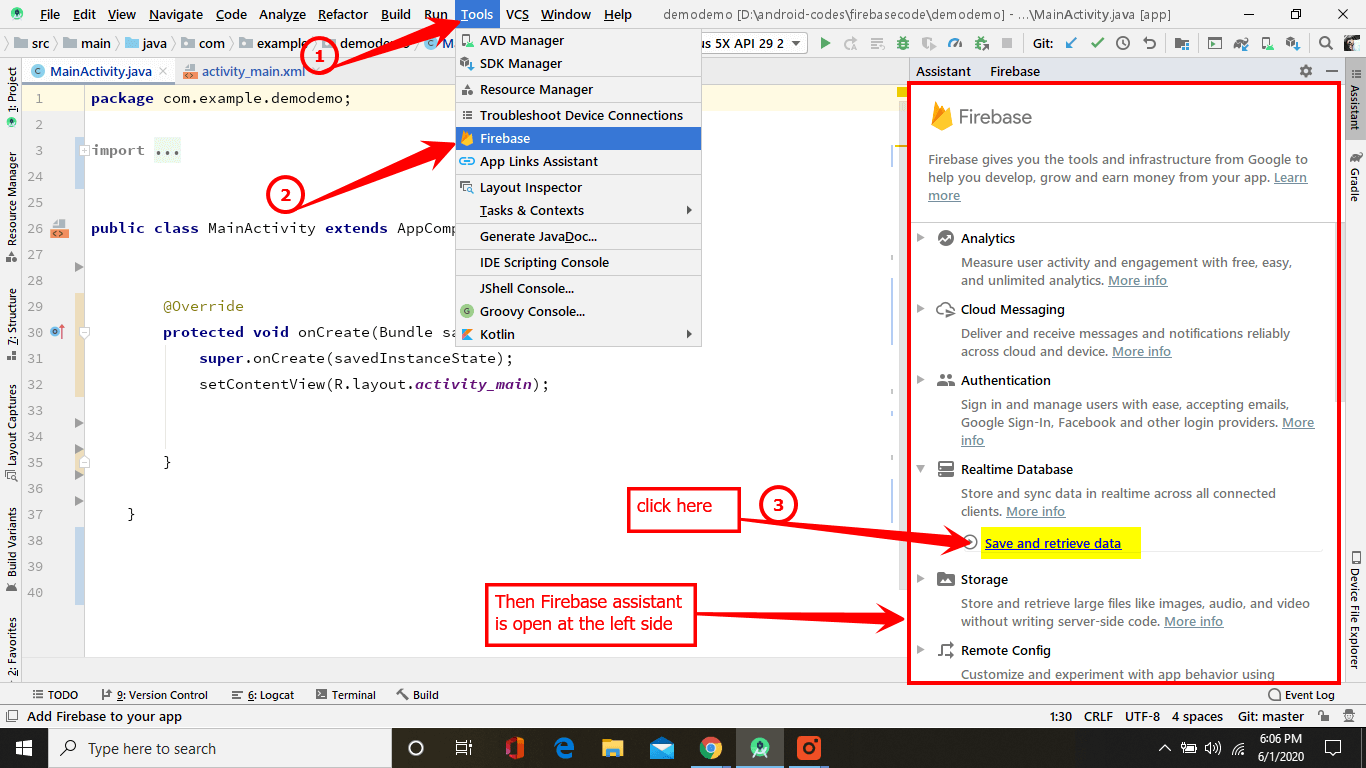
- First of all, go to Tools -> Firebase from the top toolbar. Afterward, you can see Firebase’s assistant is open on the left side of Android Studio.
- Next, by clicking on the Realtime Database drop-down icon, you will see a save and retrieve data option just click on it.

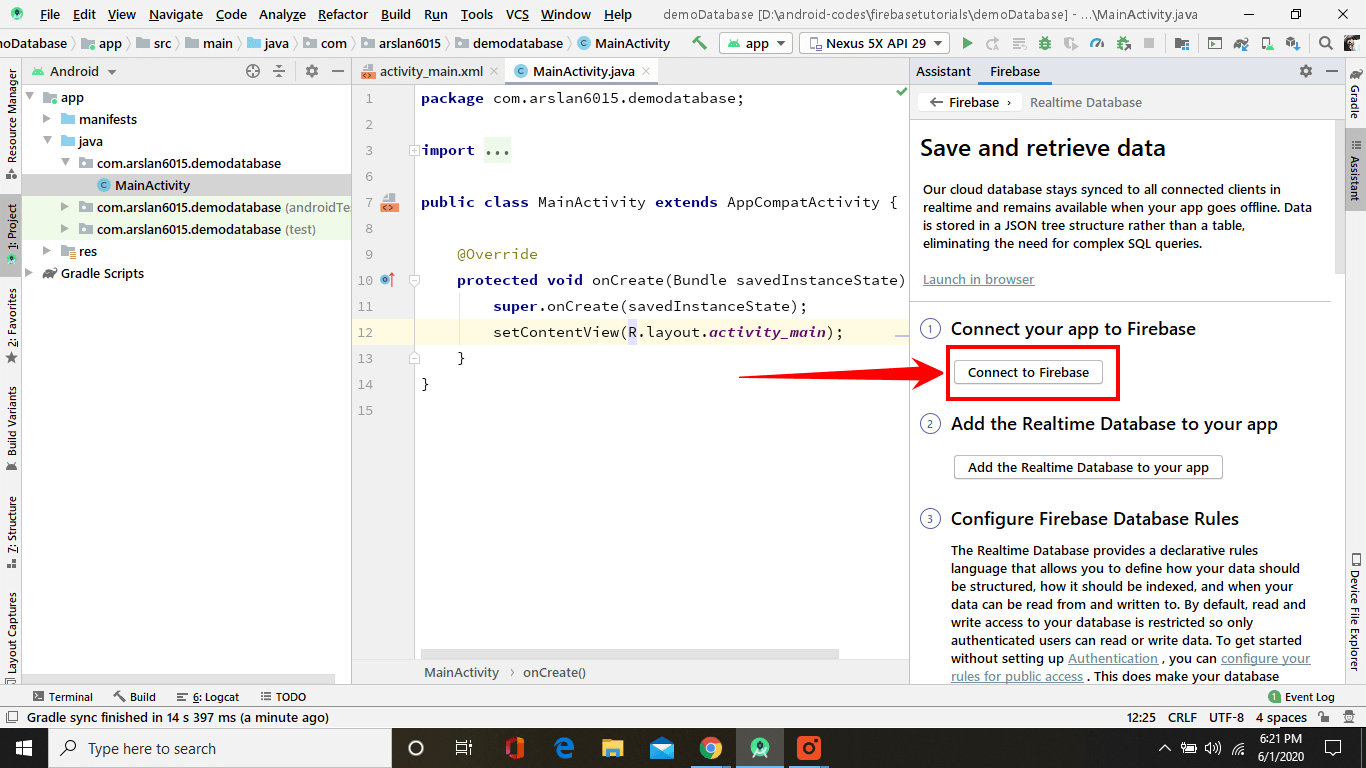
- Next, click on Connect to Firebase.
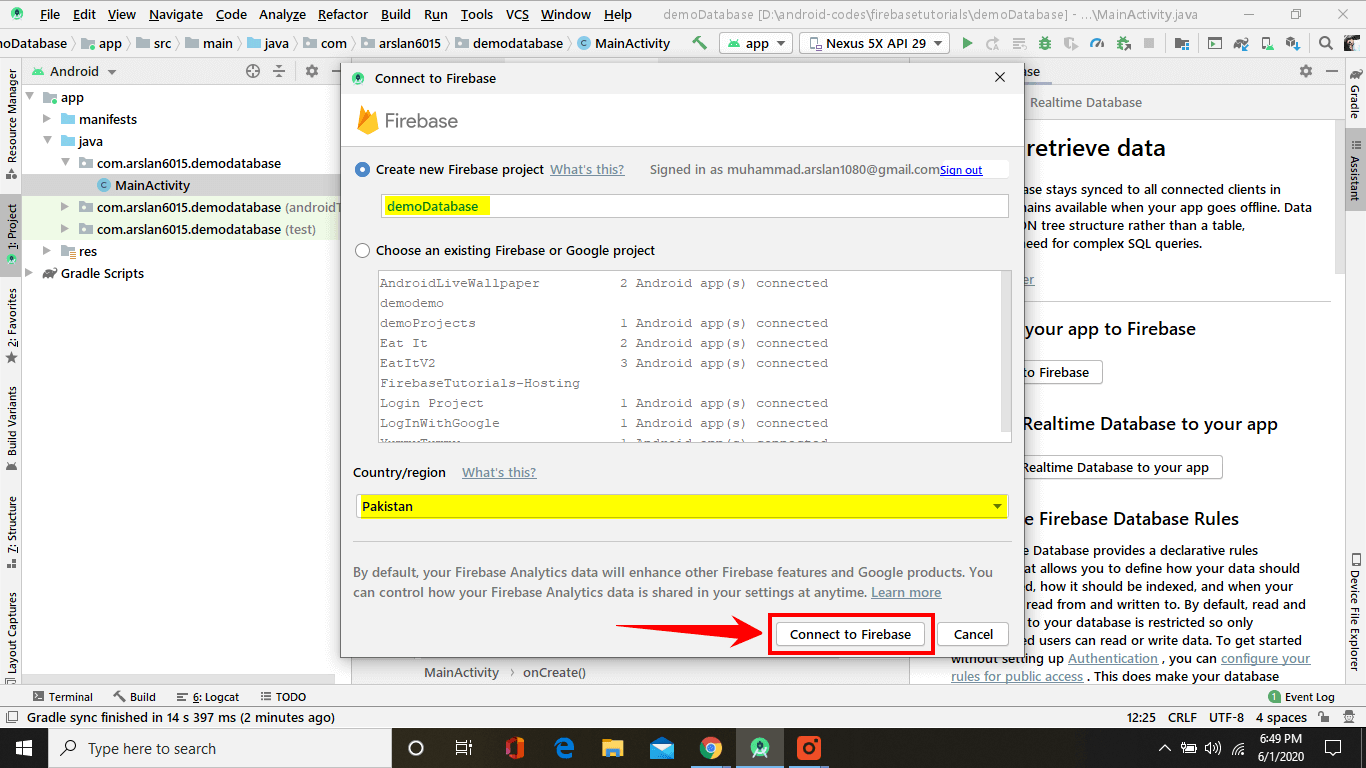
- Afterward, a new window is open here, you can create your Firebase project or choose an existing project and select your country and click Connect to Firebase.
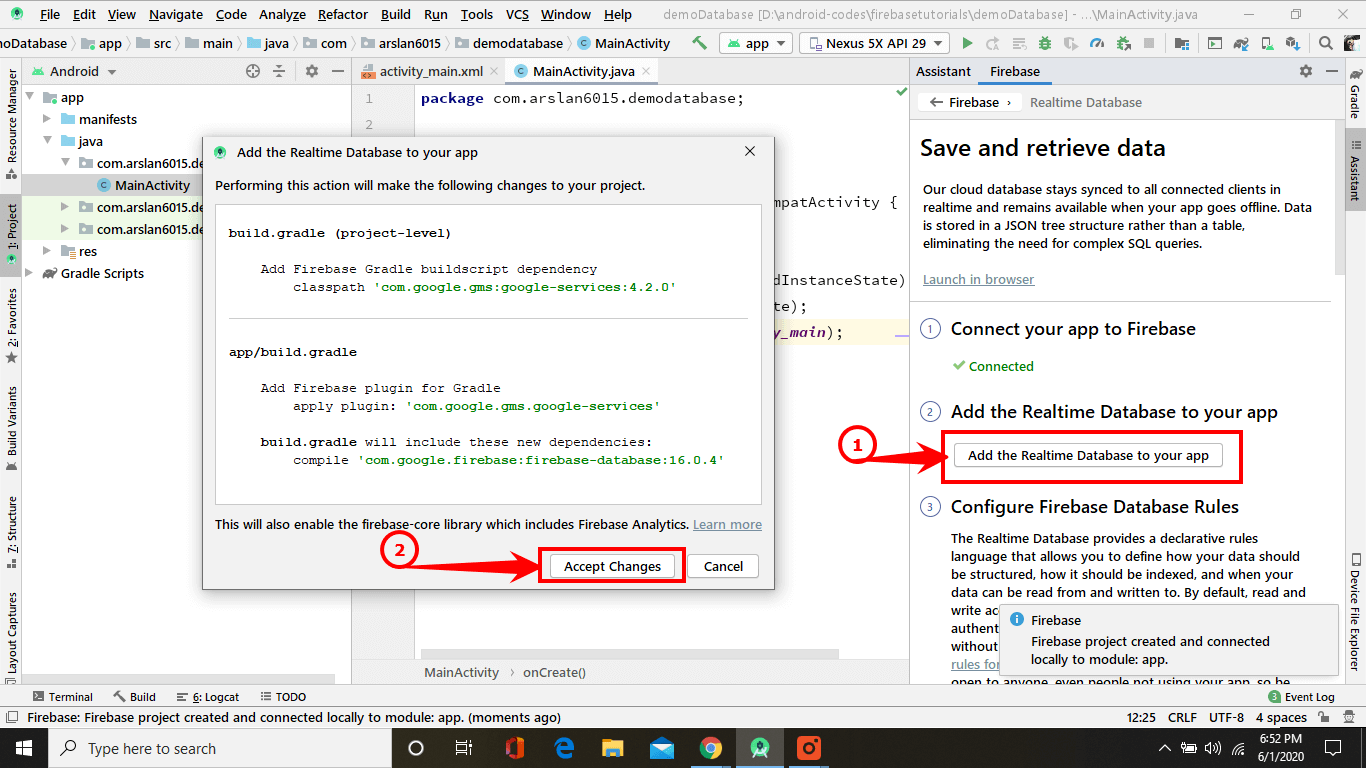
- Next, click on Add the realtime Database to your app. A pop-up box appears. Here you can see all the dependencies that are necessary for the making of this project. Now just click Apply changes.
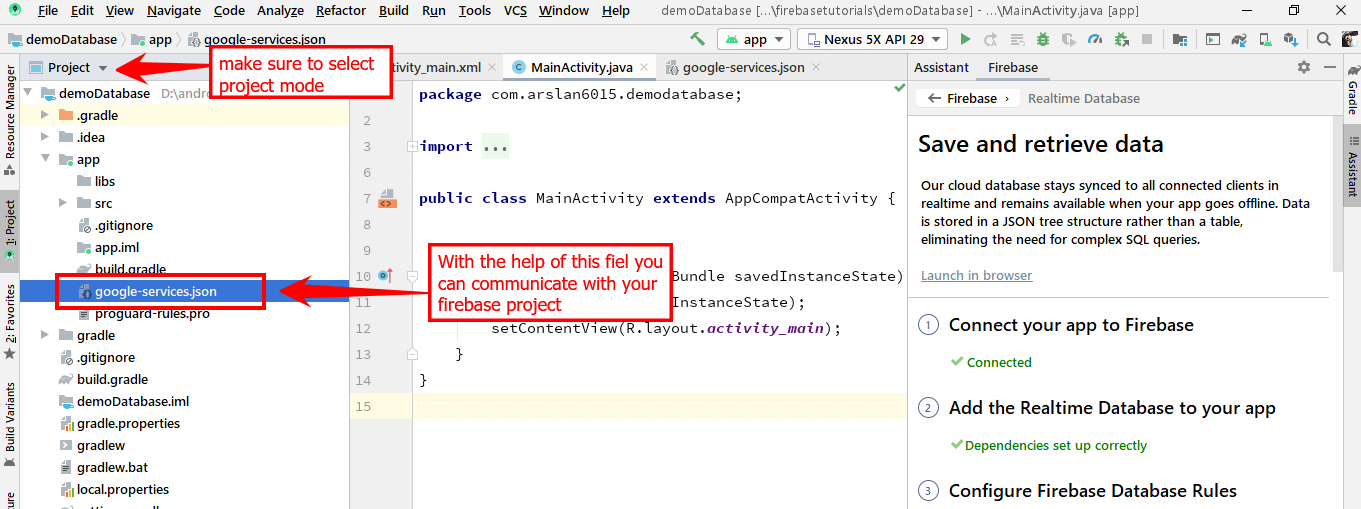
- Now go to the project view [your project name]-> app -> src and make sure you have a google-services.json file is placed & also your dependencies set up correctly.

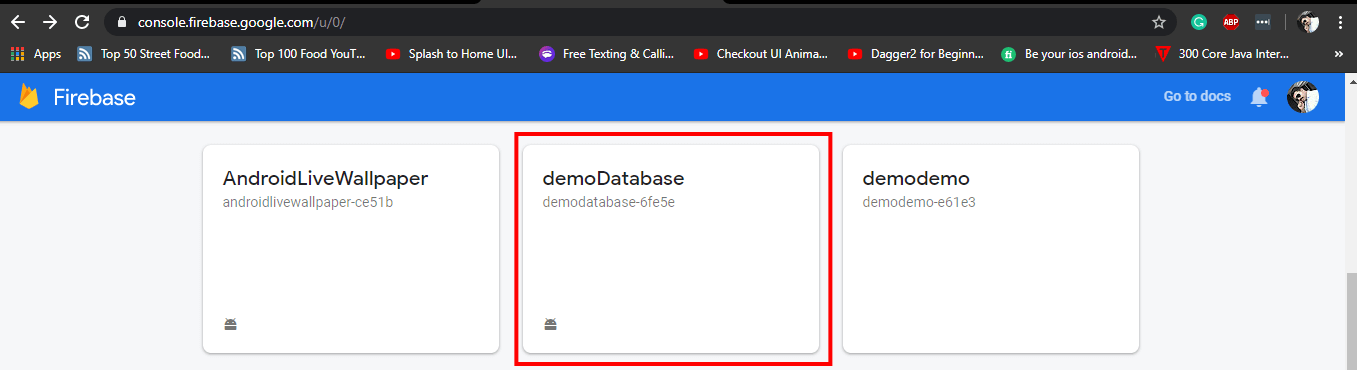
- Next, Go to the Firebase Console, and you can see your project here. Just open up your project.

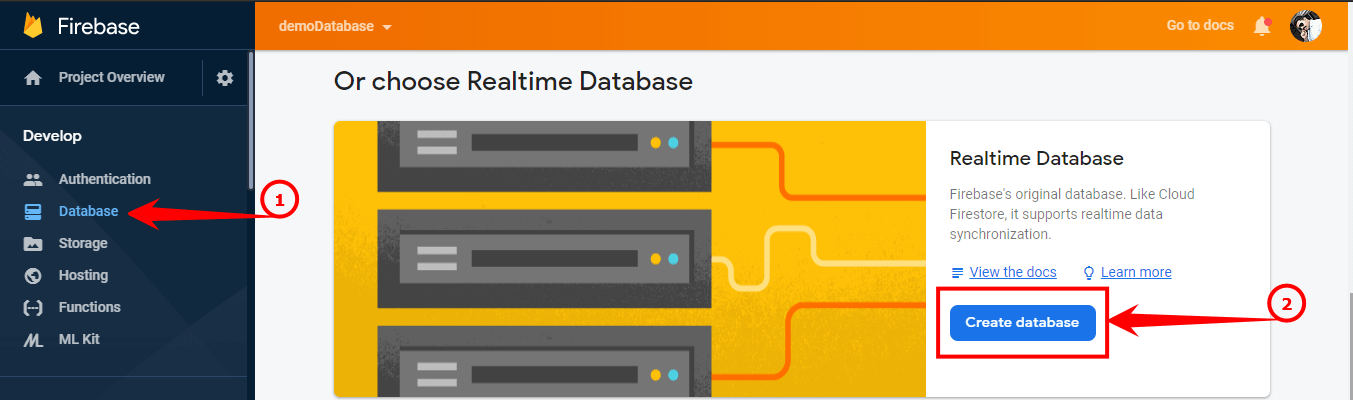
- Next, go to the database and click on Create database under realtime database.

- Here you have to select the database rules for your project. You can choose two modes.
- Test Mode: This mode allows anyone to read and write into your Database. You can go with this rule at the time of development of the application. This mode is only designed for testing purposes. After the completion of the application, you can secure your rules.
Locked Mode: This mode rejects all reads and writes from the web and mobile clients. Your authenticated app servers can still have the ability to gain access to your Database. Select your mode wisely and click Enable.
- Test Mode: This mode allows anyone to read and write into your Database. You can go with this rule at the time of development of the application. This mode is only designed for testing purposes. After the completion of the application, you can secure your rules.
Configure Database Security Rules
Firebase Realtime Database gives an expressive rules language that permits you to determine how the data should be structured, how the data should be indexed, and when it can be written to and read from.
In default settings, write and read access to the database is controlled so that only verified (authenticated) users can write and read the data.
But don’t worry, you can change your rules to a public setting.
I’ve already written a lot on database security rules.
See Real-time Database Security Rules for a complete understanding of database security rules.
How to Write a Database
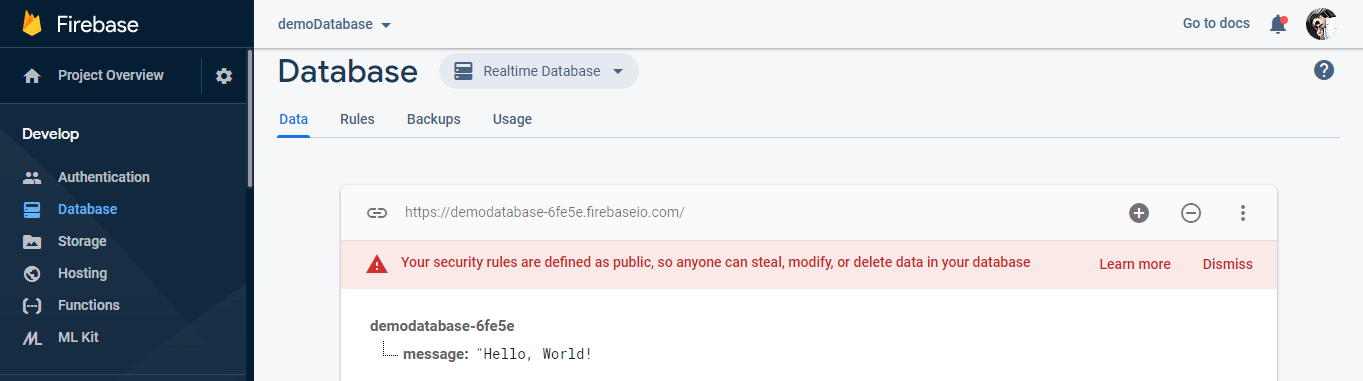
Here get Instance () is used to get the complete Instance of the Database. Then with the help of that instance, store the data at the particular location as shown in the below code snippet.
The Database reference looks like in the Firebase console in the below image.
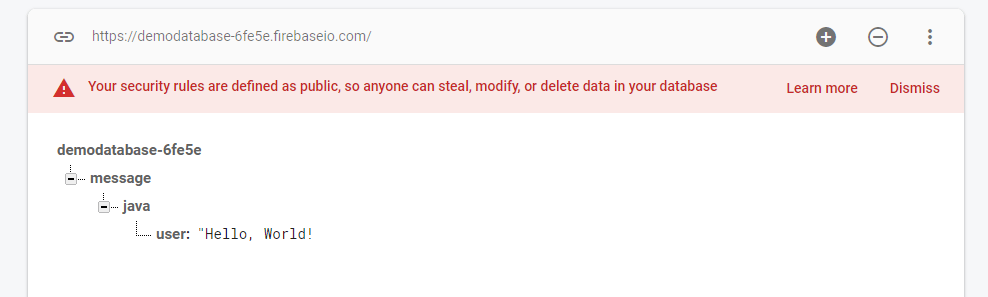
If you want to create a multi-node database, you can set the path in the getRefrence() like
And it’s output looks like in the below image.
If you click on the user, you can see the same path in the top that you have provided in the code section.
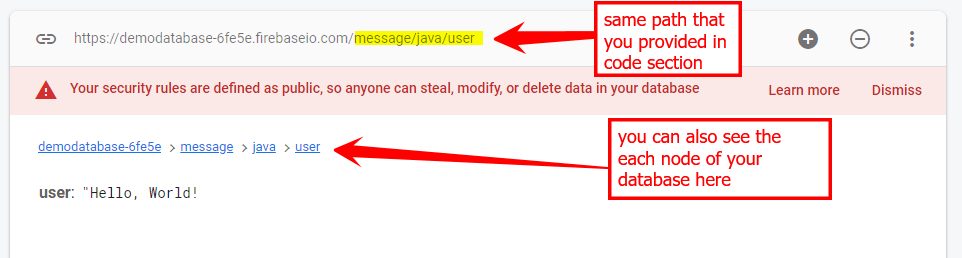
You can also use .child() to get the same results.
How to Read Database
Now we have written the data in the database. It’s time to read that particular data from the Firebase database.
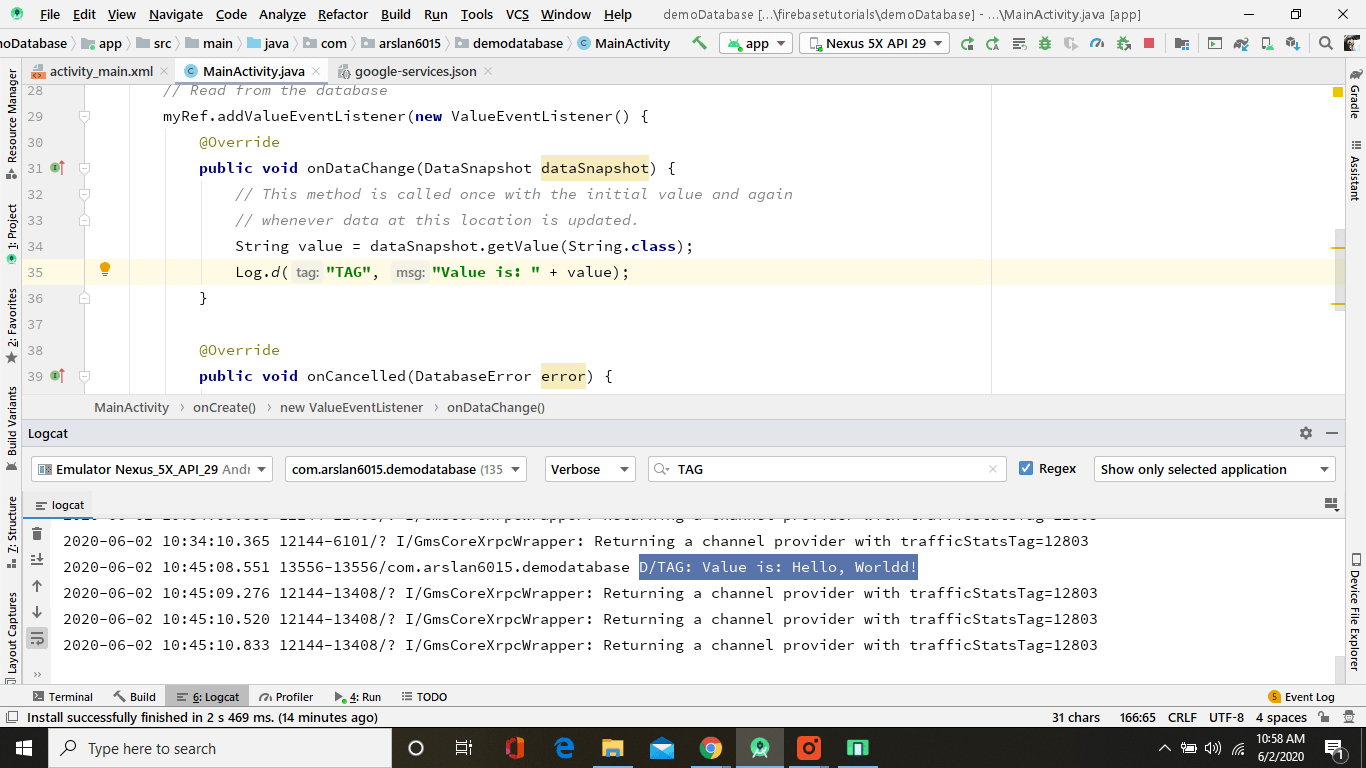
Now to update your application data in the realtime, you have to attach a ValueEventListener to the object of the reference you have created in the upper section.
onDataChange() method is called once when this method is attached to the listener, whenever a data is changed, including their children’s onDataChange() method triggered again.
Place this in your code and run the app. You will see the output in the Logcat window.
How to Delete Node from Database
Similarly, you can delete the node by Entering the following simple code. Just get the put the reference path and set the value to null or by attaching removeValue() to it.
When you delete the node it will instantly update in the realtime database. In the below image, you can see that when you delete the node it will turn red and then remove from the realtime database console.
How to Update Node In the Database
.setValue(“String”); is used to set the value in the database. The process is very simple and very similar to the other above codes.
Also, you can attach the listener just to know whether the operation is successful or not.
Complete Code of the Application
Here is my complete MainActivity.java code
In case of any errors, copy above MainActivity.java code and replace with your code and run the app. You will see the output just like the below image.
In the next tutorial, I’ll include some more advanced techniques about how you can read data when the database is more prominent and how you can display it into your app in a perfect and industry-standard way. Stay tuned.
Ask any questions in the comment section below, our experts will be happy to help you at no extra cost.