Maintaining a server is expensive and Google knows better than your wallet. 😀
For the same reason, Google provides 125K invocations, 40K GB-seconds, and 40K CPU-seconds for Firebase Cloud functions at no extra cost.
It’s great, isn’t?
Firebase revolutionized the development world providing more than a dozen useful features.
Among many features, Cloud Function is one of them that lets you write and deploy code that responds to events from Google Cloud services.
The best part?
All your code runs on Google servers who bears all your computing processing power.
Besides this, it makes your app ultra secured from being hacked and other detrimental tactics to distress your app.
Quick Jumps
How It Works
You’ll make an app that shows notifications to the end-users upon inserting the date in the Firestore database.
Ready? Let’s get started.
Firebase Cloud Function to Notify App Users – Step by Step
So let’s start deploying your first cloud function.
Here we’ll write a function in TypeScript running in the Node.js environment.
TypeScript is just like JavaScript, but better.
Step 1 – Install Node
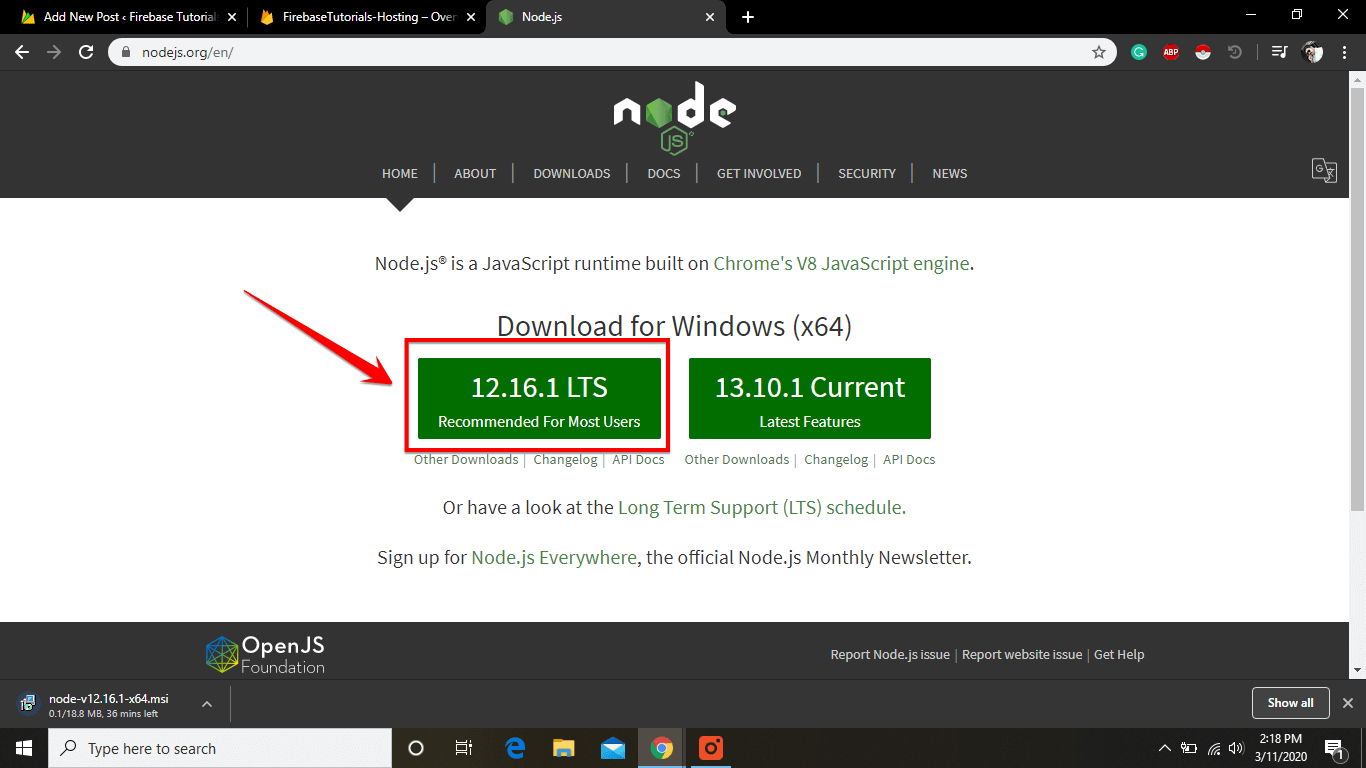
If you previously not installed node on your computer, visit nodejs.org and install.
Confused? Don’t worry.
You can also check your node version on your system by entering the “node -v” in cmd prompt and for npm “npm -v” as shown in the below screenshot.

You should have at least version 6 for node and npm version 5 or later.
Related: How to Upload a Static Website to Firebase Hosting (Tutorial)
After installing Node.js, you need to install the Firebase CLI.
How?
You can install the Firebase CLI with NPM by copy the below cmd:
and paste in the cmd prompt and hit Enter.
After installing, you can also check it’s a version with “firebase –version” cmd

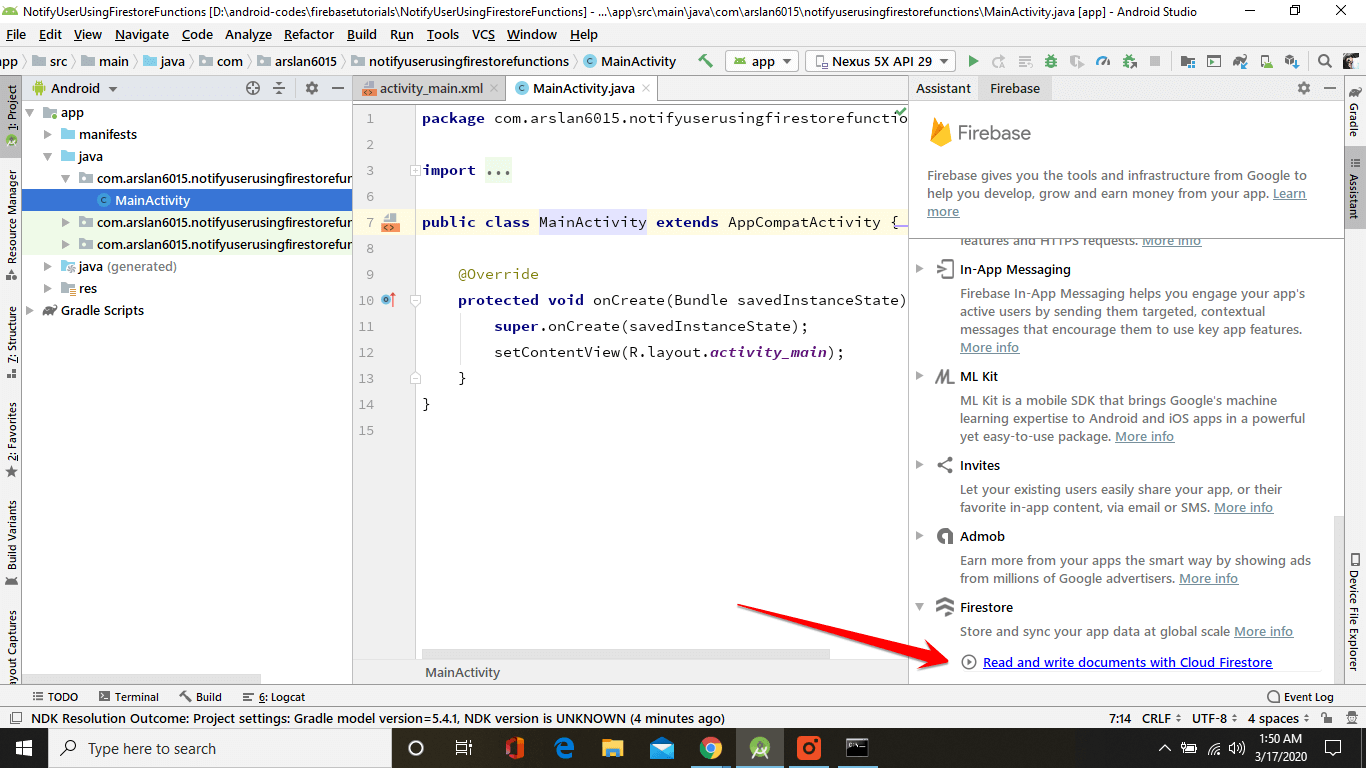
Step 2 – Create a New Project in Android Studio
- Now Create a New Project in Android Studio.
- Next Go to Tools -> Firebase from the top bar. It’ll open a new window on the right side.
- Just scroll down and click on FireStore -> Read and write a document with Cloud Firestore.
- click on Connect to Firebase
- A dialog box appears you can Create a New Project or Choose as an Existing Project. Did I say to use an existing project?
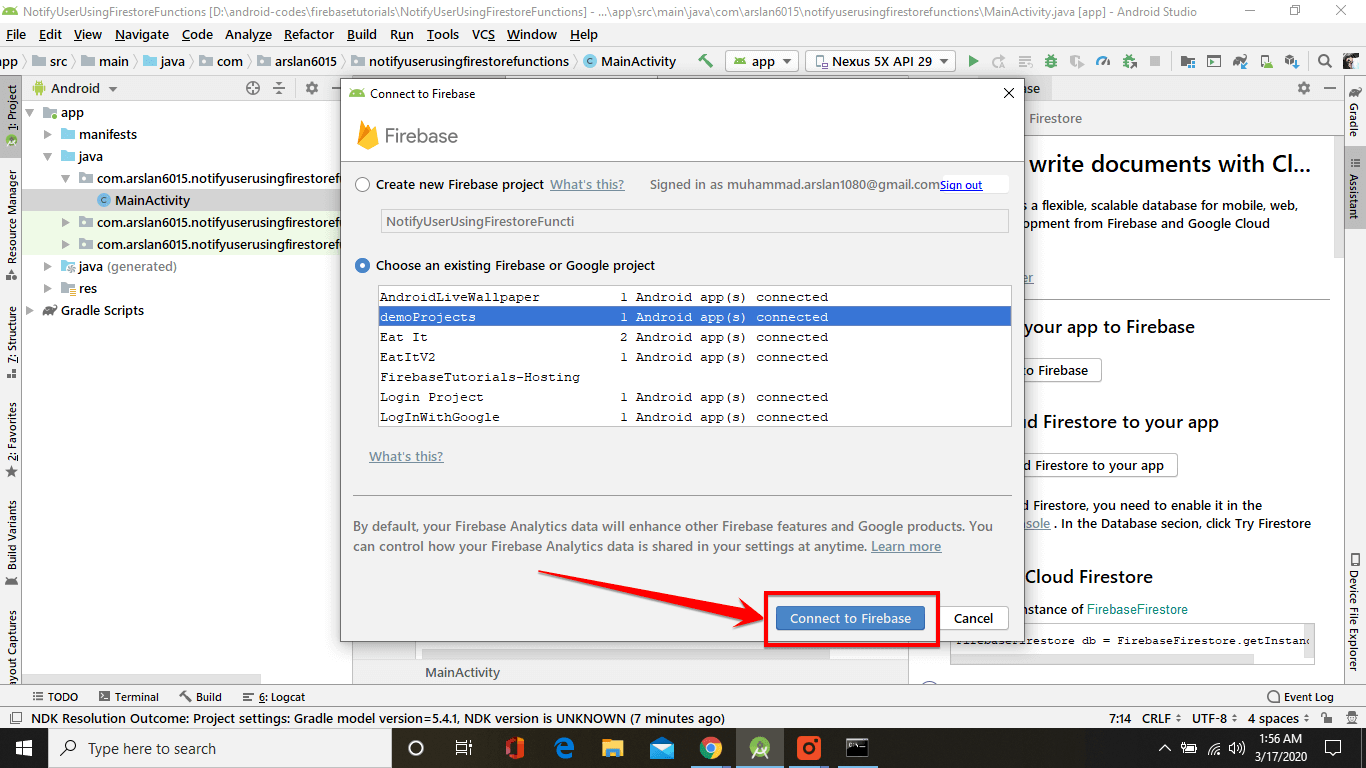
- Next click on Connect to Firebase.
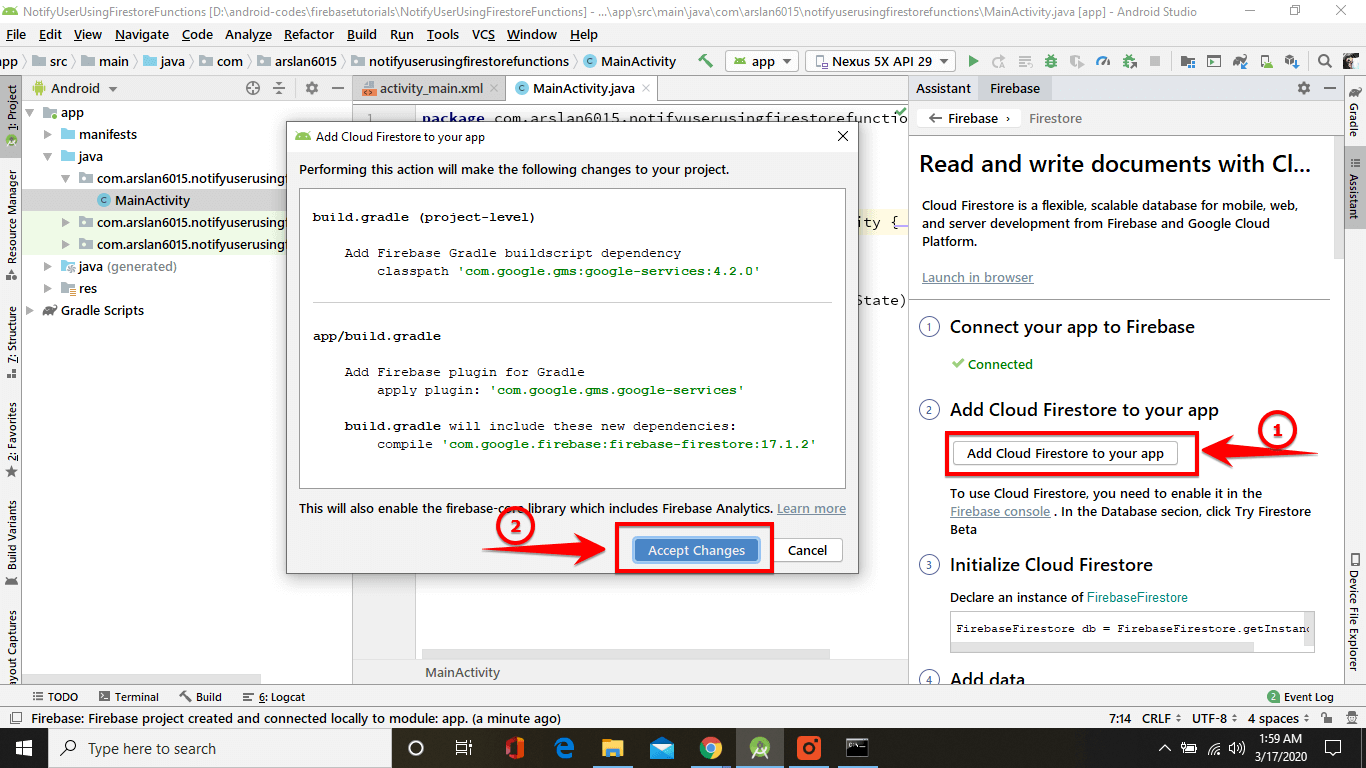
- Now, you have to add dependencies, so click on Add Cloud Firestore to Your App. Now a popup box appears and clicks on Accept Changes.
Step 3 – Initialize Firebase
- Now create an empty folder where you want to store your function files.
- Afterward, open folder and type “cmd” on the search bar and hit Enter. It will open a cmd prompt with a folder address.
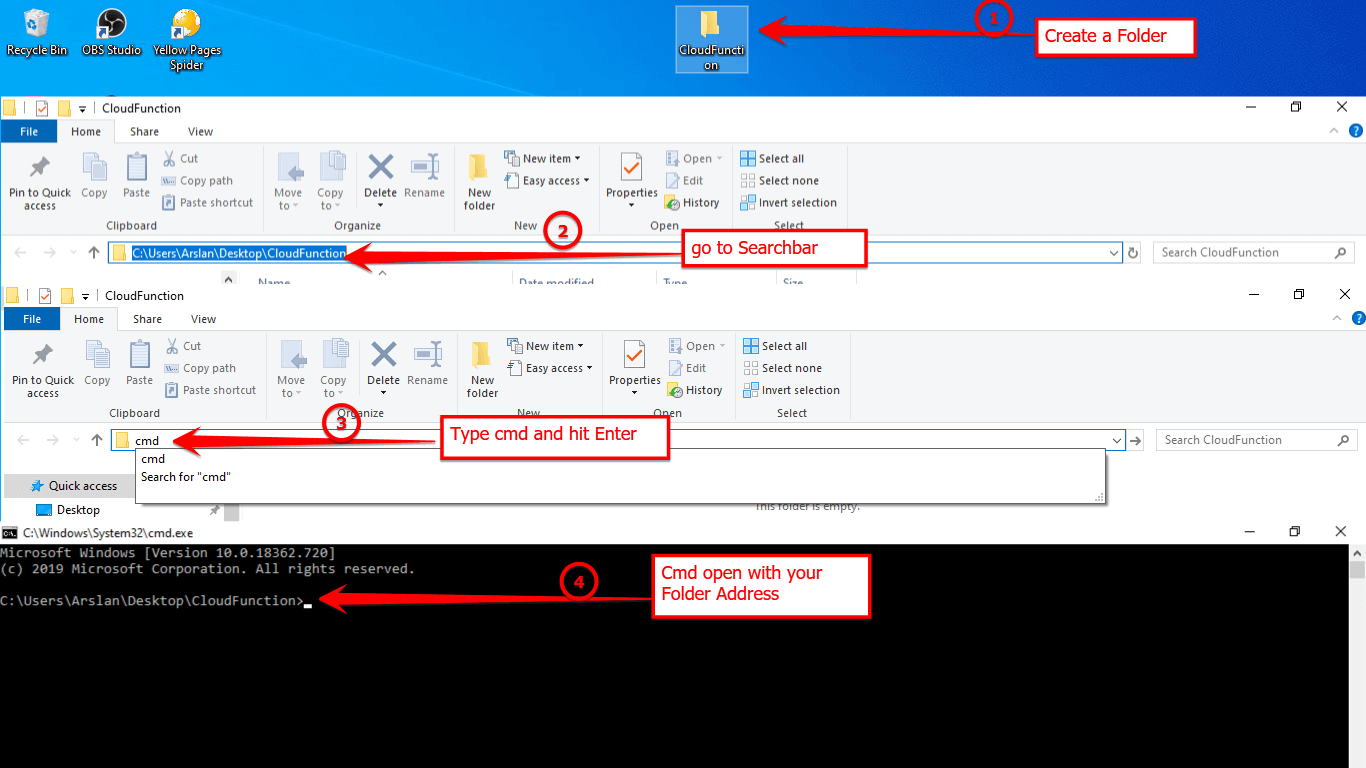
- Now copy below cmd and paste in the cmd prompt and hit Enter.
- Now press Y and hit Enter.
- As you know that you are working with the function just move the arrow key down select Function and press space bar a little (*) appears and hit Enter.
- Then you have to select “Use an existing Project“.
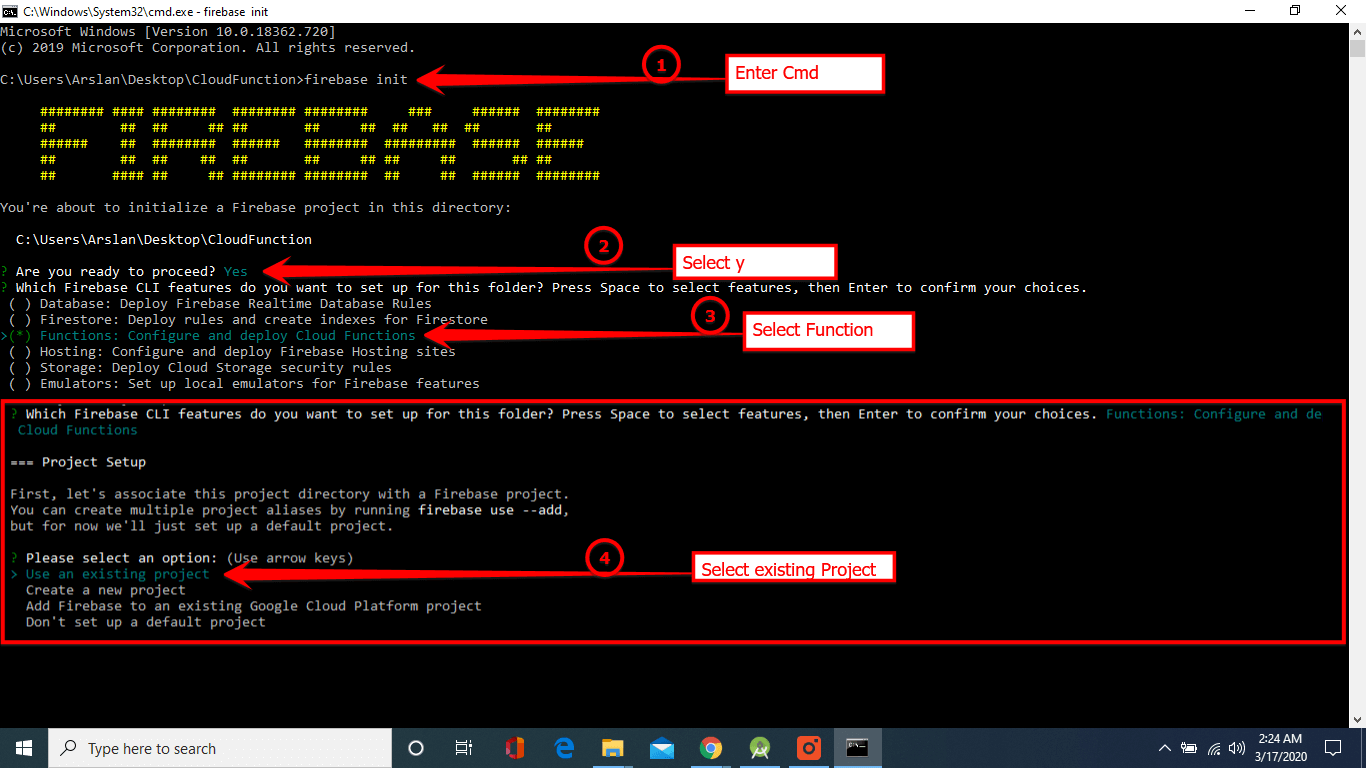
- Afterward, select your project.
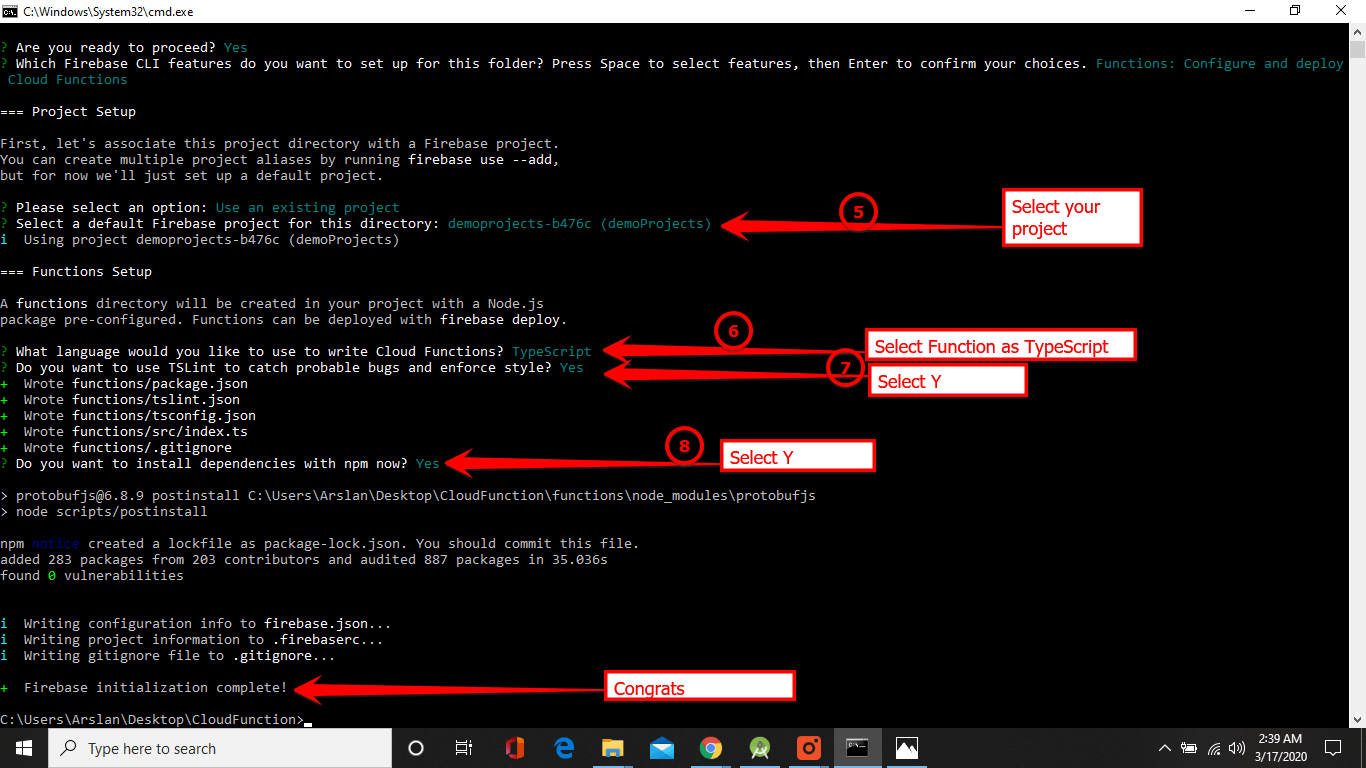
- Select Function “TypeScript“.
- Press “Y” and hit Enter.
- Now you can see Firebase initialization successfully
Step 4 – Write Function
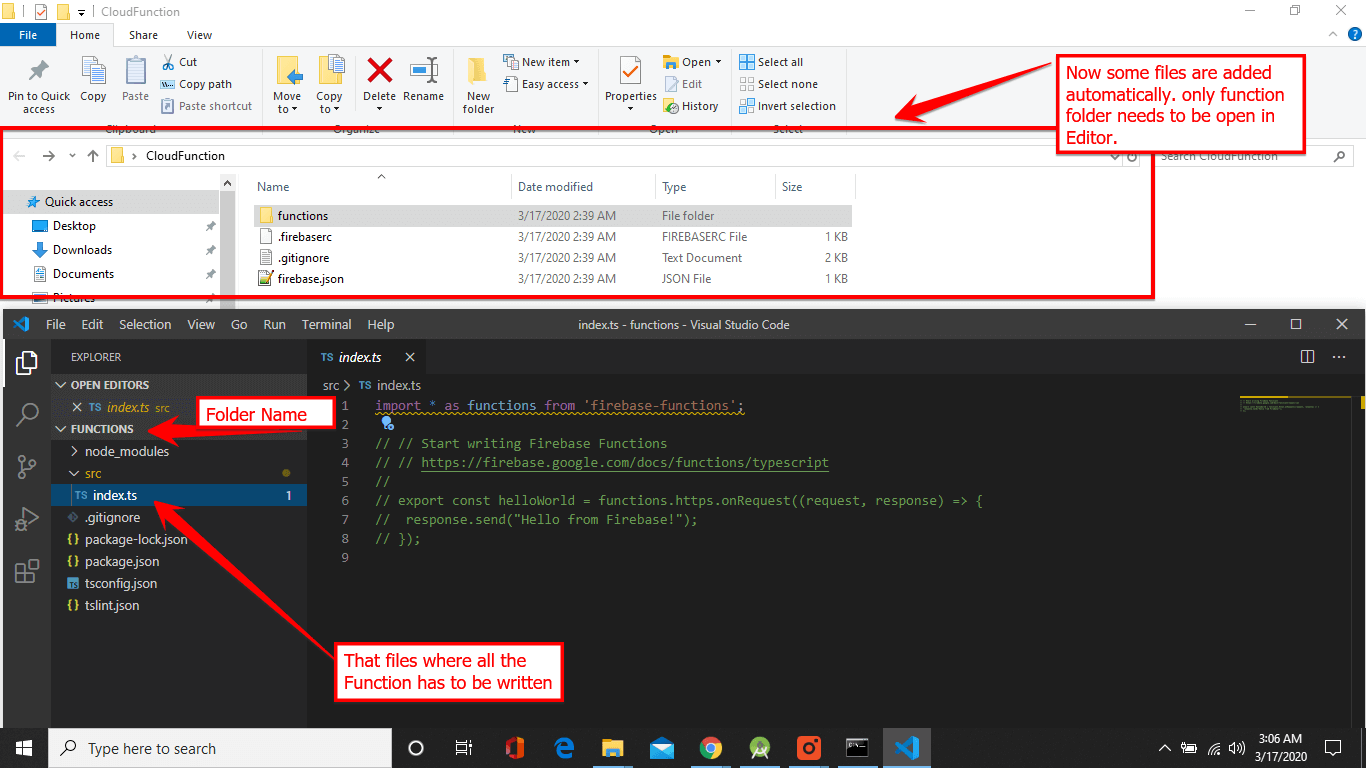
- Now you can see some files have been added in your app folder.
- Then open Visual Studio Editor and drag your Function folder in it.
If you don’t have VS Editor go to code.visualstudio.com to download and install. It’s a piece of cake, isn’t?
- Now type the following function on index.ts file.
One more thing is that Cloud Function runtime actually requires JavaScript code to run.
But I’m using TypeScript so it has to be compiled first into JavaScript before deployment.
Well, you don’t need to worry about it at all, Firebase CLI will do it automatically when you run the deploy cmd.
Moreover, it will automatically make the JavaScript files in the lib folder.
If you want to learn more about the function, click here to get more samples at GitHub. 👍
Step 5 – Create a Firestore Database
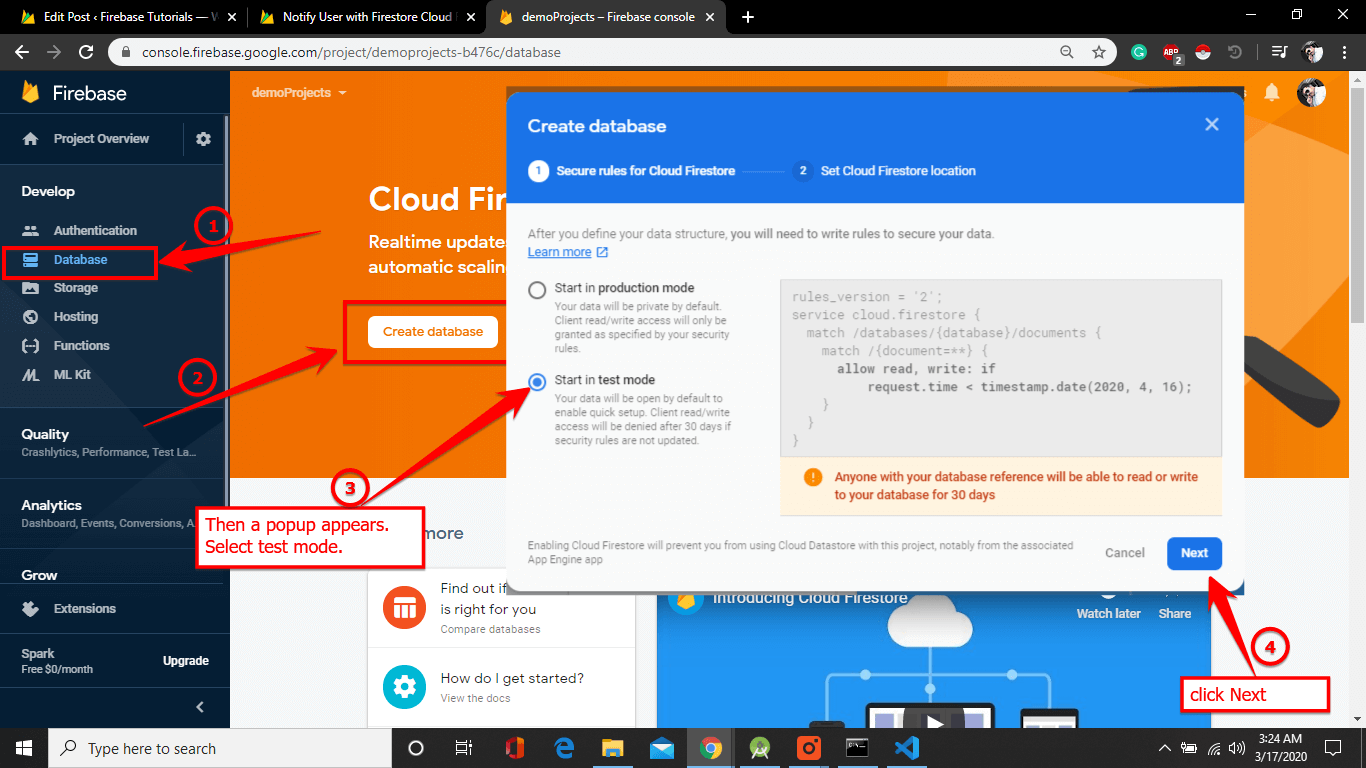
- Go to console.firebase.google.com and open your project.
- Then click on the Database from the left side.
- Now click on Create Database.
- Now a popup box appears to select “Start in test mode” because we are creating this app for an educational purpose. But if you want to implement this feature in your app, you can select production mode as well.
- And click Next.
- Now select cloud Firestore Location and click done.
This will take time to load your database project.
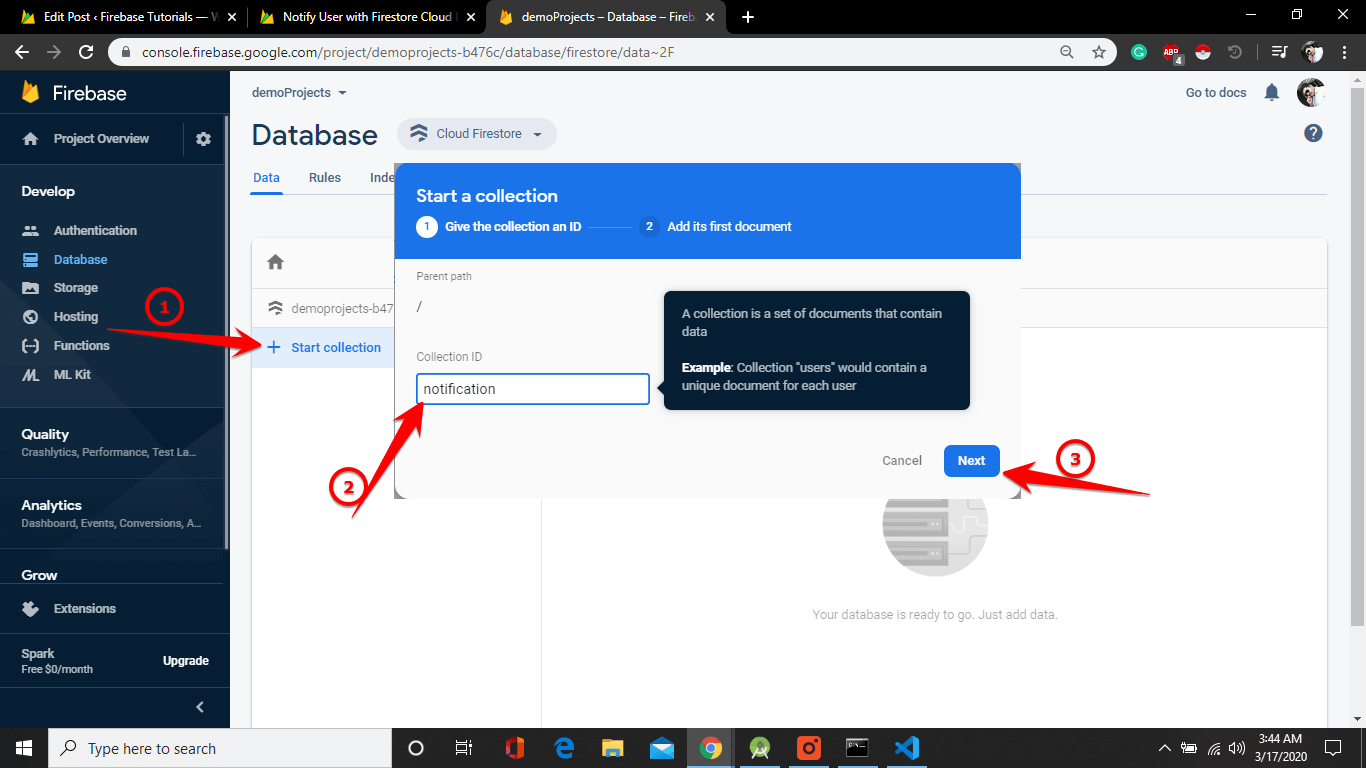
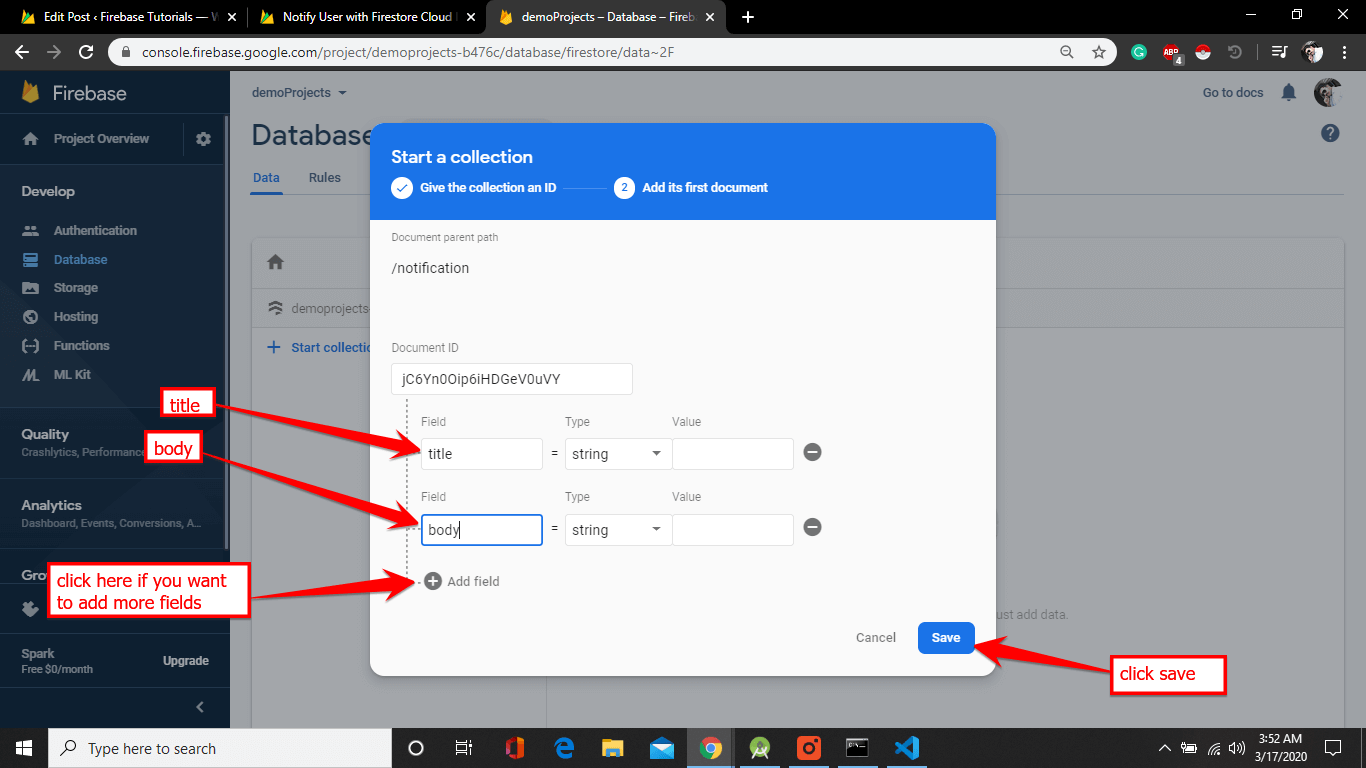
- Now click on Start Collection
- A popup box appears Enter Collection Id and clicks Next
- Now click on Auto-ID to generate the automatic id.
- Afterward, you can Enter title, body and click save.
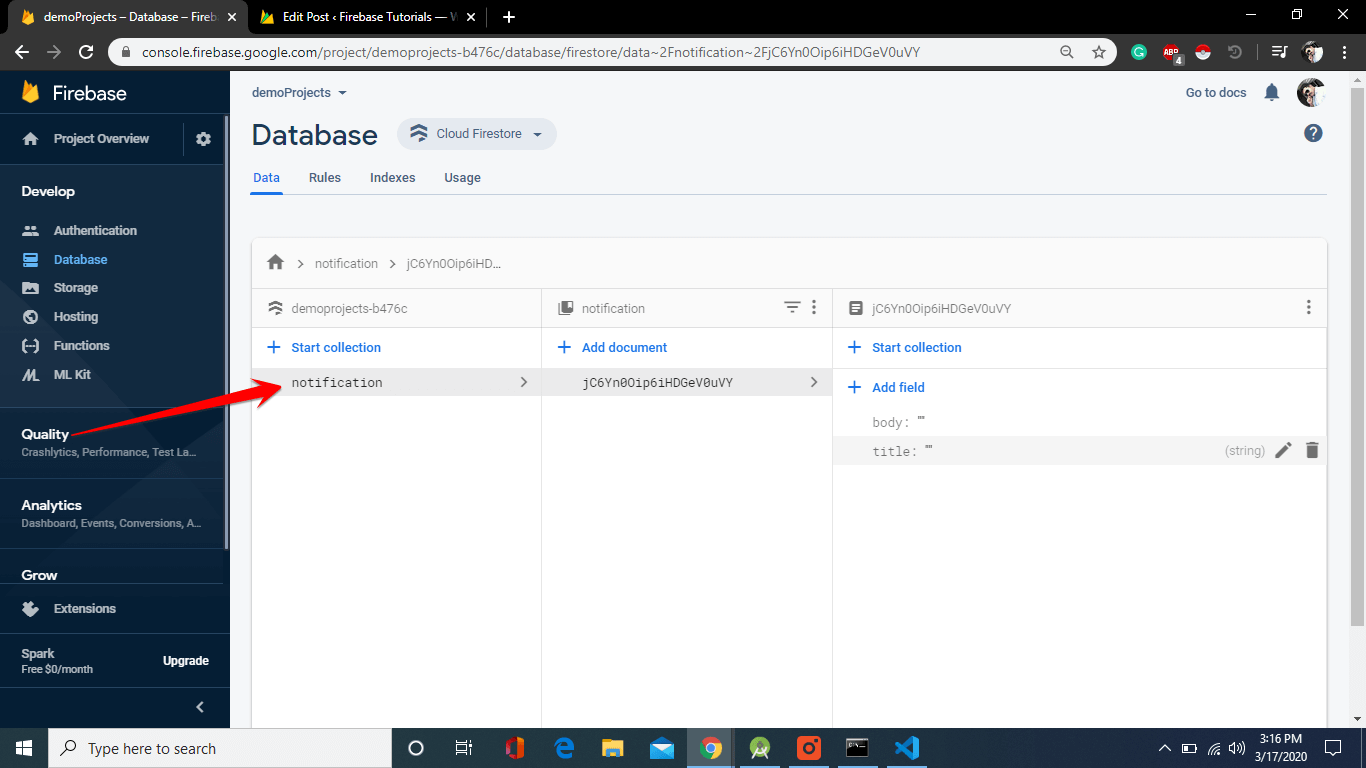
Now your Firestore looks like this.
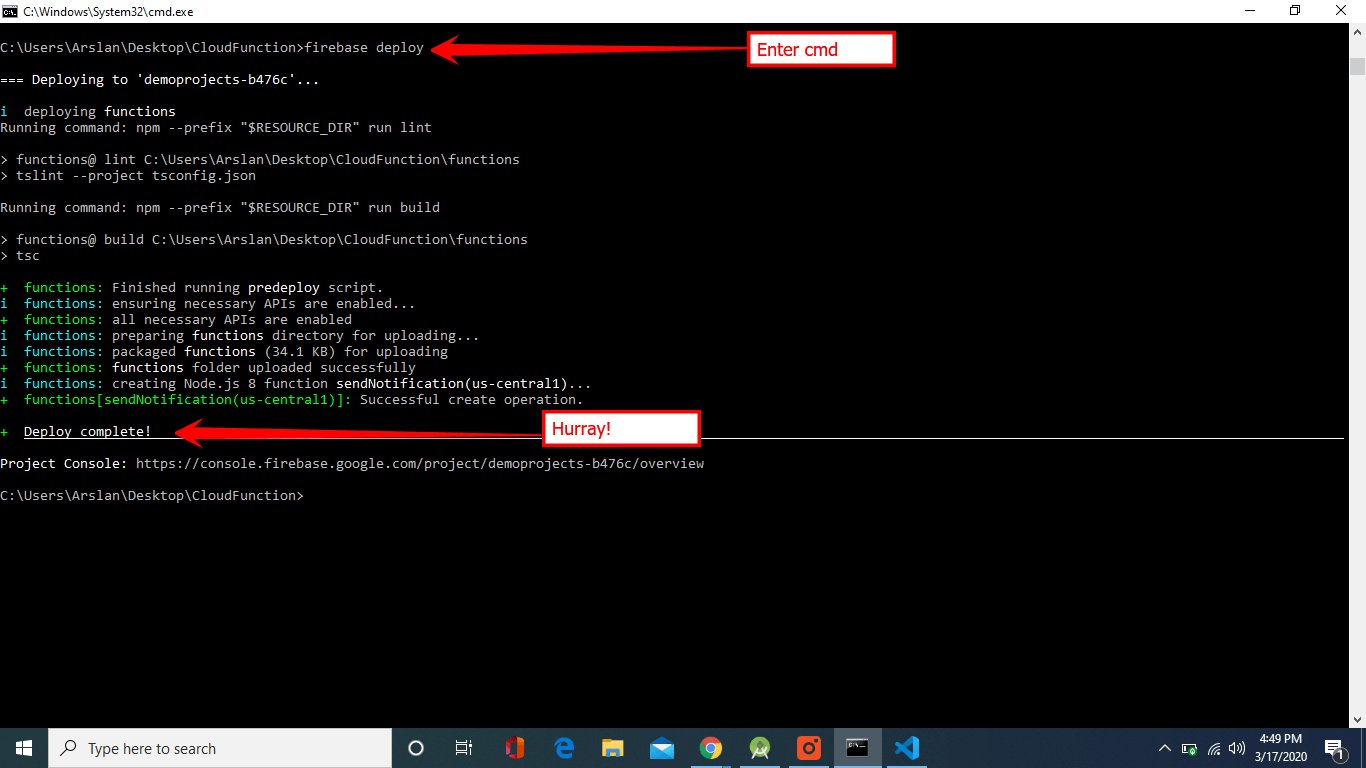
Step 6 – Deploy the function
Now everything works fine. It’s time to deploy the function.
After that, you need to go to the cmd prompt. Copy below cmd and paste in the cmd prompt and Hit Enter
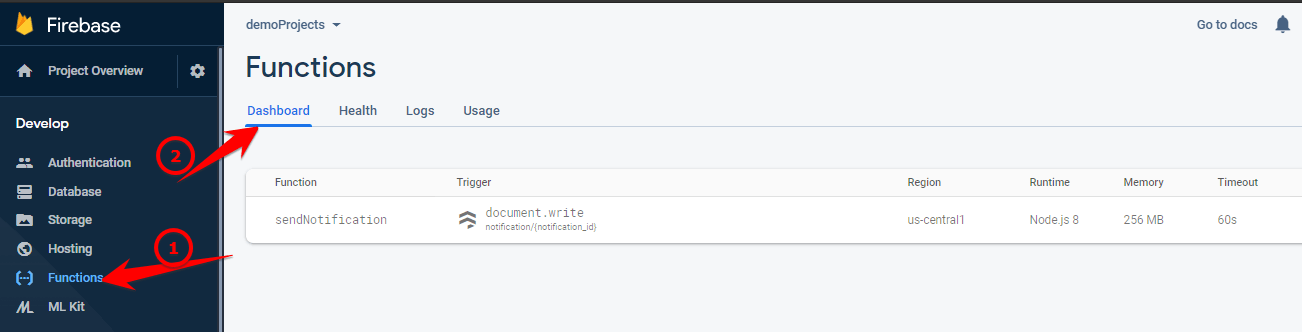
Next, go to Console -> Function -> Dashboard you can see a function is added successfully
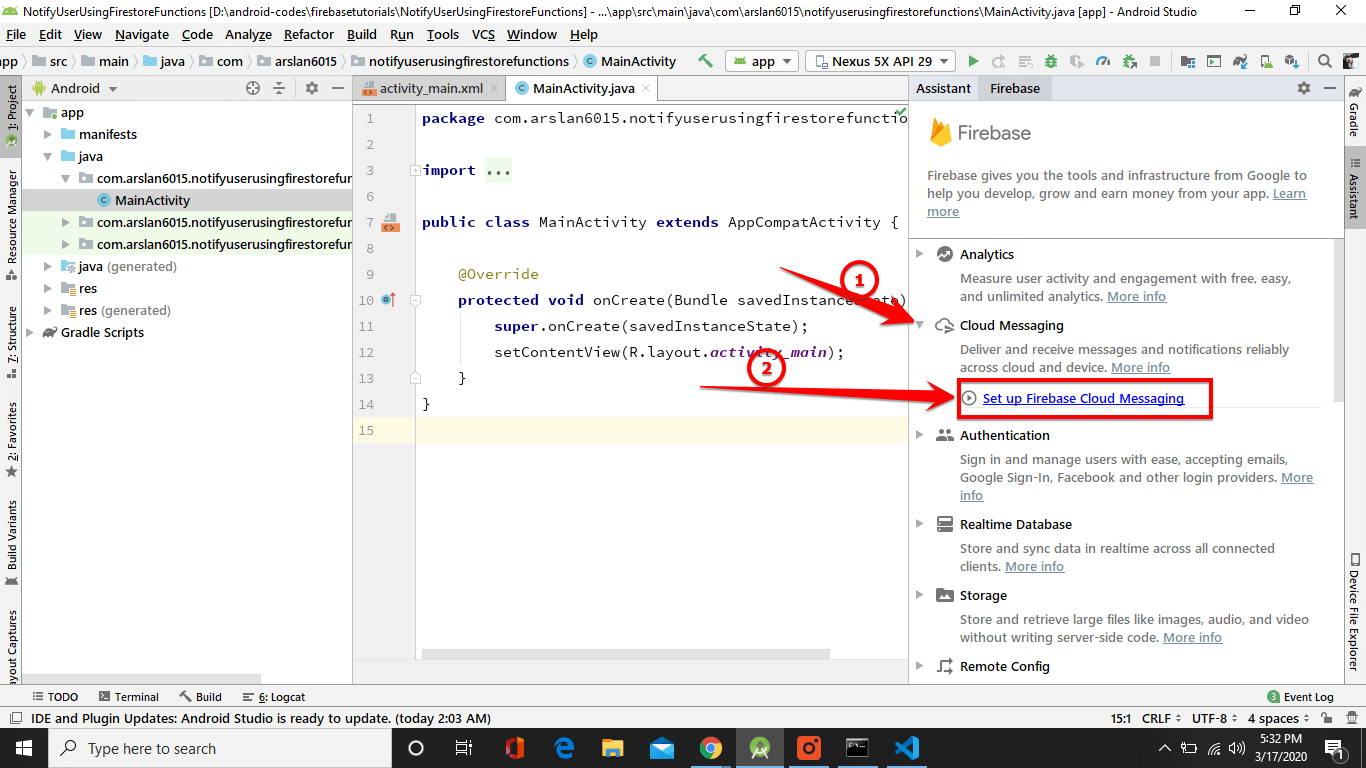
Step 7 – Set up Firebase Cloud Messaging (FCM)
- To set up FCM, go back to the Android studio.
- Next, go to Firebase assistant -> Cloud Messaging -> Set up Firebase Cloud Messaging
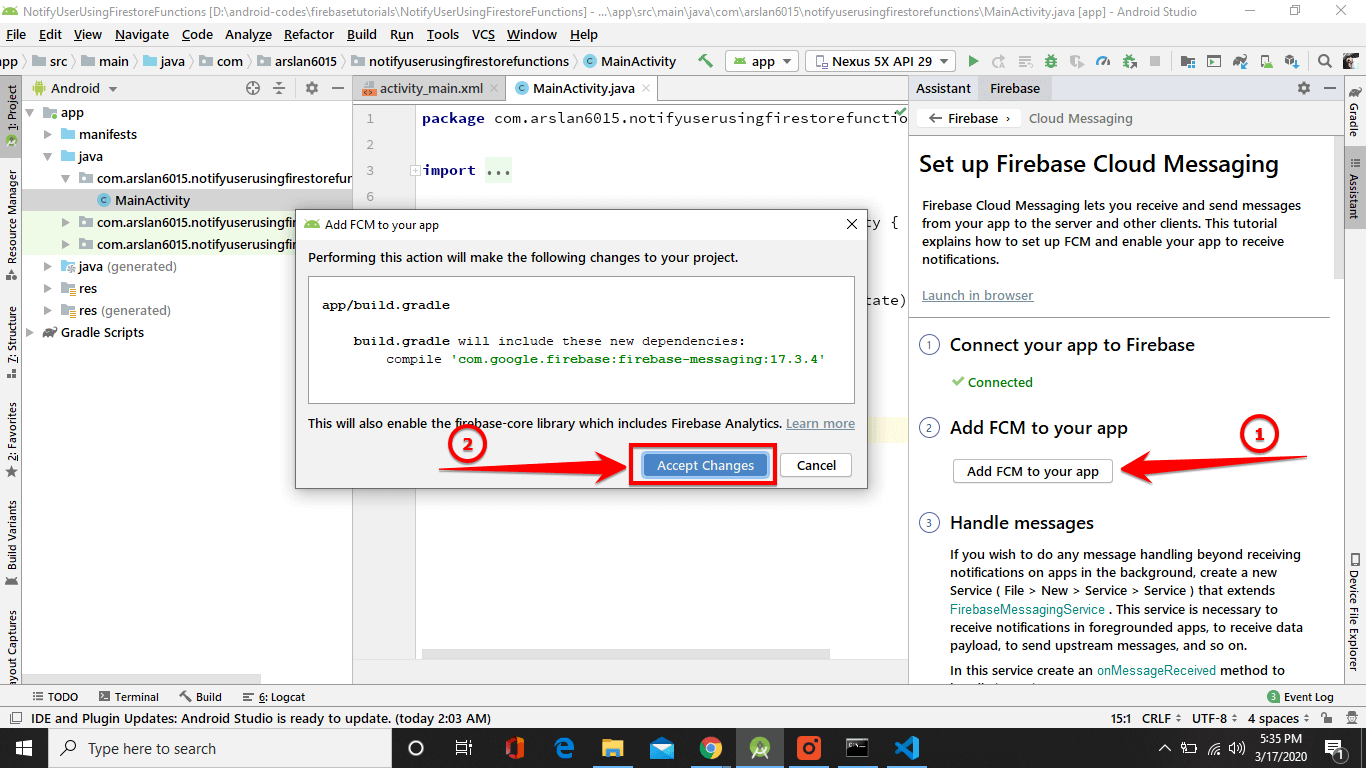
- Next, click on Add FCM to your app
- A popup box appears to click on Accept Changes it will add a dependency in the build gradle (app) file.
After setting up dependency correctly, type the below code in onCreate() in MainActivity.java
This will get the instance of FirebaseMessaging and send notification using subscribe to topic methods.
You can also check complete documentation regarding topics.
Here is the complete code of MainActivity.java
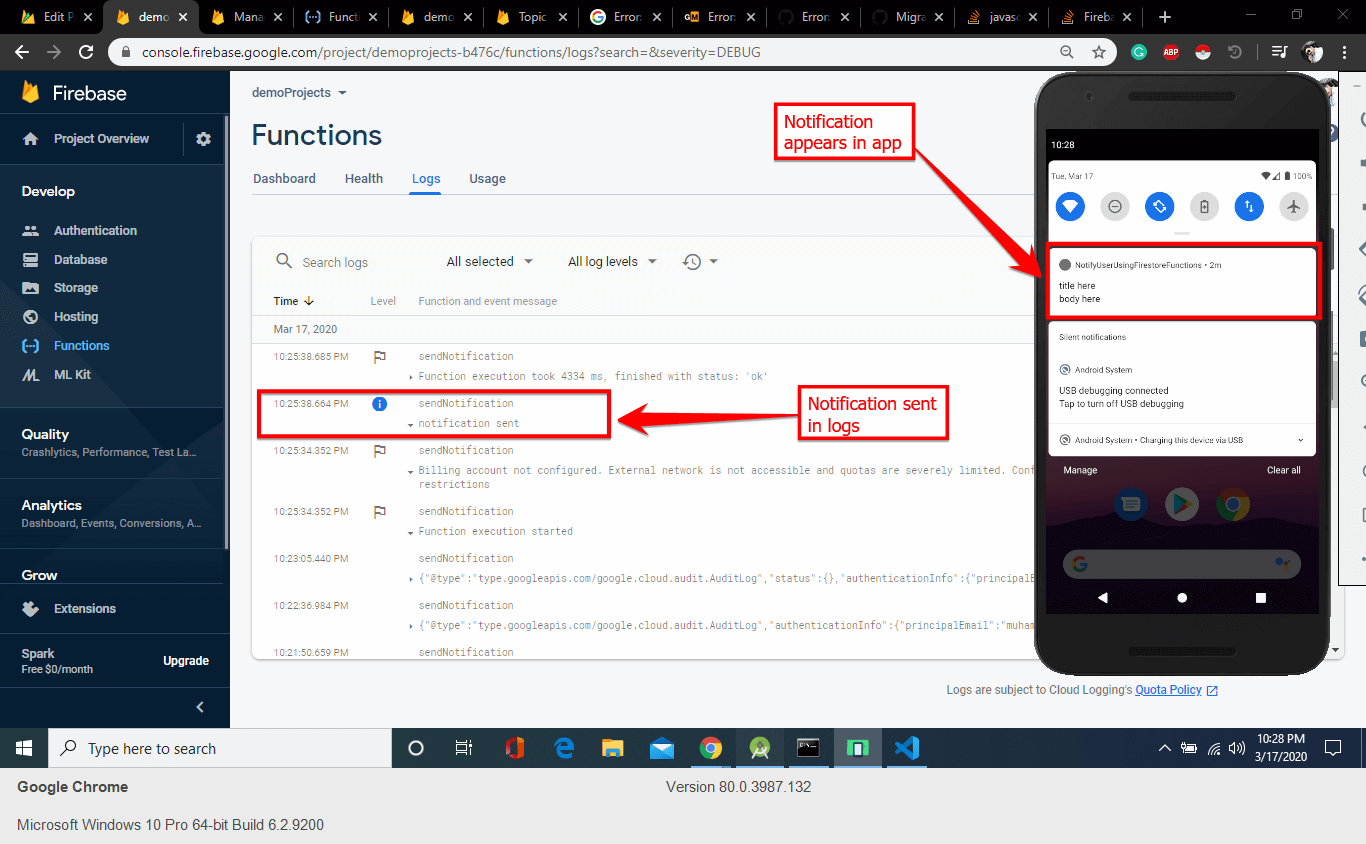
Step 8 – Run the App
Hurray! Everything is done successfully. Just run the app and check you can see in the image below. Notification will come when the app in the foreground or in the background or even the app is killed.
Whenever the new record is added in the database, then a notification is generated. You can add some codes in your project to add data dynamically from the users.
Ask any questions below, we’ll be delighted to answer.
1 thought on “Use Firebase Cloud Function to Notify App Users (Tutorial)”
Comments are closed.