Custom made things are cool, ain’t? 😂
The custom domain feature of Firebase Dynamic Links is also cool that helps in:
- Branding
- SMS marketing
- Email marketing
- SEO
More.
But, Waqas, how SEO?
You can use the deadly combination of Firebase hosting and Firebase Custom Domain to connect with each to make your website blazing fast.
I’ve seen websites that use the tactic and rank well on Google. I’ll soon write on the topic in detail.
Normally, Firebase gives a page.link domain that looks spammy and dirty to eyes, doesn’t it?
But the perception changes as you attach the custom domain since you can make a link that is professional and builds credibility and trust.
https://example.com/link-suffix
https://example.com/links/promos/link-suffix
https://links.example.com/link-suffix
https://ex.amp.le/link-suffix
Note: You need to attach the custom domain to Firebase hosting for using Firebase Dynamics, explained in this article.
Setting Up a Custom Domain in Firebase Console.
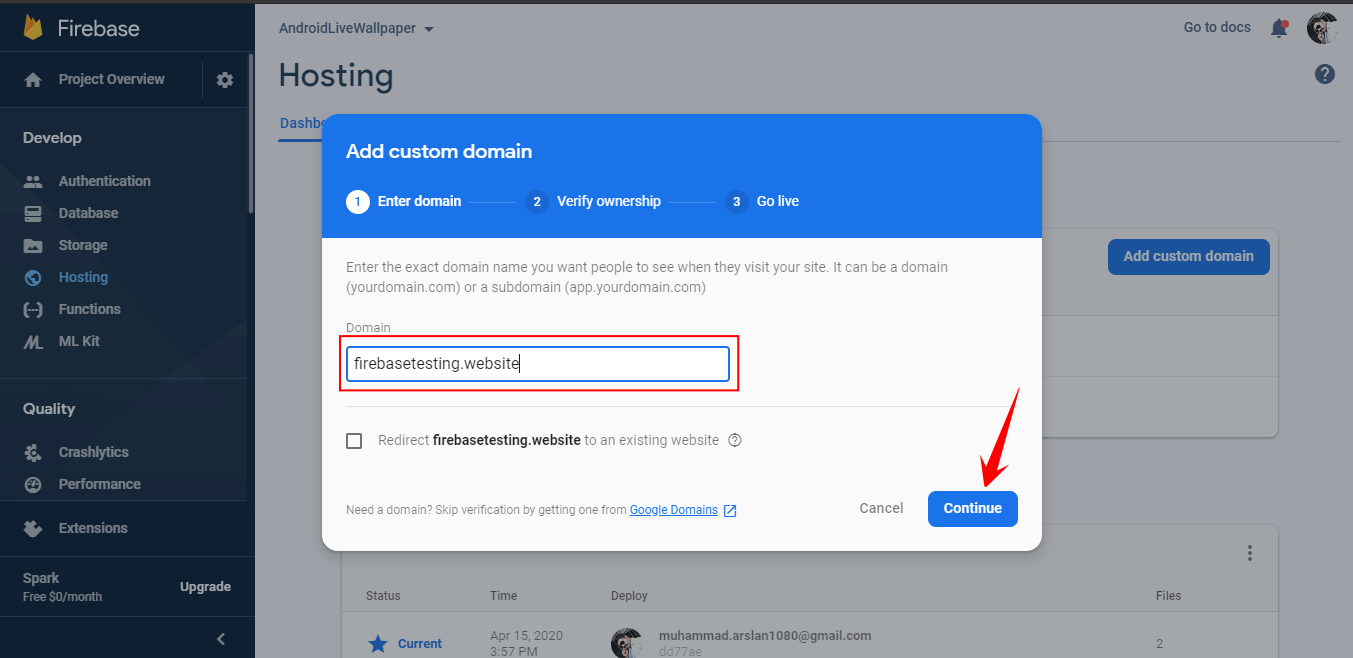
I spent a few dollars to purchase a domain, firebasetesting.website, from NameCheap just for the sake of writing this tutorial. 🤣
For easy understanding, I’ve divided into two parts:
1. Setting Up Hosting for Dynamic Links
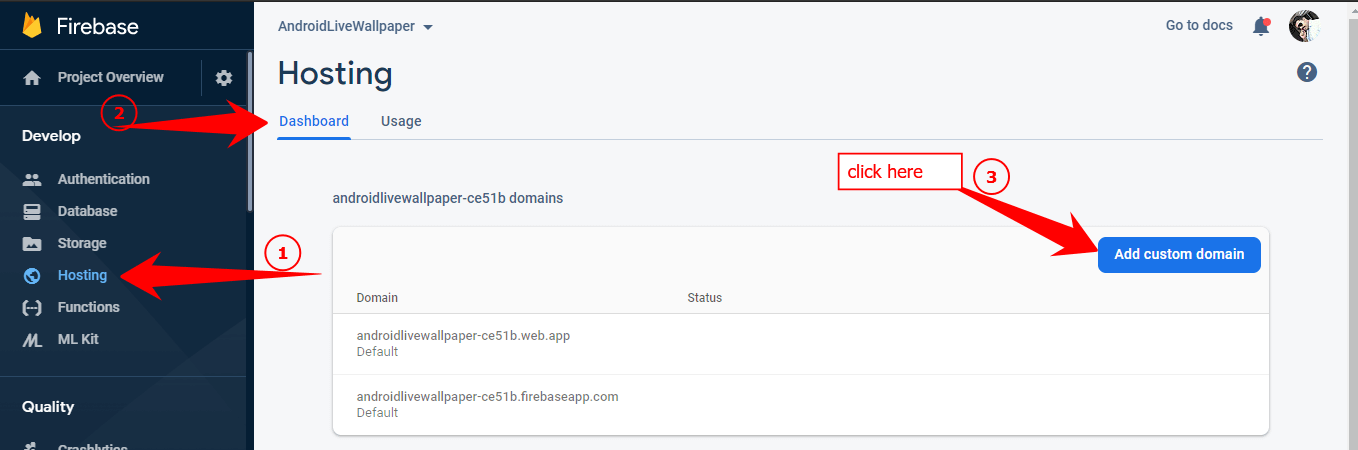
First, go to Firebase Hosting on Firebase Console and select your project or create a new project if you haven’t created a project yet.
Don’t know how? Read how Firebase works.
Then enter the domain name that you just purchased or any existing domain. You can also use free domains.
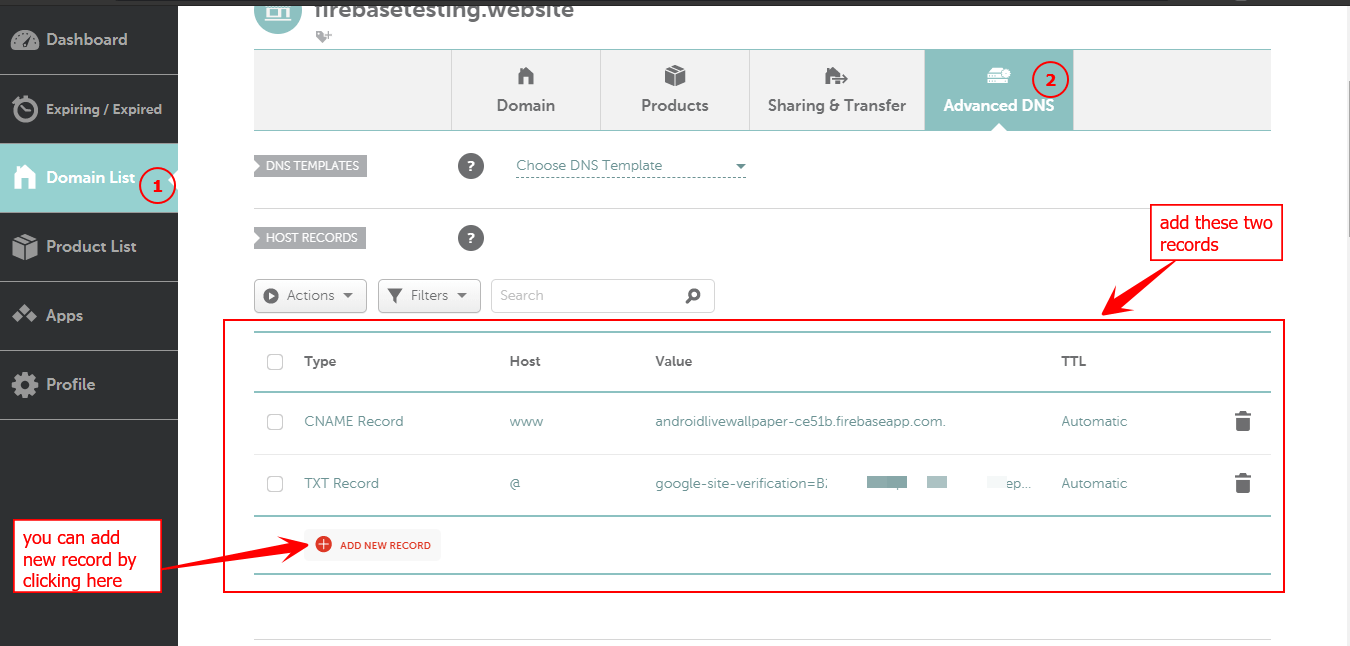
Afterward, you have to verify the ownership of your domain. To do this, just copy the TXT record and paste it inside your DNS provider.
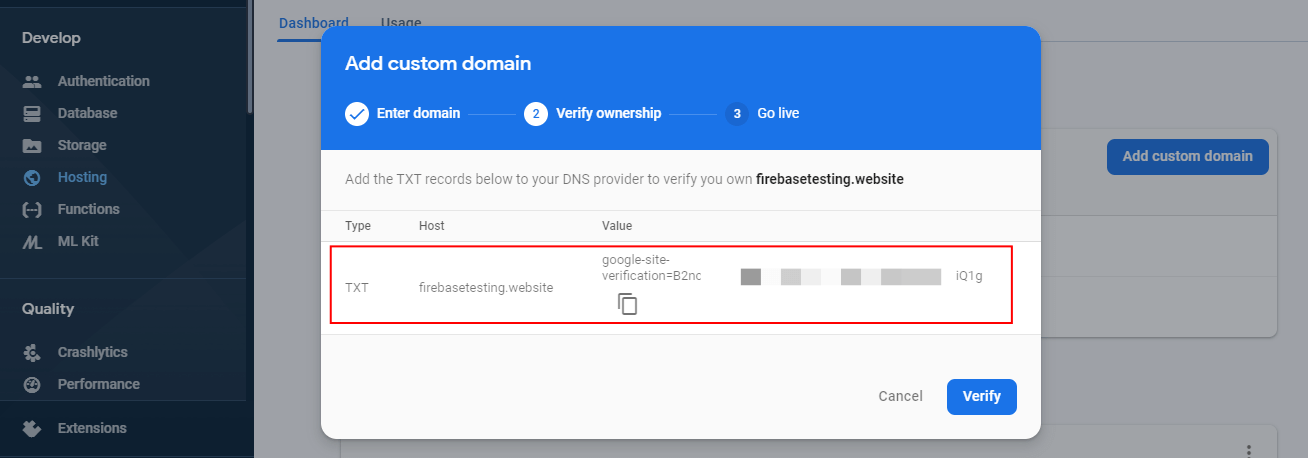
I use Namecheap.com, so I’ve added this information in the Advance DNS section.
It may take up to 24 hours to propagate the data approximately.
In my case, it took 10 minutes.
Want to make it instant? Use Cloudflare that makes DNS propagation stunningly fast.
After that, go to the Firebase Console and click Verify.
Now copy the A Records, as shown in the image below.
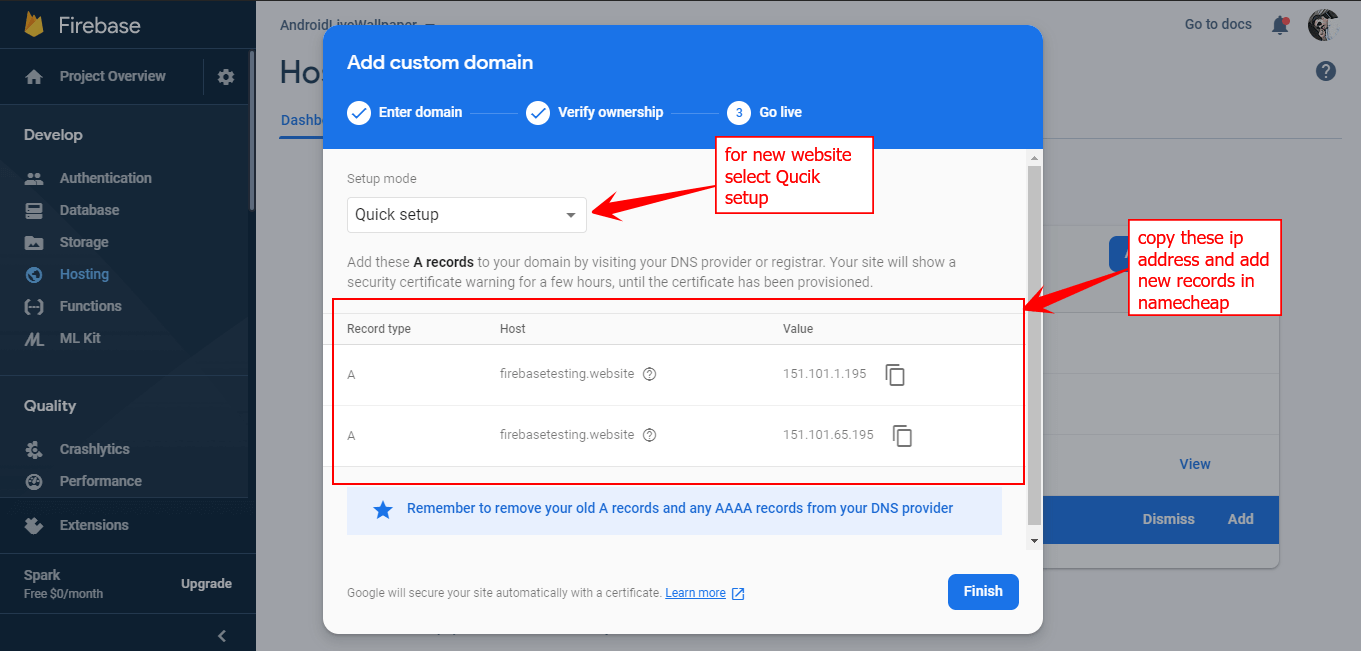
And paste into Namecheap.com in the same way we added in the Advance DNS, but as A Records.
Here you can see I’ve added four records.
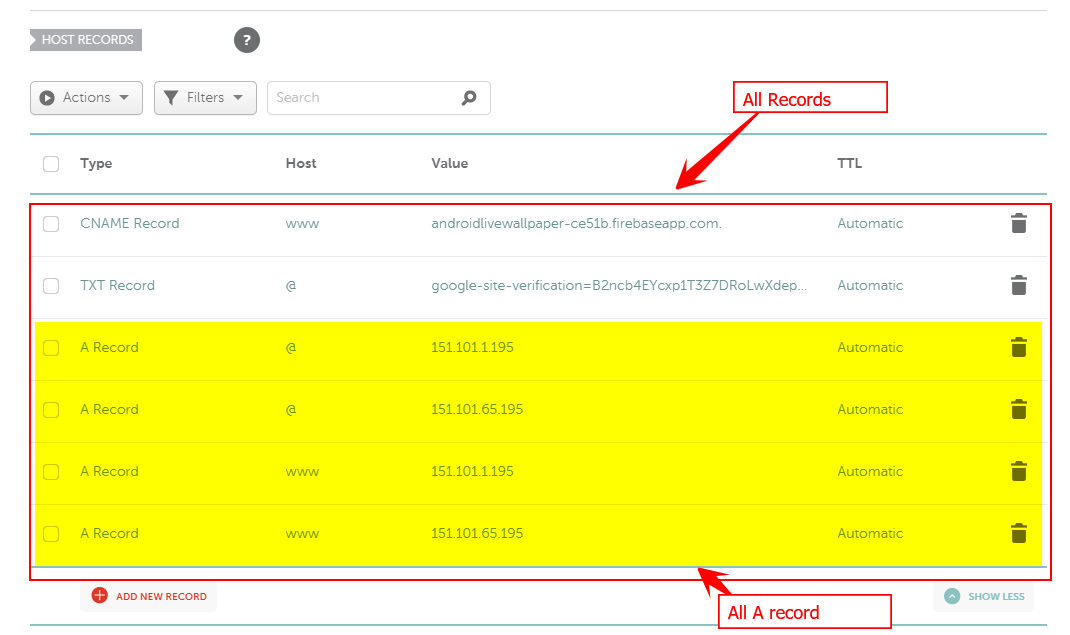
Two records with the host value of (@) and two records with the host value of (www).
The reason is that some companies register A Records with the host value of (@), and some companies register A records with the host value of (www). That’s why I’ve added both types of records to avoid confusion.
Did you know? @ means your website name.
After adding all the A records, go back to the Firebase Console and click Finish.
If you are facing any problem, don’t forget to ask a question in the comment below, you’ll be responded quicker than any support.
2. Dynamic Links of Firebase Console
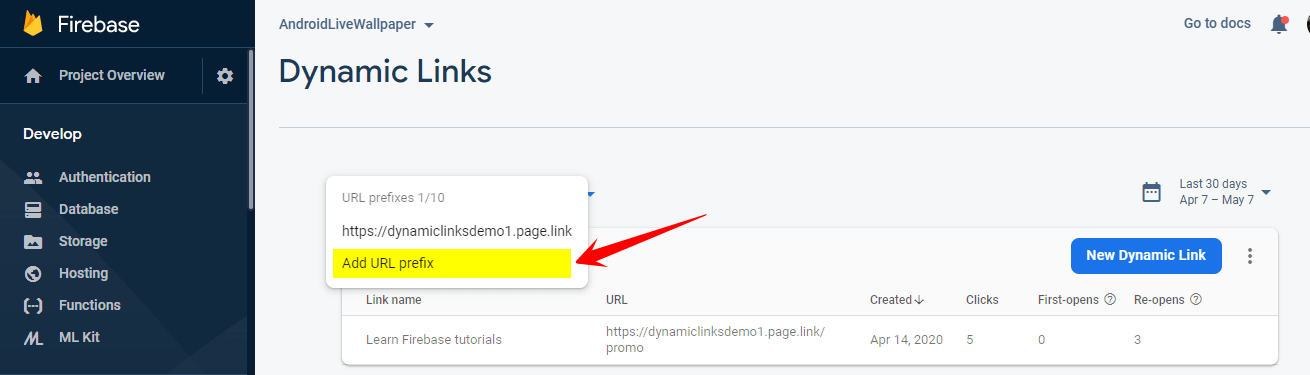
Open Dynamic Links and select your project.
Now, if you haven’t used Firebase Dynamic Links before, then click Get Started.
And click on Add URL prefix from the top drop-down menu.
Now complete the setup wizard as I did in Part 1.
Enter your custom domain name and click Continue.

Then select the Firebase Hosting portion and click continue.
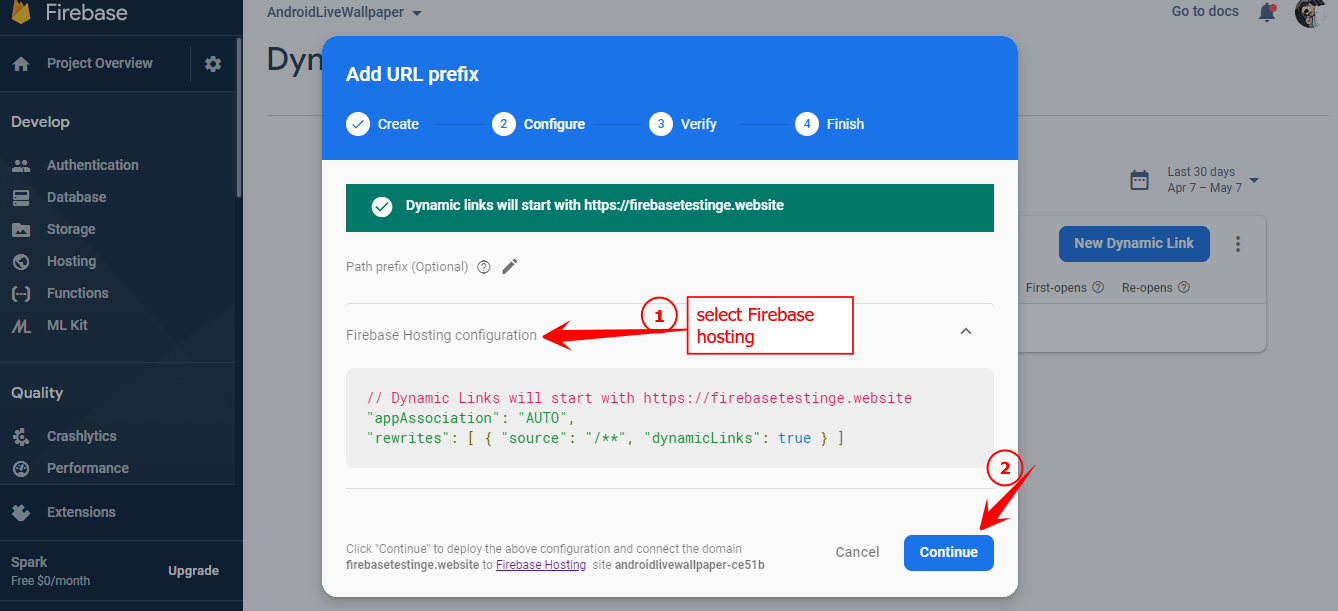
Now you’ve already verified your domain in the domain registrar, in my case, is Namecheap.com, which we already did in Part 1. Click Continue and then click Finish.
Next, your domain is attached in the Firebase Console, as you can see in the image below.
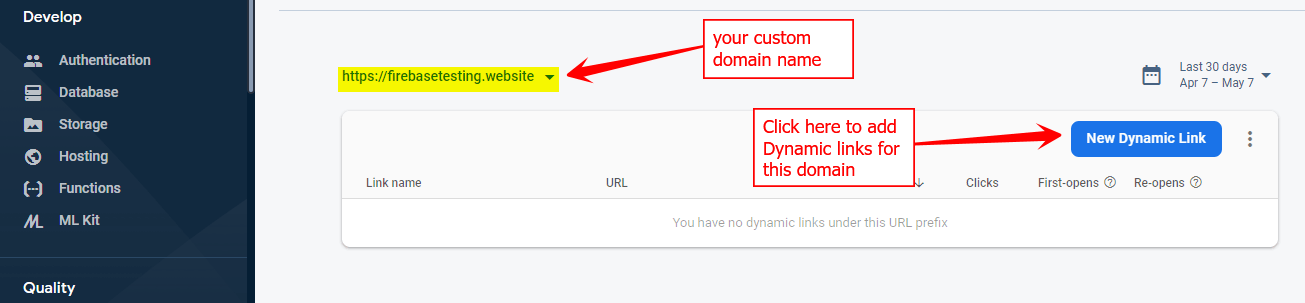
Now your custom domain is attached to your Firebase account. Afterward, you can create more dynamic links for this domain as well.
Don’t forget to ask a question below, we feel happiness when someone asks a question.