Dynamics things are amazing since changes take place constantly.
The same is the case with Firebase Dynamic Link that can manipulate links and can change its behavior in realtime.
Quick Jumps
What are Firebase Dynamic links?
Dynamic links are the deep links that work according to the configurations you use.
With a single click, you can redirect your users to the app, either Android or iOS.
The best part?
If your app is not installed in the user’s device, you can redirect to the Play Store to download the app.
Do you know?
A Firebase Dynamic Link is smart.
What do you mean by being smart?
If your app is installed, the app opens the link and redirects to the required page or product.
If not installed, it prompts users to first download the app.
It’s a great way to increase your download.
And you can use it in SMS marketing as well instead of Bitly short links.
How Do Firebase Dynamic Links Works? (Video)
Dynamic links can be created in many ways as you use client libraries or REST API.
But in this tutorial, I’m going to create a simple and easy tutorial that will help you:
- Taking the users to open the website if the app not installed
- Taking the users to the app if the app is installed
Don’t you like to watch the video? Don’t worry, read the tutorial.
Firebase Dynamic Links Tutorial (Step by Step)
1. Create/Open an Android Studio Project
First of all, create a new or open an existing project in Android Studio. Learn to add a project if you don’t know.
2. Add Firebase SDKs to Your App.
Now add Firebase SDK to your app.
Once done, you have to add the SHA-1 signing key. If you are using app links, also specify SHA-256.
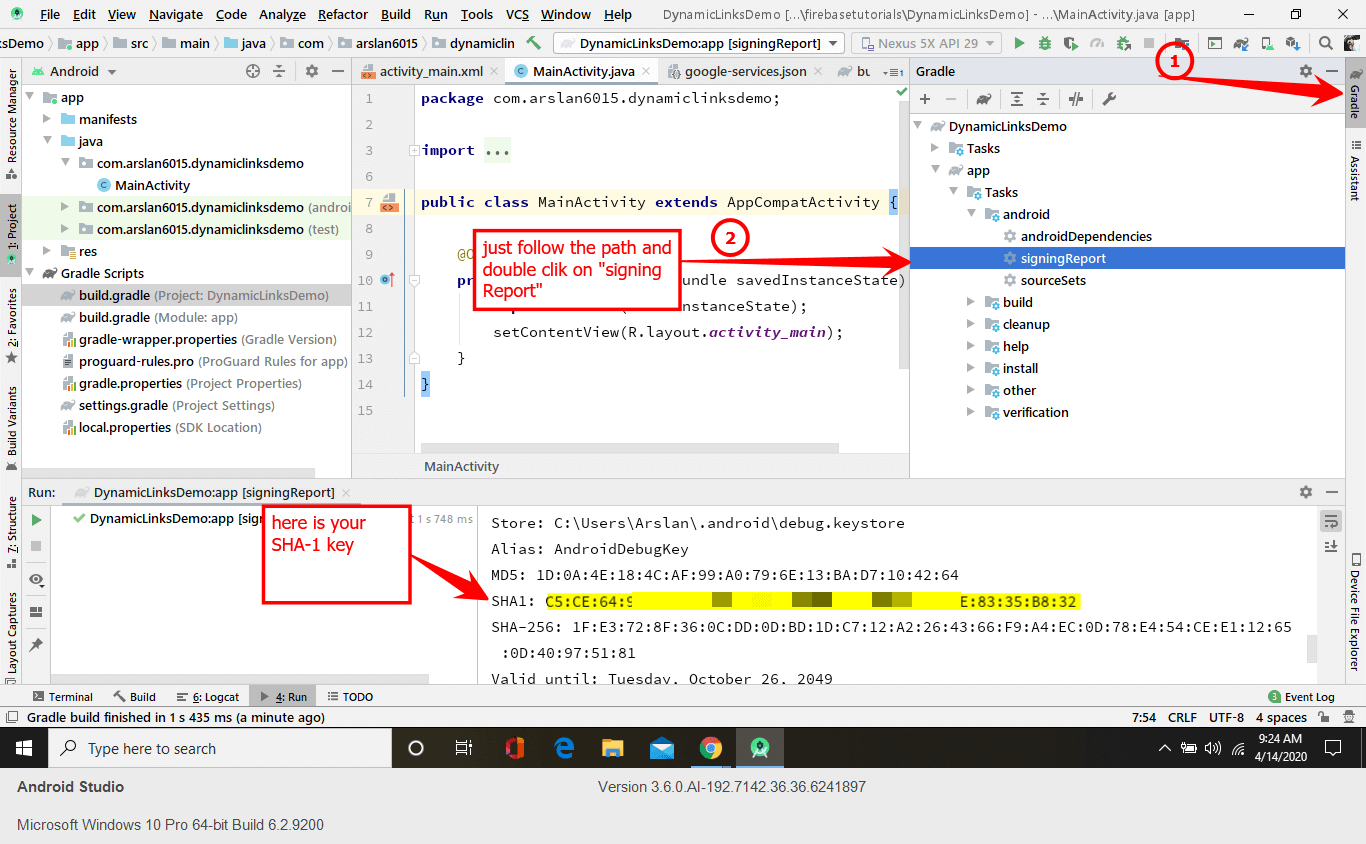
- To add the SHA-1 key to your app, go to Android Studio and click on Gradle, which is available on the right top side.
- Afterward, click on [your app]-> App -> Task -> Android -> Signing Report and you will find SHA-1 Key inside run window.
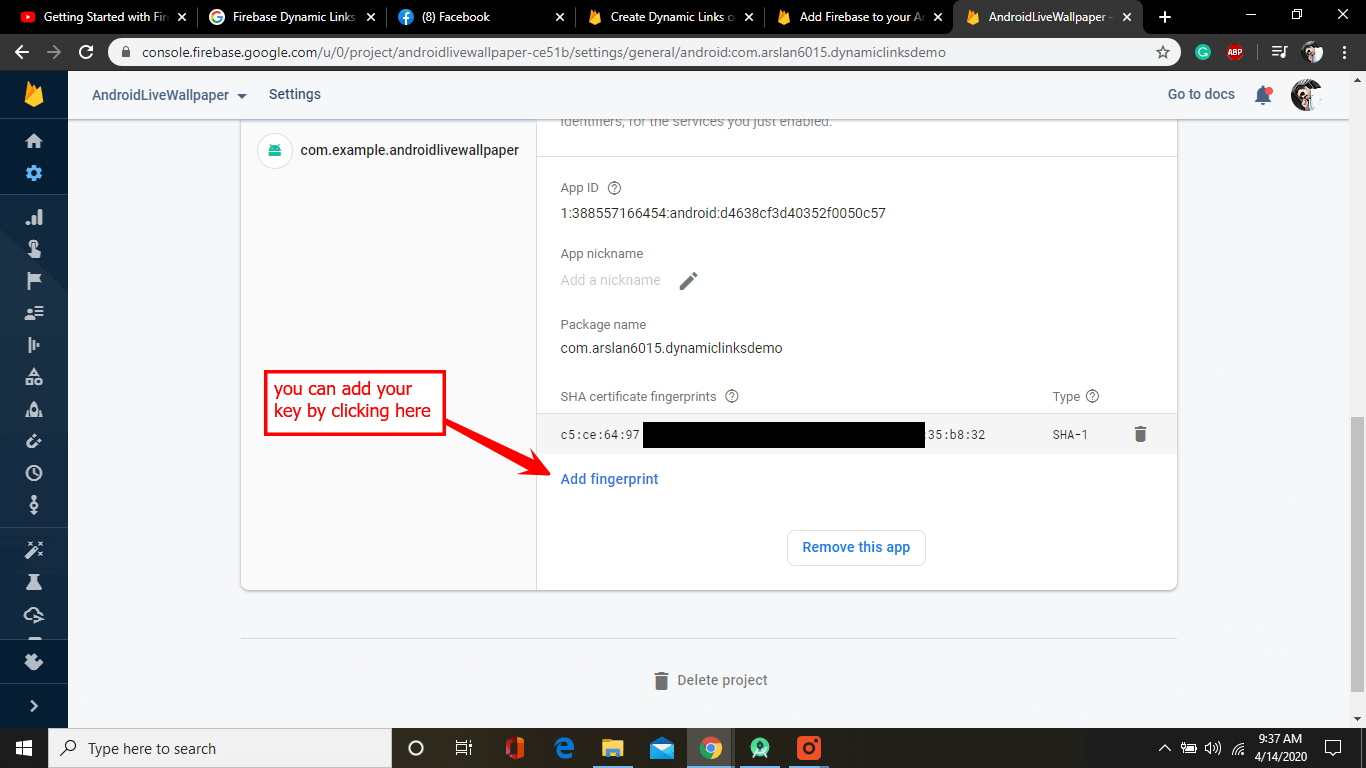
Next, open your Firebase project in the Console and open setting by clicking on the gear icon.

Afterward, you can add your SHA-1 key by clicking on “Add Fingerprint.” Add SHA-256 key if you’re working with app links; otherwise, you don’t need to add SHA-256 key.
3. Configure Your Android App
After adding the Firebase SDK to your app, go to the Gradle Script-> build.gradle(app) file and add below dependencies inside dependencies {} block.
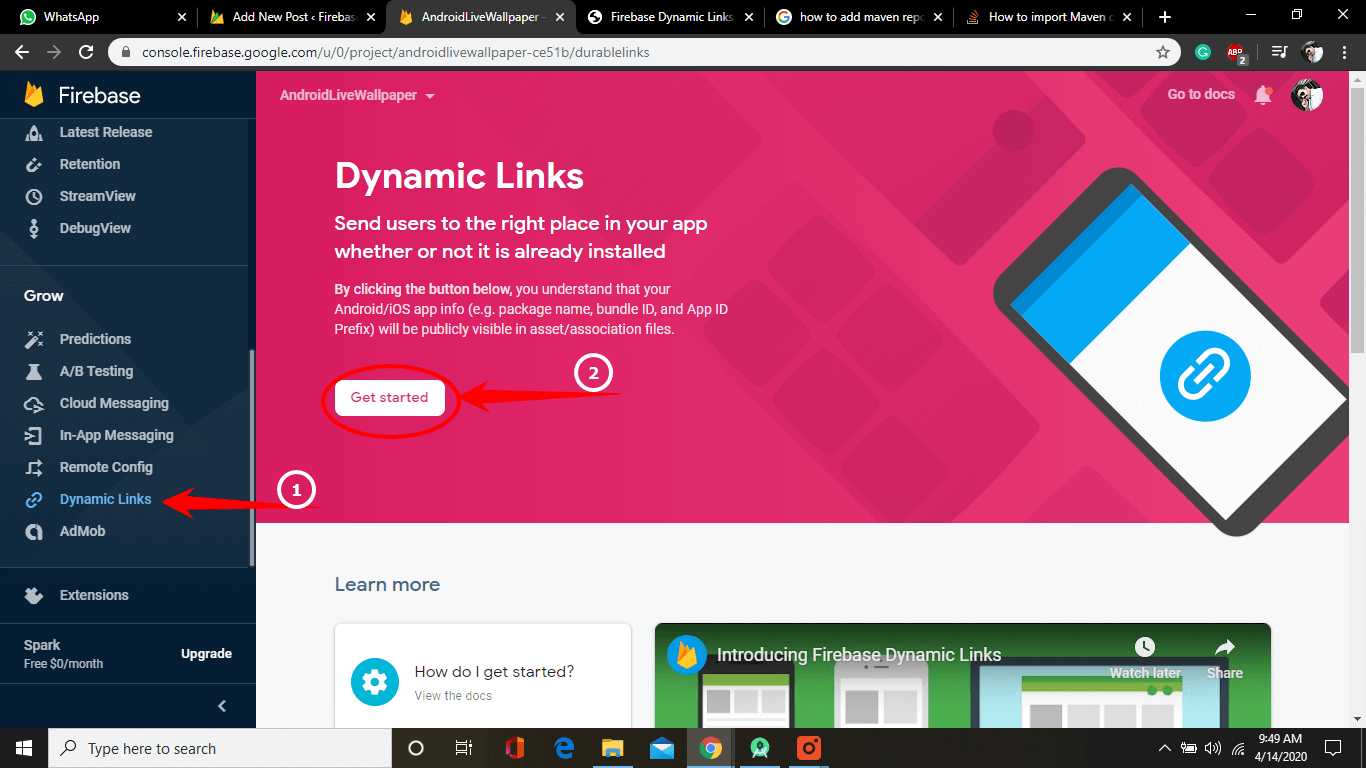
It’s time to go to the Console and click on Dynamic links -> Get started.
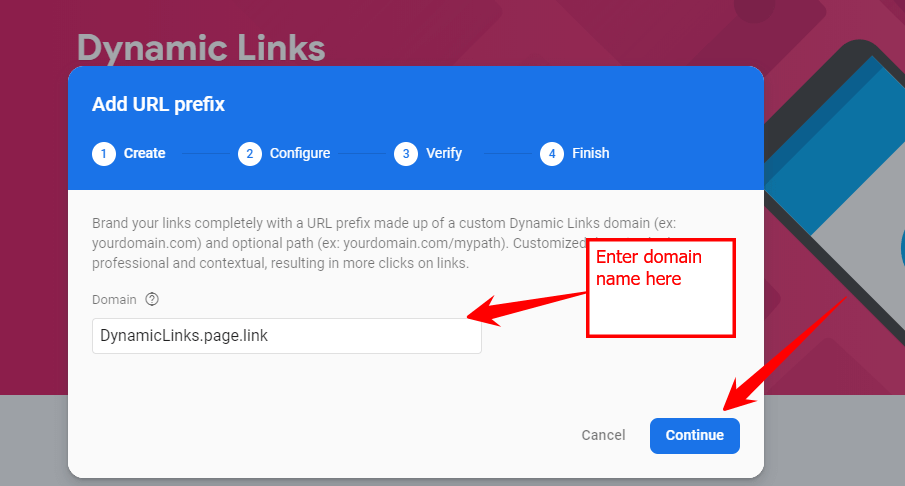
Then a popup box appears.
Enter your domain name here.
Don’t you have a domain name right now?
Don’t worry, Firebase gives you a free subdomain name. You can use this like an abc.page.link where page.link is given by Firebase.
After successful registration of your domain, you will see a page like this.
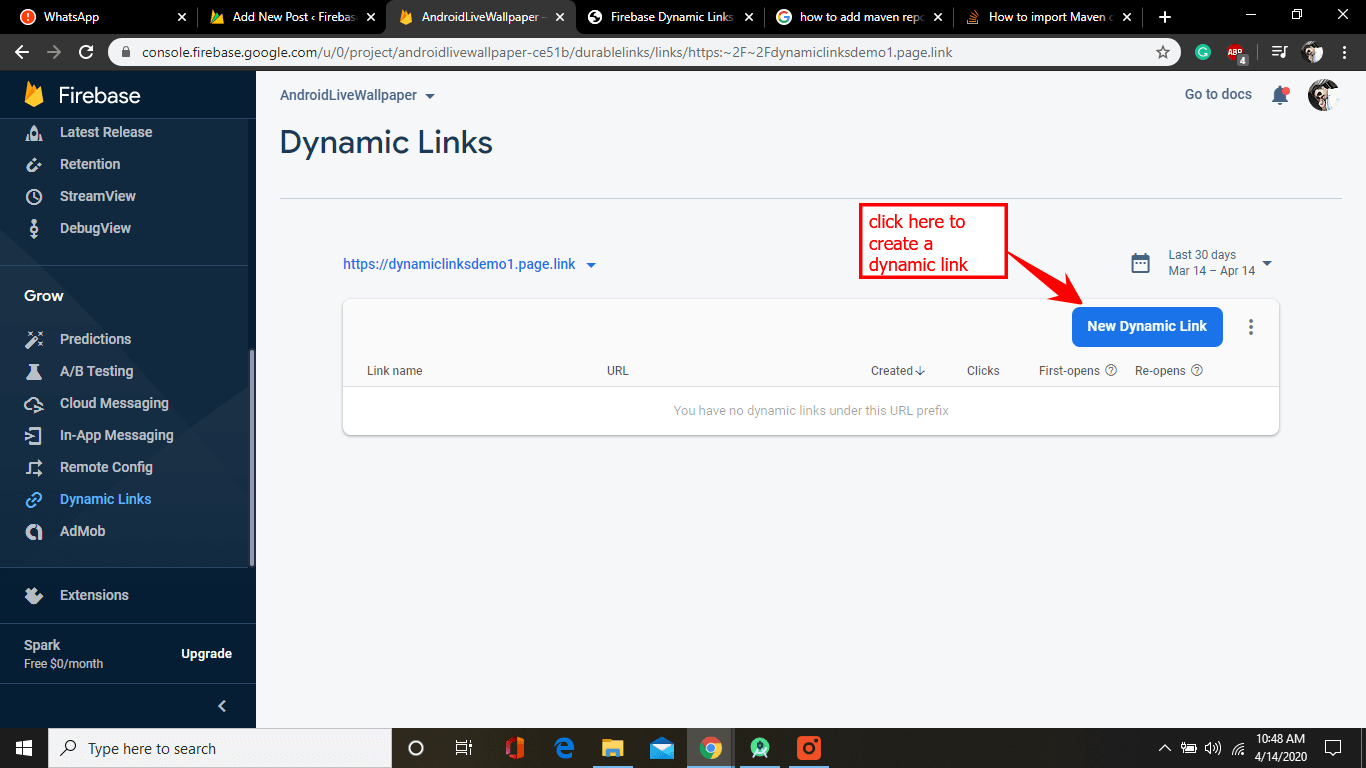
4. Create a Dynamic Link
Finally, you have set up our project, and it’s time to create a dynamic link.
There are many other ways to create a dynamic link, but I am here to discuss the most basic way.
Just click on the New dynamic link button.
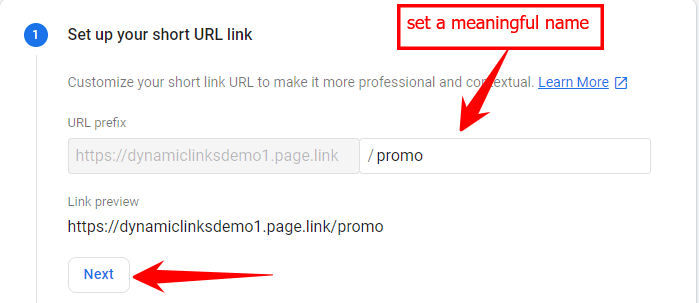
A new window open Enter text of your choice like “Promo” if you are using for a social network campaign etc. and click Next.
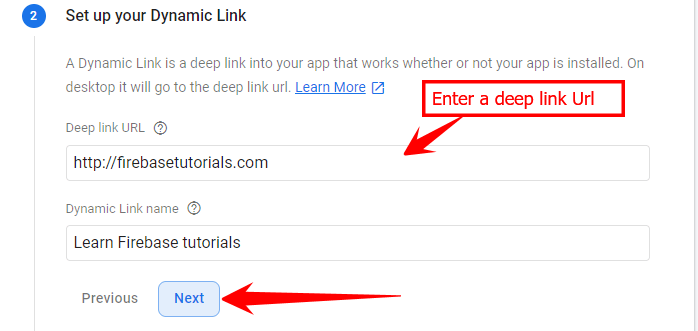
Next, add deep link URLs and click Next. I already discuss the deep link above.
Next, add the iOS behavior to your app since I don’t have an iOS app that’s why I select as a web browser

Afterward, define behavior for your Android app.
When users open a dynamic link demo app is open, but if your app is not installed on the user device, then the link will automatically be redirected to the website, for example, firebasetutorials.com.
But in most cases, you will redirect your user to the Play Store to download the app.
You can also set the behavior that when a user is not able to install your app, then he/ she can do particular events.
For example, your app support API Level 21-30, and your user device API level is 20, then what he/she can do? In this case, you can redirect the user to the website.
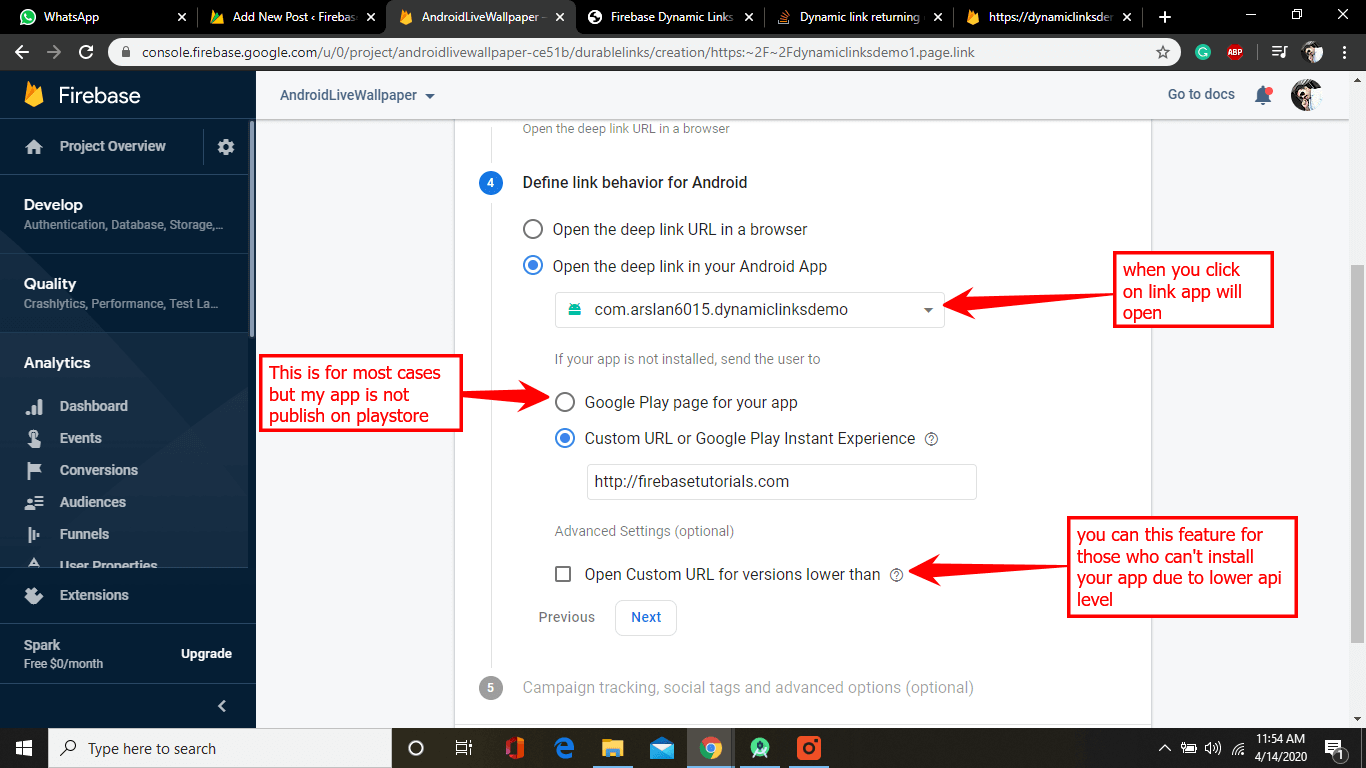
Next, you can find some advanced features here.
These features will help you a lot when you are creating a social campaign to catch your audience to install the app.
It works with two ways. You can show an interstitial with a dynamic link, or you can show a beautiful image with a nice and short title and description, etc.
You can even track your campaign using Firebase analytics tools.
Also, play store tracking is captured with this.
![]()
Hurrayyyyyy! The first dynamic link URL is created.

For a better understanding of how dynamic link works, just watch the video.
Let us know any questions you may have. Every question will be answered.


2 thoughts on “Firebase Dynamic Links Tutorial [Easy Step by Step]”
Comments are closed.