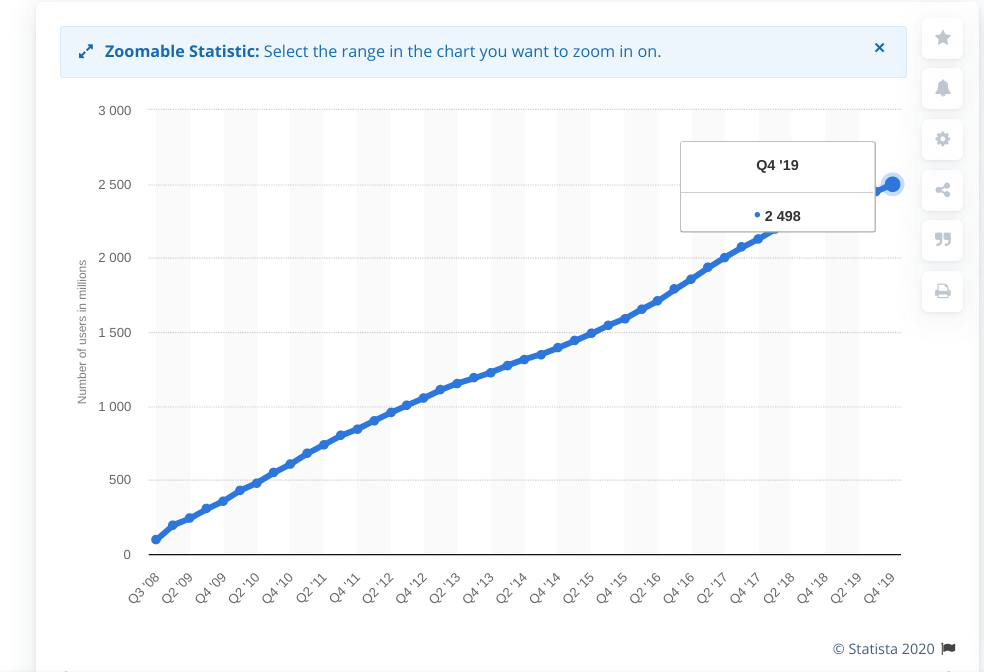
Facebook has over 2400 million users, and it makes sense to implement Facebook login in your Android app for faster and better user experience.
Users have become utterly impatience. They want everything instant either to watch a video on Youtube or signing an app.
I don’t want to waste your time, let’s get started.
Quick Jumps
How Does It Work? (Video)
Facebook Login for Android Step by Step Guide
In this tutorial, you’re going to create a simple login system with Facebook.
We also wrote a tutorial on Android Facebook Login with Firebase Auth that was done in Android Studio.
This tutorial is without Android Studio. Cool?
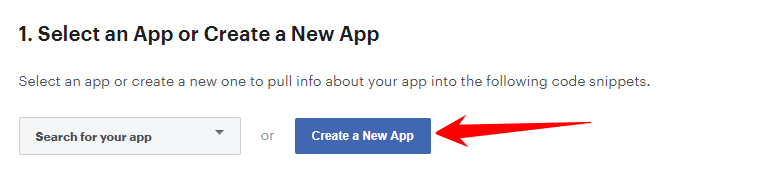
1. Select an App or Create a New App
First of all, go to the Facebook Developer Console. Select an older app if you have or create a new app.
Now a popup box appears Enter Display Name, Contact Email and create a new app Id.
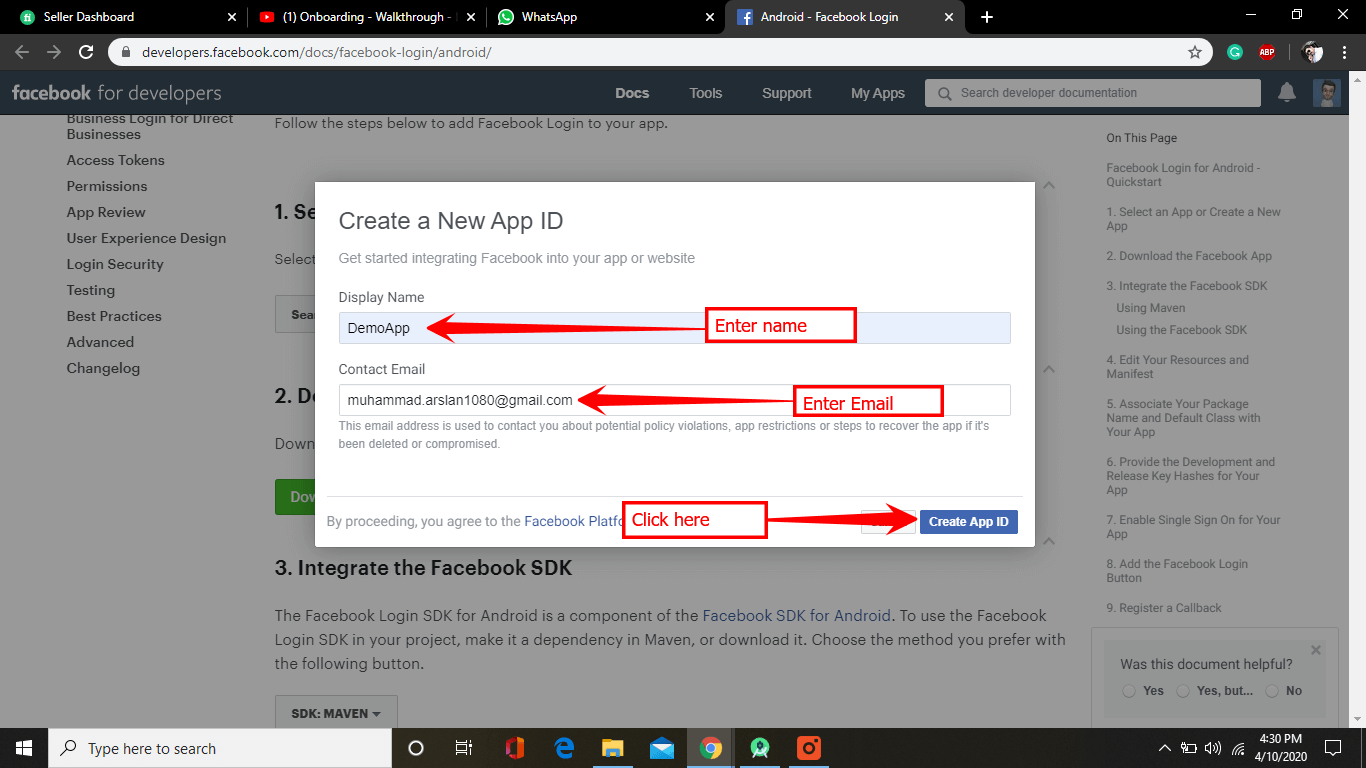
Then Facebook might be asking you to fill the captcha. Just fill and hit Enter.
Now you can see the app is generated.
2. Download the Facebook App
Now if you don’t have Facebook installed on your device. Just install it from Google Play Store.
By the way, downloading the app is not necessary.
But if you didn’t download the app. It will redirect to the browser.
3. Create/Open a Project
Now open an existing project or create a new Android Studio Project
4. Integrate the Facebook SDK
- Just go to the app -> Gradle Scripts -> build.Gradle(project) and add below code inside buildScript { repositories {} }; and click sync Now.
- Now go to the app -> Gradle Scripts -> build.Gradle(app) and paste below code inside dependencies{} block and click Sync now.
5. Add Files in strings.xml
Open your app/res/values/strings.xml File and add below code inside <resources> Tag.
You can find your app key, and protocol key at Facebook developer console in section 4.
6. Add Files in AndroidManifest.xml
Open the app/manifests/AndroidManifest.xml file and add below code inside <manifest> TAG.
Now paste below metadata element, Facebook activity, customTabActivity inside <application> TAG
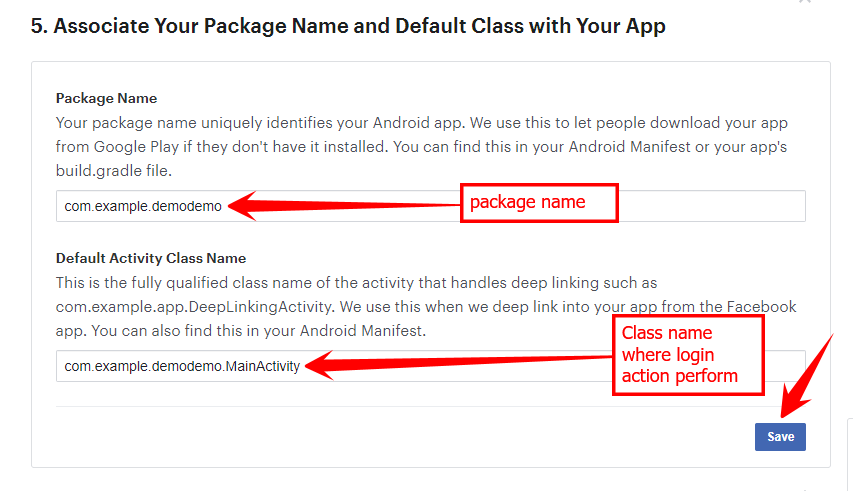
7. Associate Your Package Name and Default Class with Your App
8. Provide the Development and Release Key Hashes for Your App
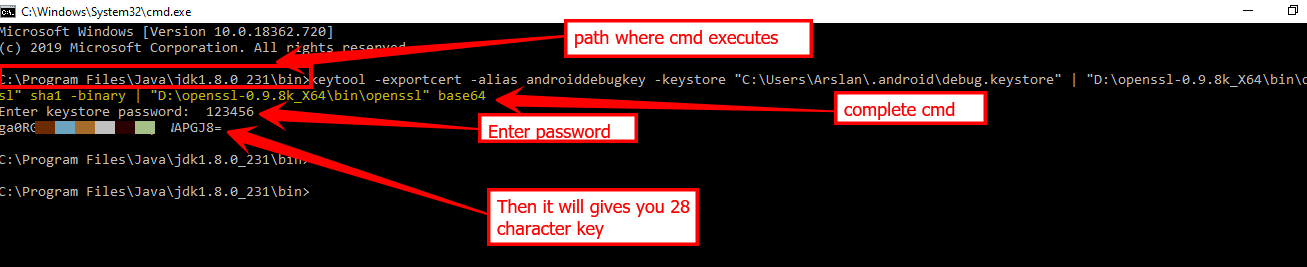
If you want to generate a release key you need two things.
- 1. Key and certificate management tool (key tool) from the java development kit
- 2. open SSL for the window you can get it from Google code archive
And paste the below code in the cmd terminal.
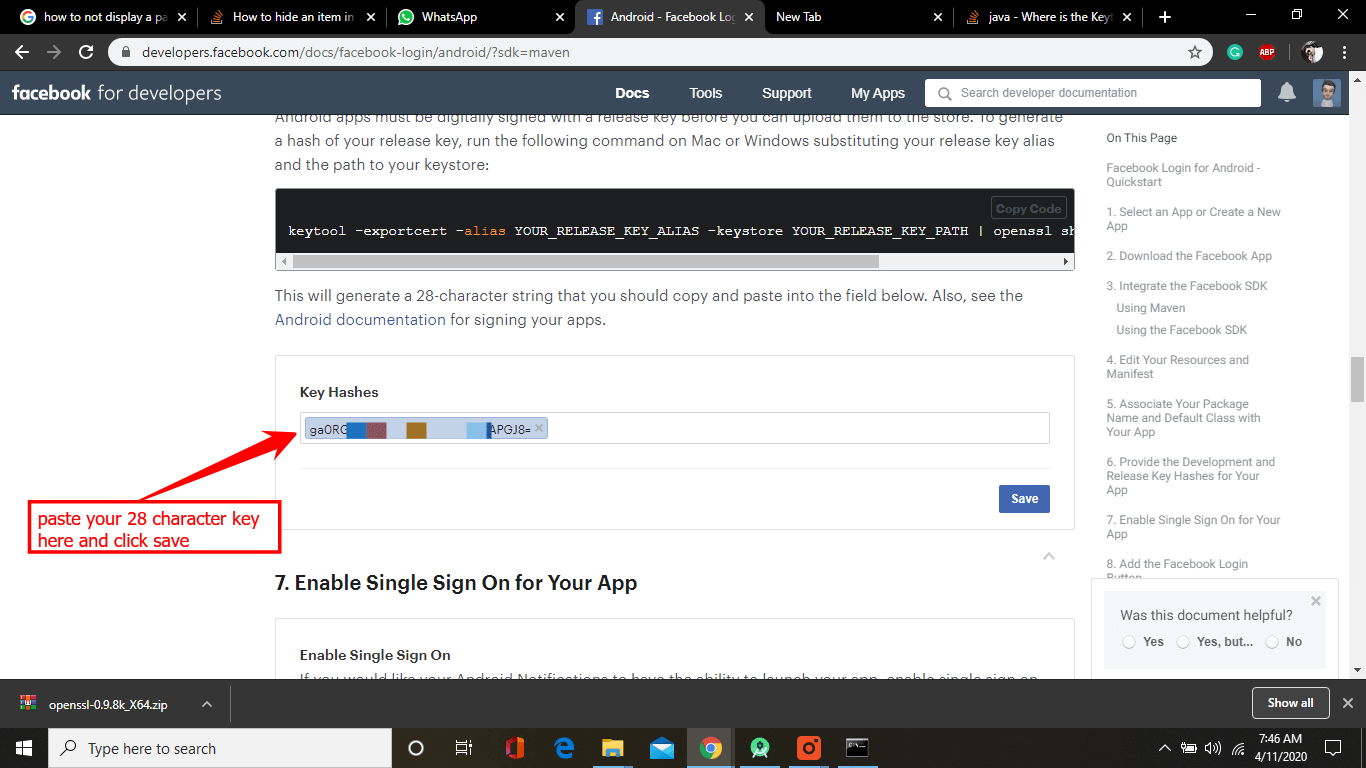
You will get a 28 character key just like the below image.
And paste inside Facebook developer terminal section 6 and click save
9. Add the Facebook Login Button
Now add below code inside activity_main.xml
10. Do Some Code in MainActivity.java
First of declare these fields, in the beginning, MainActivity class.
Now create a callback method just to handle login response. Just copy below code and paste inside MainActivity onCreate() method.
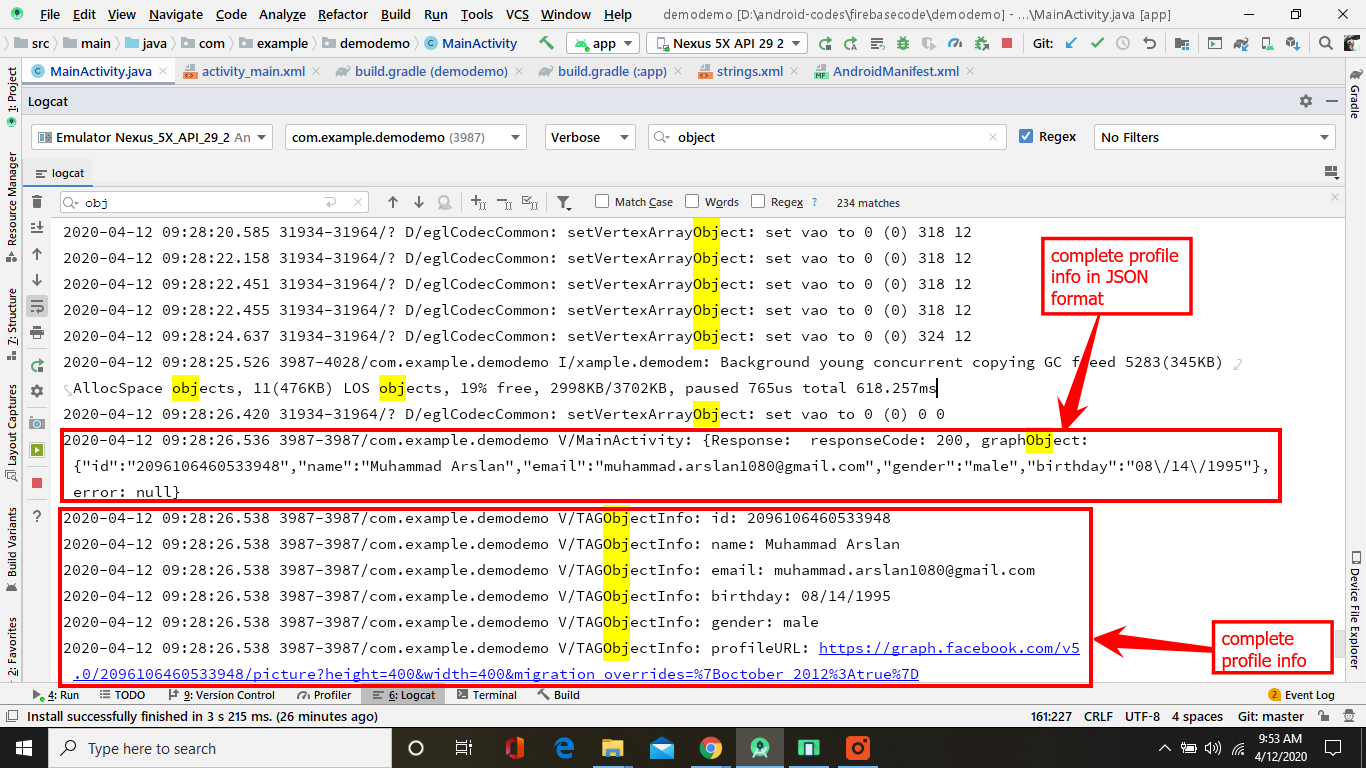
11. Run the app
That’s it. Now just run the app. Below you can see all profile information of your User Account.
This StackOverflow article is really helpful you can check this if you are getting any issue.
Or ask any question you might have, our experienced Android developers will answer each of your questions.
2 thoughts on “Facebook Login for Android Easy Tutorial [With Video]”
Comments are closed.