Have you ever wished you could have done A/B testing with your life as your girlfriend A is better than girlfriend B? 😂
Apologies ladies and gentlemen, but the good news is that you can perform A/B testing using Firebase with Remote Config on your app. 🤖
With the feature, you can test any tiny changes like the placement of a button, whether you have to send notification or not, the flow of an application, etc.
But it’s hard to know whether you are doing good or bad?
Related: How to Send Push Notifications With Firebase in Android (Visual Guide)
Right?
Of course, you can ask your girlfriend to ask about the changes you’ve made, that’s pretty time-consuming.
But the best way to find is to run the A/B test with Firebase Remote Config.
Quick Jumps
How Does It Work?
Basically, Firebase Testing runs on Remote Config which is a cloud service that lets you change the behavior and appearance of your app without requiring users to download an app update.
You can decide which users will be affected for the change from the Firebase Console.
Firebase splits your app into different groups and makes sure that they are seeing the right version of your app.
Afterward, Firebase analyzes your app data you get back using some sophisticated Bayesian statistics, so you can be confident that the data you are seeing is not just a random chance.
Once the A/B test determines the winner you can roll out your app changes to the rest of the app users and send a notification to the users.
All done through Firebase console.
In this way, your growth team can create an experiment that they like without wasting the time of your engineering team.
How to Perform A/B Test Using Firebase with Remote Config (Step by Step)
Step 1: Setup Remote Config on Project
You may have noticed that it’s very painful to build, test and publish a new version of the app just to change some hard code value on it.
But with Firebase Remote Config, you could change that value in the firebase console and that affects your app without republishing it.
Remote config gives you the ability to define a set of named parameters and assign the value in the console.
Then in your app, you can fetch those values and use them according to your needs.
Any time you change a parameter value in the console, it will be made available to your app.
In this portion, I will be showing you how you can read some values from Firebase Remote Config!
Step A: Create a New project
First of all, create a new Android Studio project.
Step B: Add Firebase Remote Config to Your App
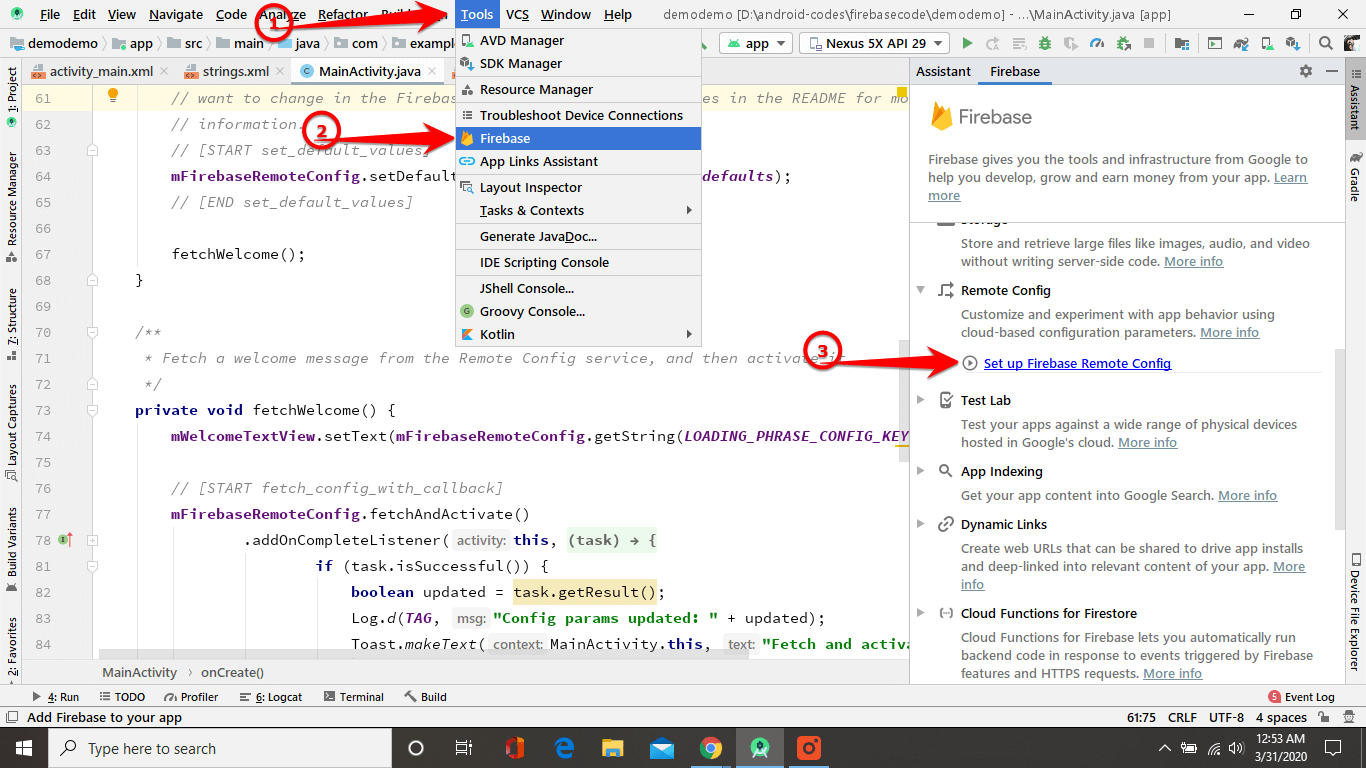
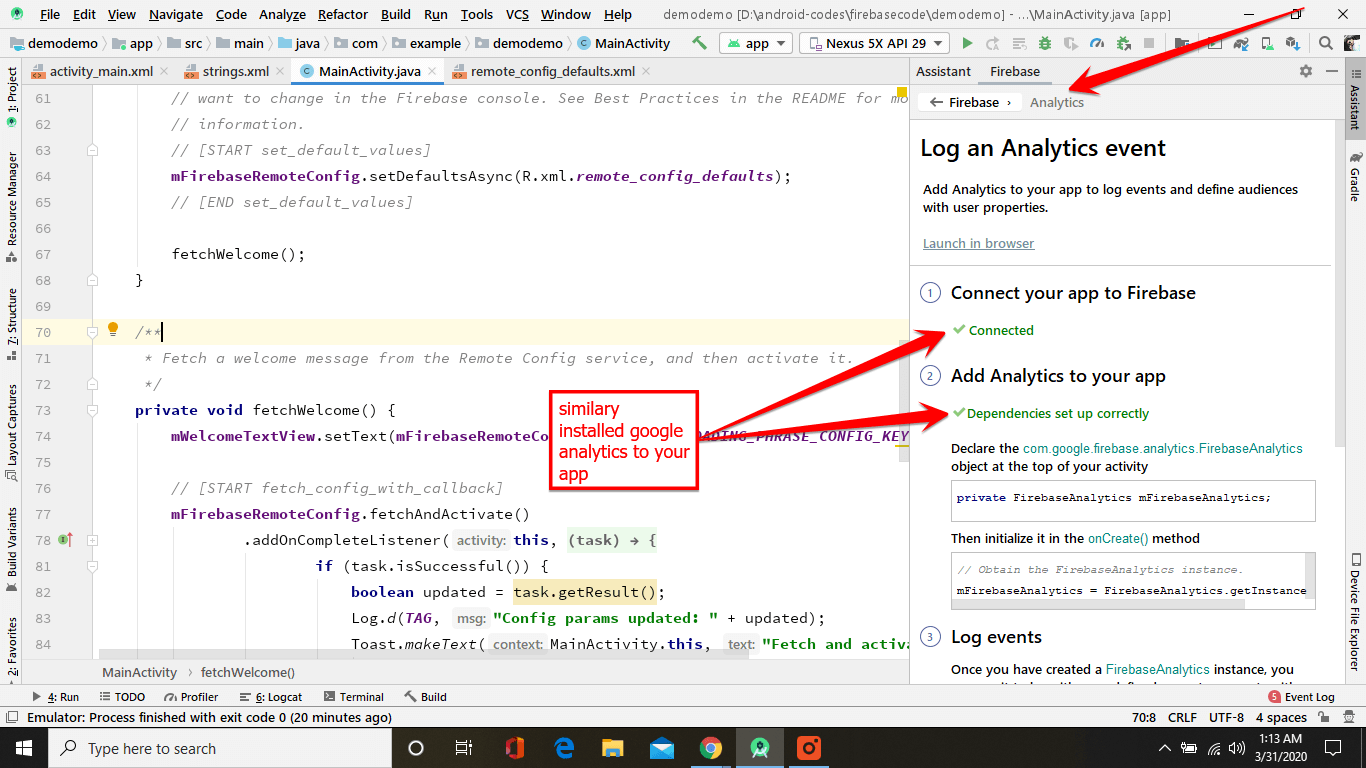
- Now click on Tools > Firebase.
- Afterward, a new window appears. Click on Remote Config > Set up Firebase Remote Config
- Now Connect your app to Firebase & Add Dependencies
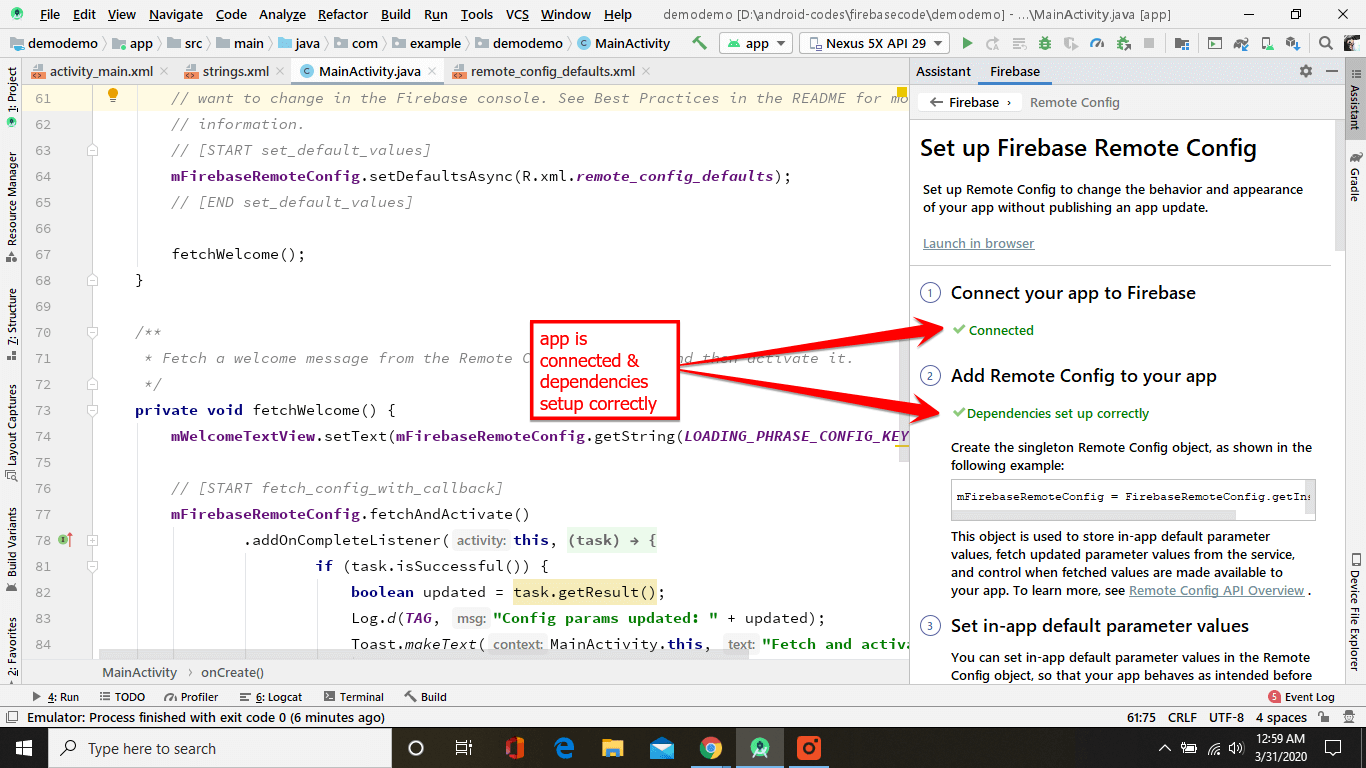
- Similarly, you need to add Analytics to your project because for remote config you need to add analytics to your app
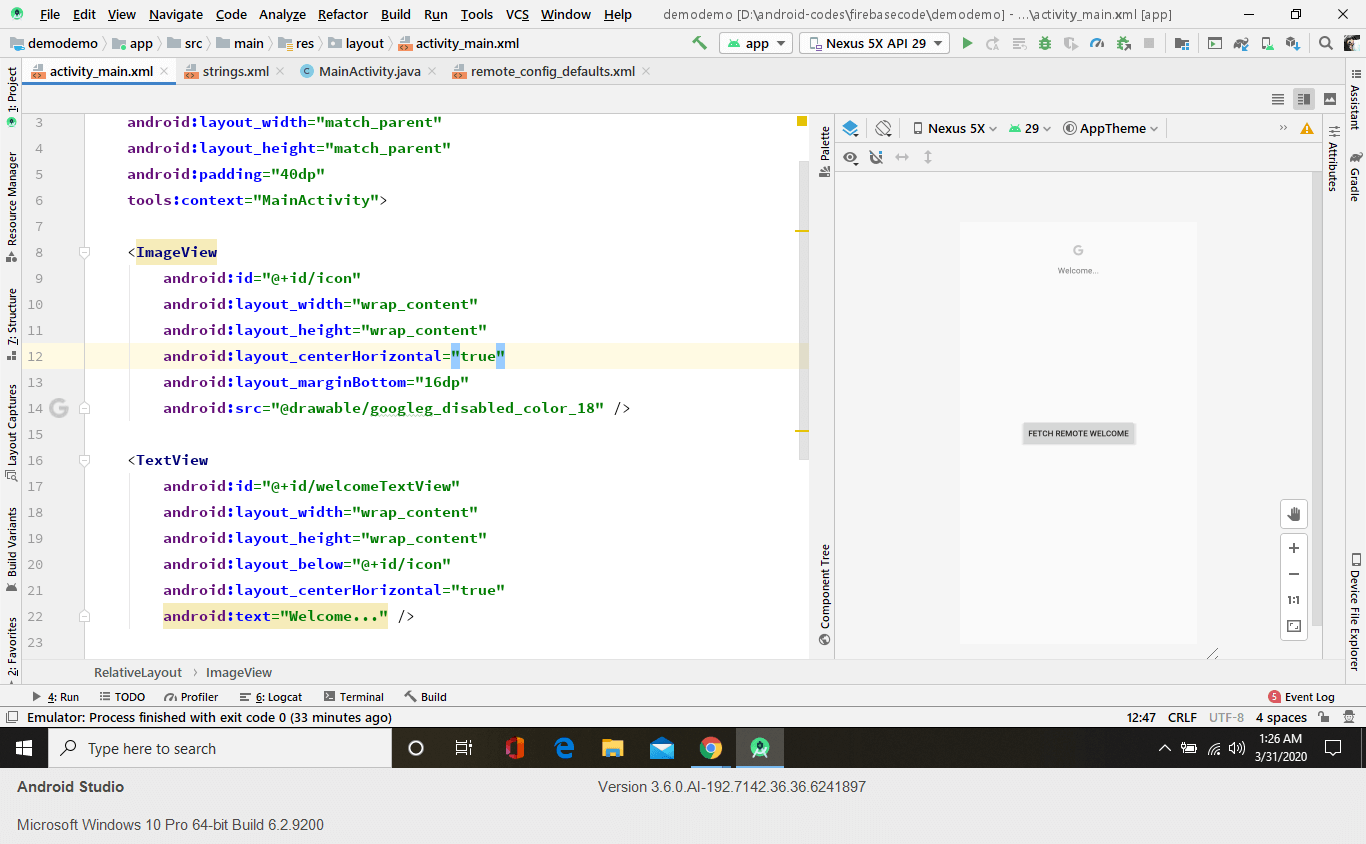
Step C: Design your layout
activity_main.xml
It looks like the below image:
Step D: Implements codes
Here you implement code in four-steps
1. First of all initializing RemoteConfig and get the instance
2. Get a singleton object of remote config
Singleton object is used to store in-app default parameter values, fetch updated parameter values from the Firebase backend, and control them when fetched values are made available to your app.
During development, it’s recommended to set a low fetch value but in production, you should increase this value otherwise the app gets throttled. Want to know more about it? Go throttling.
3. Set App Default Parameters Values
You can set in-app default parameter values in the remote_config_default.xml file (which we implement in the next steps) so that your app behaves as intended before it connects to the Firebase Remote Config backend, and so that default values are always available if none are set in the Firebase backend system.
4. Fetch & Activate Values
If you want to only fetch values from the Firebase backend call fetch() method.
Similarly, if you want to activate values from the Firebase backend call activate() method. Here you implement fetchAndActivate() method to fetch and activate values in just only one code.
And you can also handle the callbacks when the process finishes!
Here is the complete code of MainActivity.java
Step D: Setup Default Parameters Value in the App
- Now create a new resource directory by right click on Res > New > Android Resource Directory
- Afterward, a popup box appears then enter XML as directory name & resource type and click on OK

- Now create new XML resource by right click on XML -> new -> XML Resource File and paste below code.
These values are basically key-value pairs.
It looks like the below image.

Step E: Set Parameters Value in Remote Config Firebase Console.
Now go to the console and enter key-values and make it publish and run the app.

Step F: How Remote Config Works (Video)
For better understanding watch the video.
Here is the official source code by the Firebase team.
For better understanding, you can read the documentation about remote config.
If you are curious about what you can do with Firebase remote config Read: what can I do with Remote Config?
Here is the complete code on GitHub
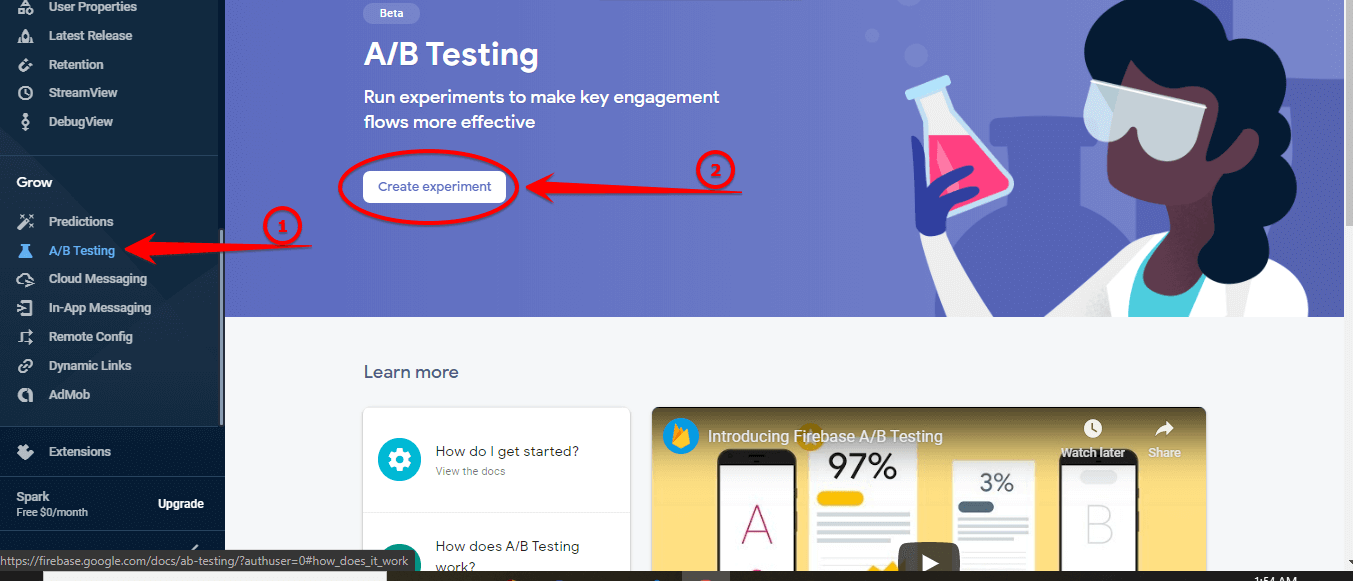
Step 2: Creating an Experiment
- First of all, go to the console and select your project.
- Next click on A/B Testing -> Create Experiment
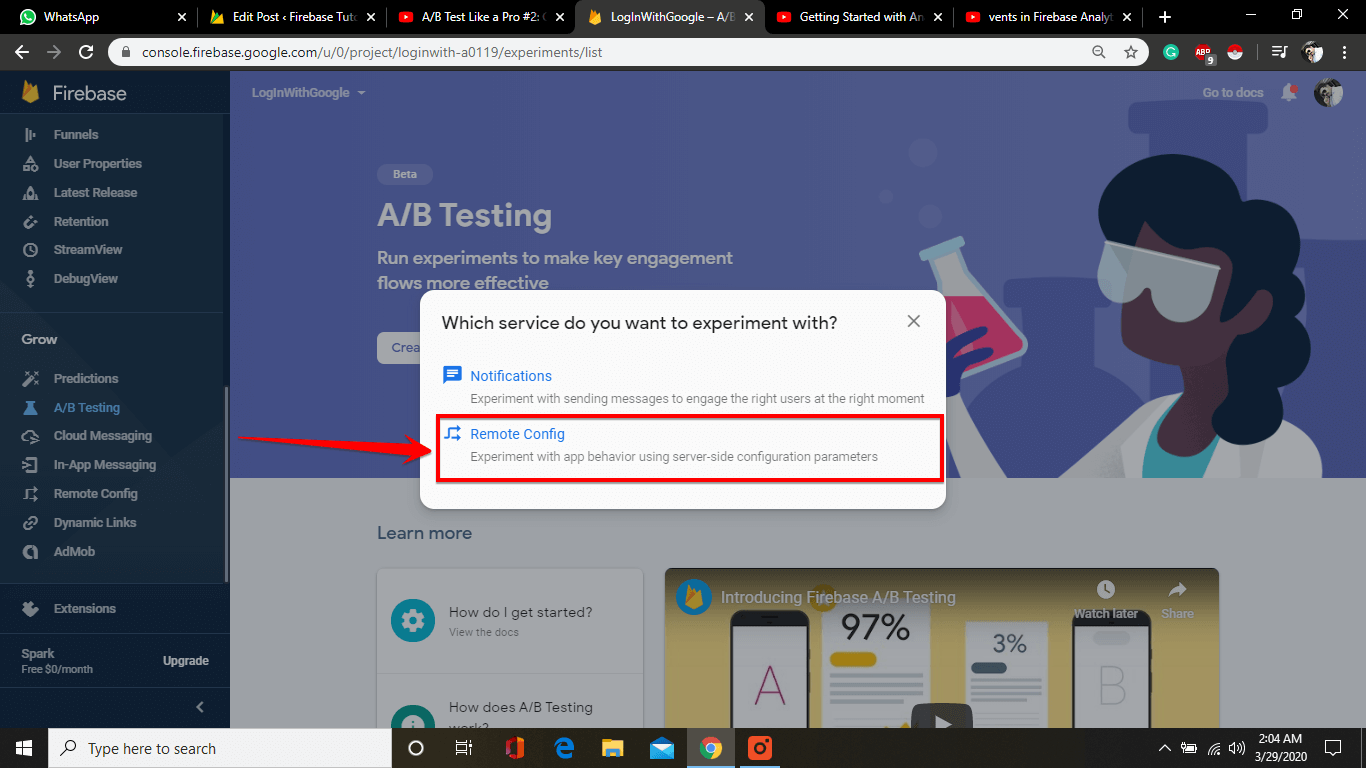
- Now here you’re going to work with Remote Config, click on it.
Remote config experiment has four major parts:
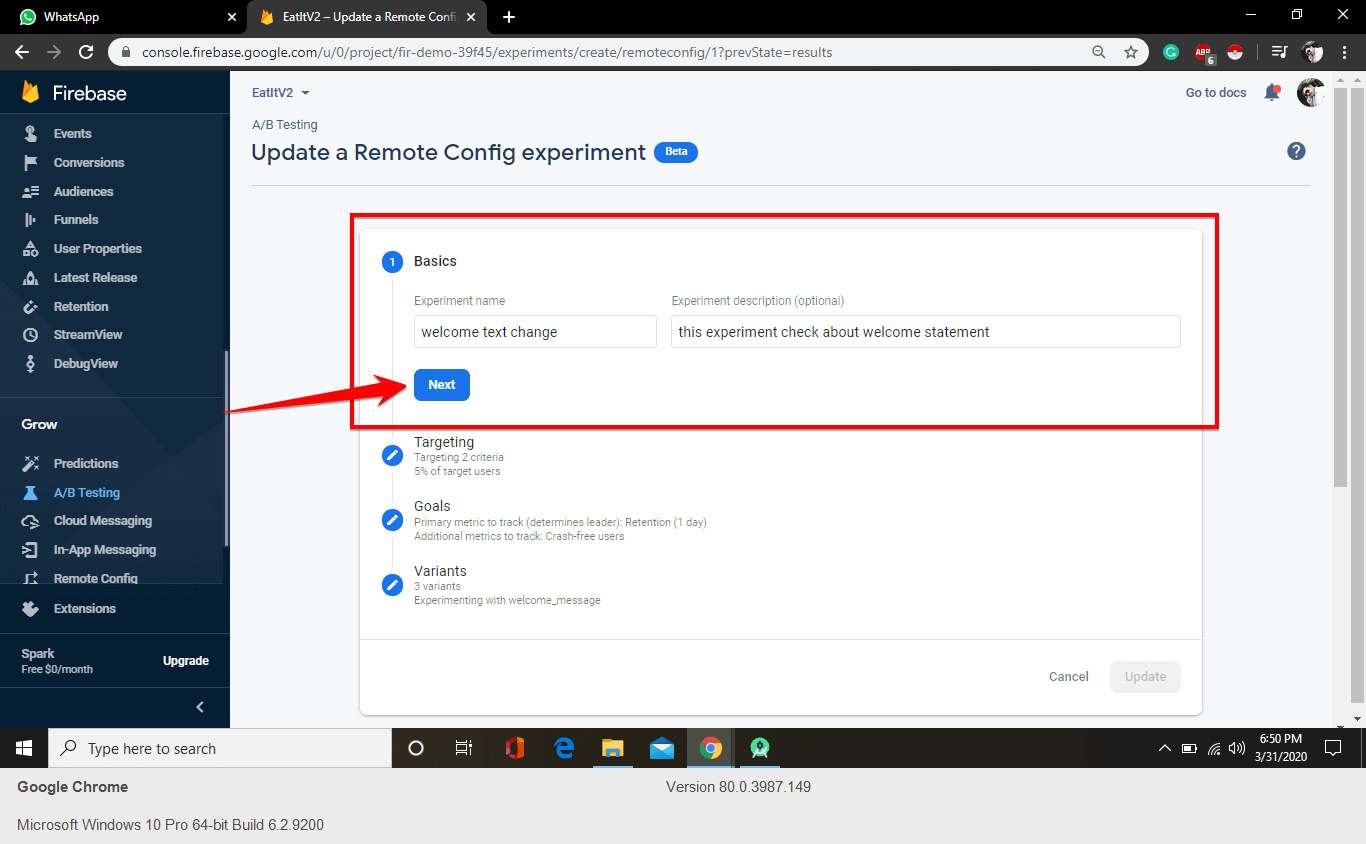
A. Basic:
In the basic step, you add the basic things like the experiment name and its description (short and relevant) and click Next.
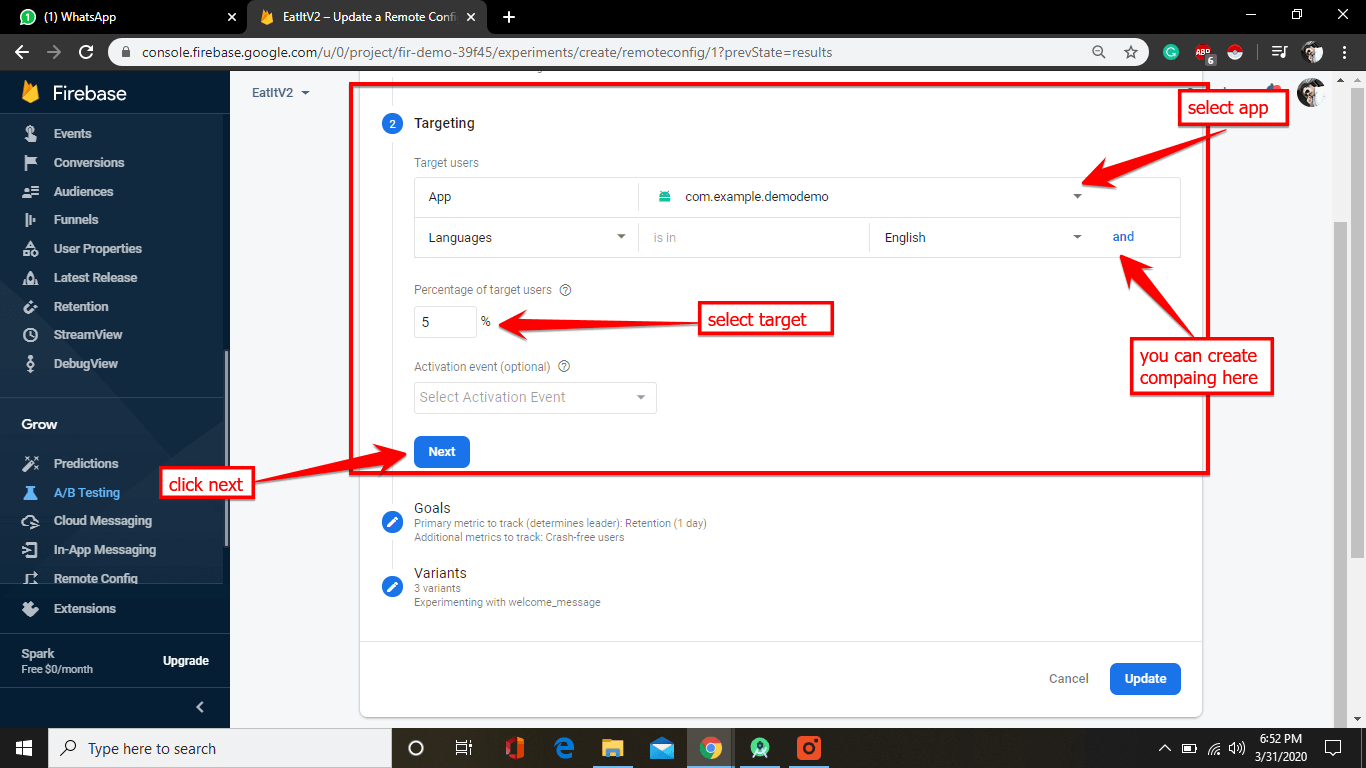
B. Targeting:
Afterward, select your targeting user.
Note: You can’t run your experiment on the same Android & iOS app at the same time because these platforms have different use patterns.
That’s why it won’t work on another. The best way is to make a separate experiment.
You can make a campaign by clicking on and buttons.
In my case, I’m targeting a device that only the English audience has installed.
Moreover, you can select country/region, app version, user audience as well
Percentage of target user: In this case, I’m using 5% of the total audience.
Keep in mind that don’t put your test to 100% because if your app found some bugs then it may affect your entire audience.
It is recommended to use 5-10% depending upon how risky you think your chances are.
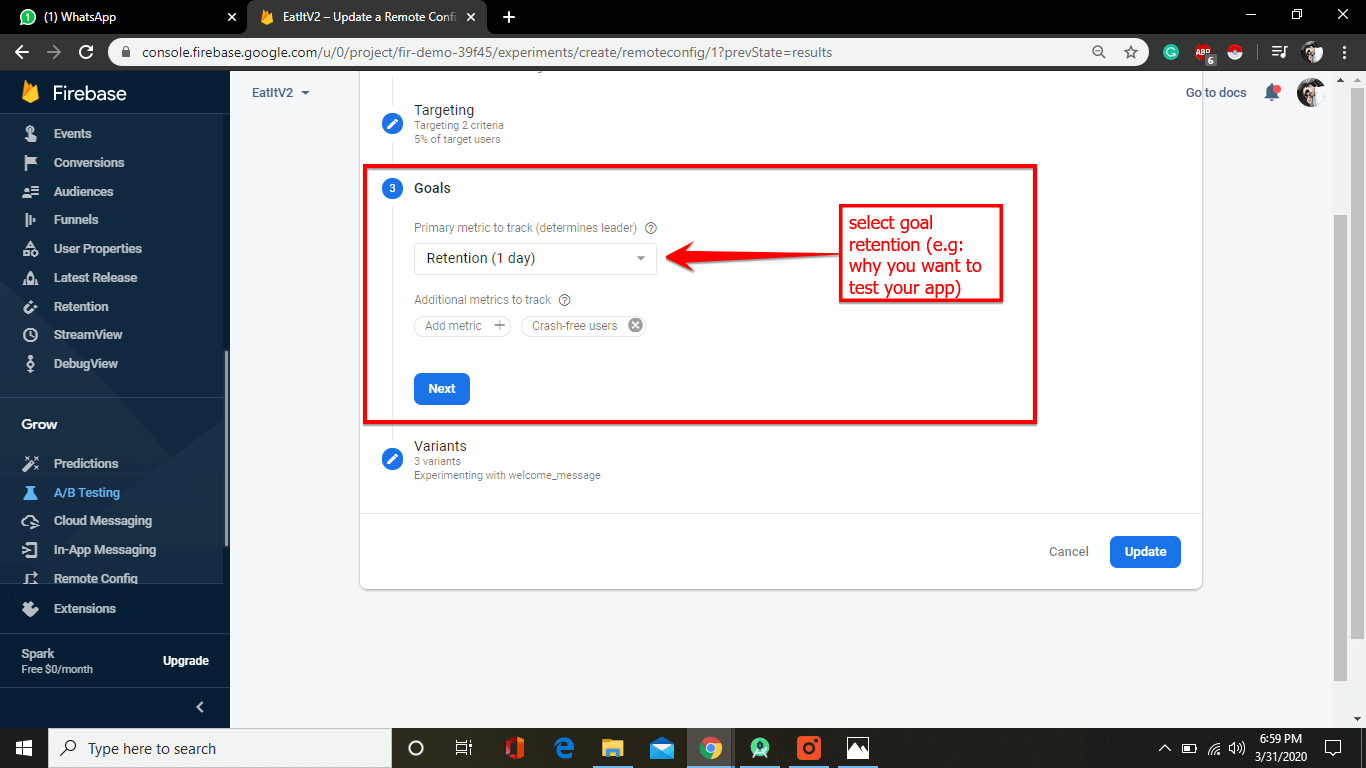
C. Goal:
Now select Goal Retention e.g, why you want to test your app.
There are a bunch of high-level goals like user engagement, retention rate (amount of time people spent with your app), in-app-purchase revenue, AdMob revenue, total revenue, etc.
There are also analytics events available in the app like a crash-free user, session start, etc.
Click the Add metric+ button to add more goals.
You can add 5 metrics to test at the same time.
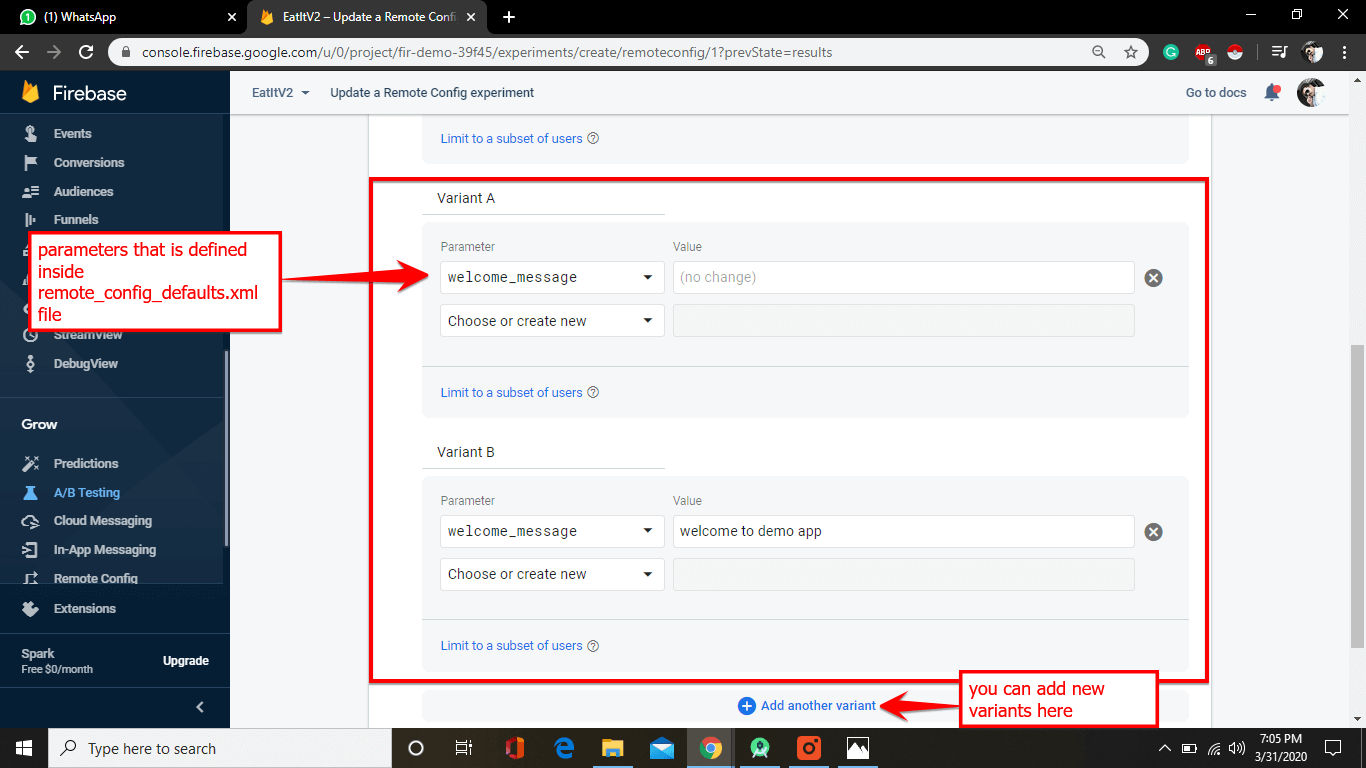
D. Variants:
In the end, add a variant to your app.
In my case, I’m testing two variants A & B. You can add multiple variants as well. As you know the parameter you already defined inside remote_config_defaults.xml.
If you didn’t select any value then it means a default value is selected.
Now click on the Review button
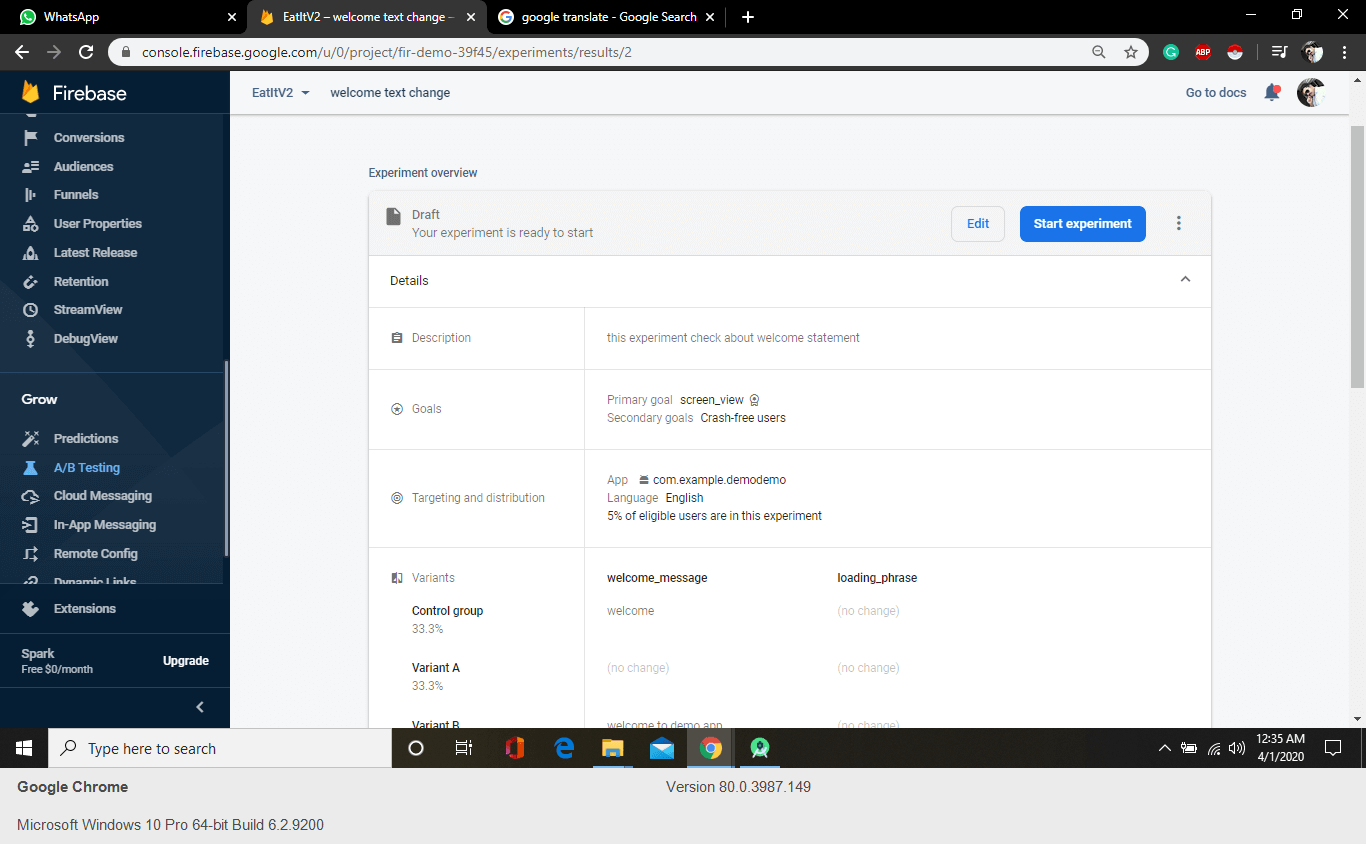
Now you can see a summary of your test.
Everything looks pretty good.
But how do you know that my text should fit in the space and looks good or not?
Manage Tests
Luckily A/B testing makes testing these variants easy.
What you need to do is to grab an instance ID token (which is a unique identifier) of our application and assign it to the instance of our app running on a particular device and then we can tell remote config to deliver a specific variation to that specific app instance.
So then we can try out each variation before we publish our experiment.
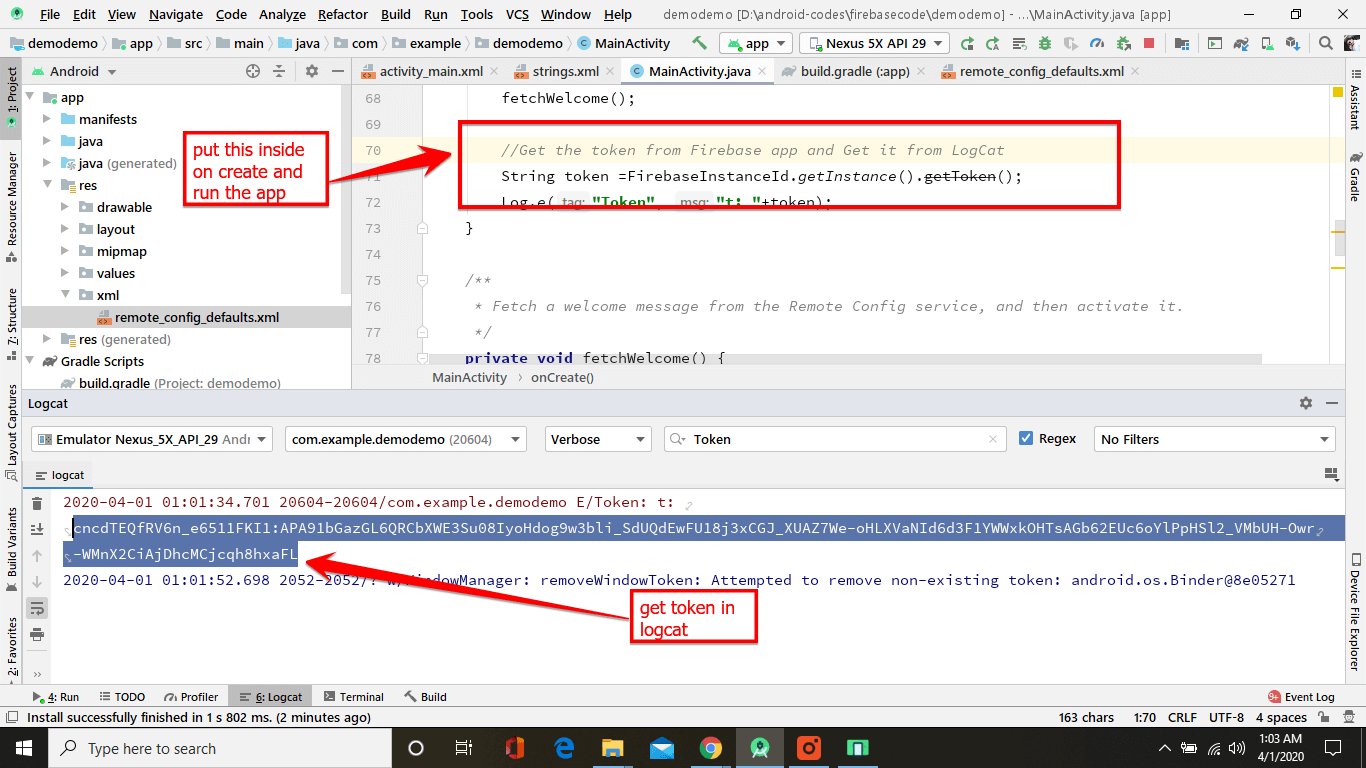
So getting our instance-id token requires a tiny bit of code.
Just copy above code and paste it inside MainActivity.java onCreate() method and run the app. you will get token in the logcat window as shown below
Now go back to the console and scroll down your summary page and click on Manage test devices.
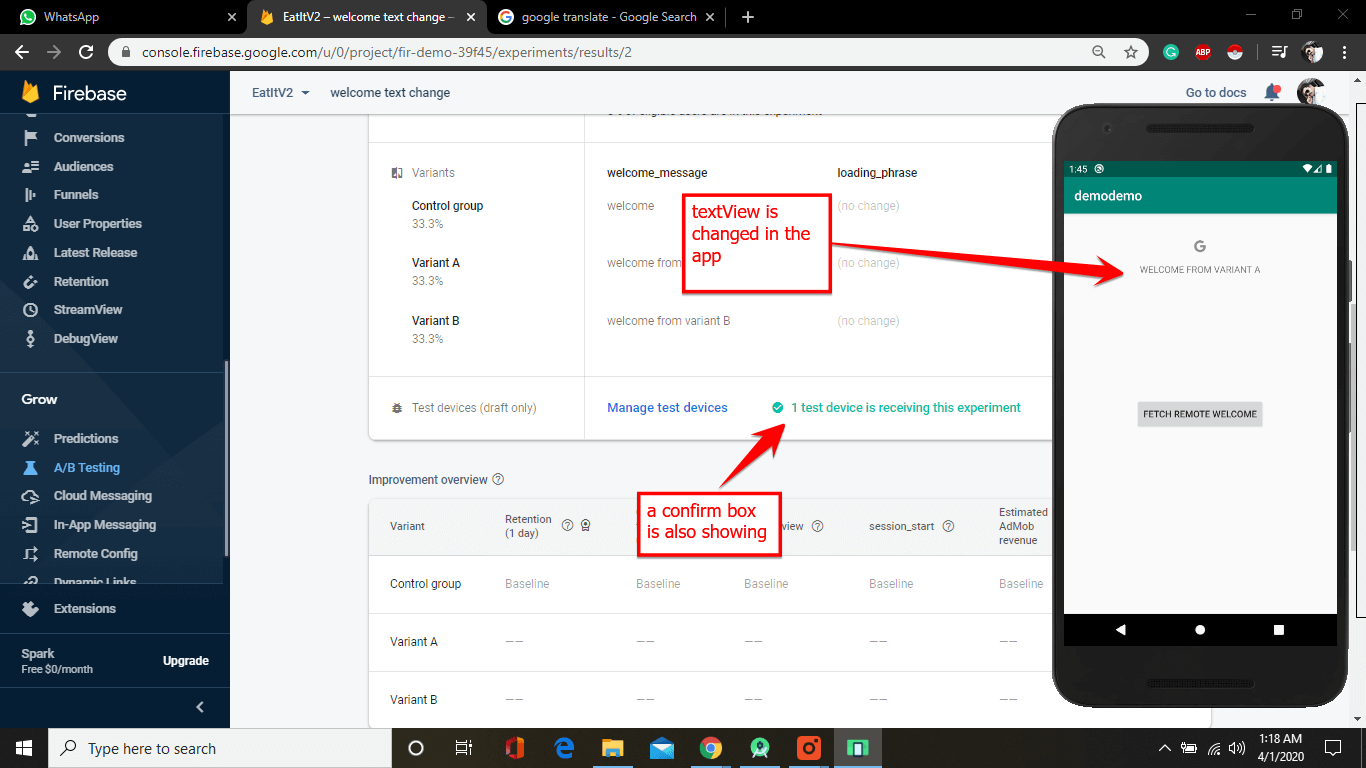
A popup box appears Enter Token ID, Select Variant, click Add and click Save

Now you can see “1 test device is receiving this experiment” at the bottom of the Details portion.
And you can run the app and TextView also showing the details.
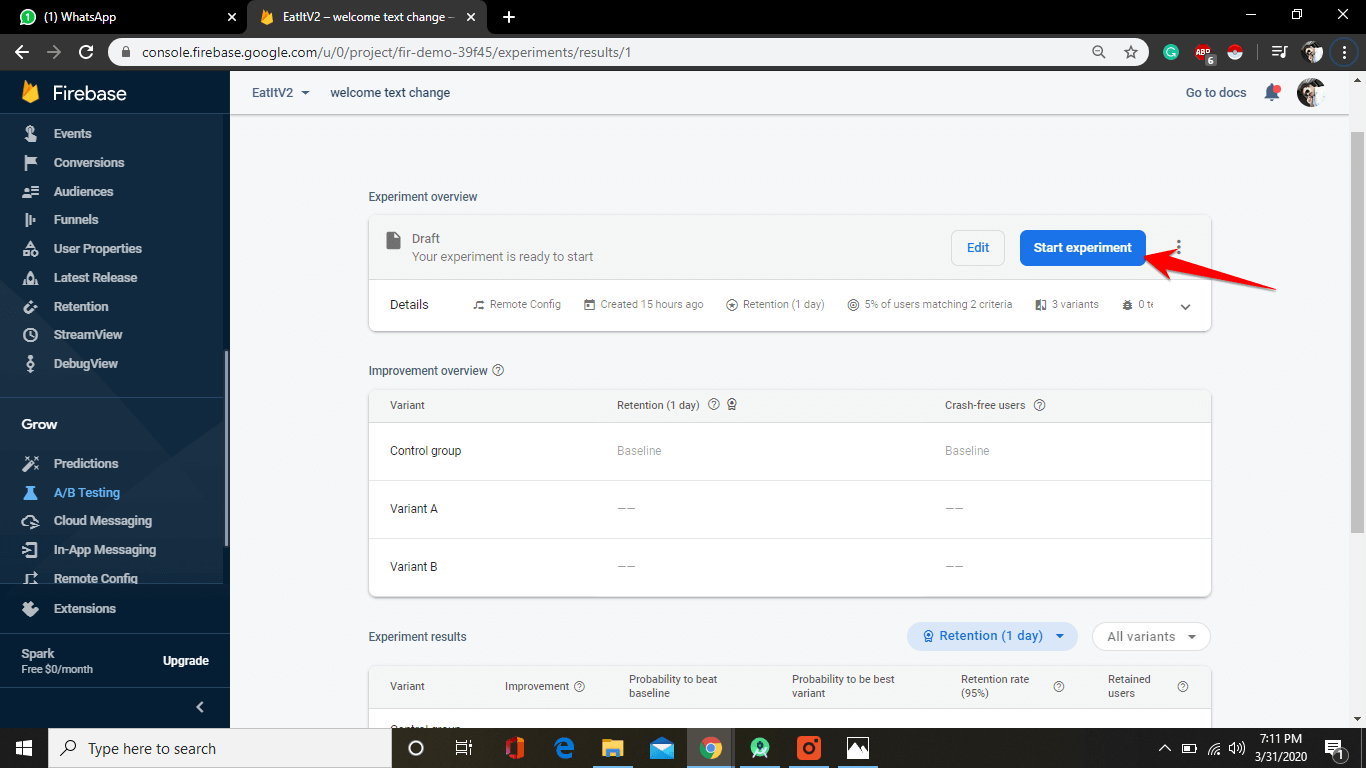
Now your experiment is ready. Click on Start experiment
Now the next step is to sit back, feel relaxed and wait.
You need some time for this experiment to run so it can reach the right amount of users and also they need some time to get used to it.
Now the next step is to analyze your experiment.
Step 3: Understand the Experiment Results.
Well, now it’s time to check the results of the A/B test.
It is recommended that not to change anything in your app during the testing phase until the A/B test determines a winner.
See when the user sees something different on your app, they notice and react to it.
But that doesn’t mean this change is good in the long run.
What if your changes are bad and people don’t like it?
That’s why Firebase suggests you run your test for at least two weeks in order to get the best and perfect results.
Now go to the console, open your project, and go to the A/B testing tab and open your experiment. Here you can see I have 0 results here.
The reason here is that I’m testing this app on a sample app that has a monthly active user of 1.
But if I test on some devices then it’s not getting better results.
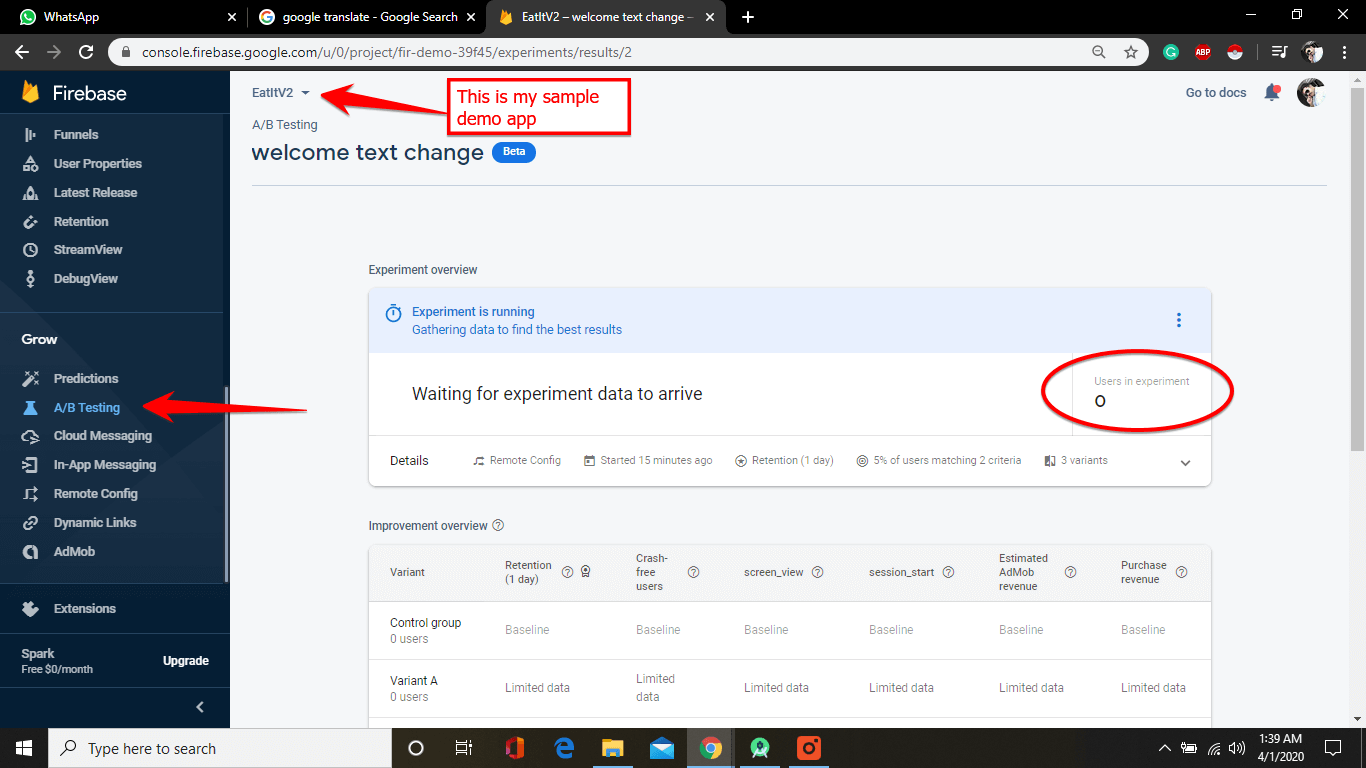
So you need to try this on the actual real app which is already in production which has the actual users.
One more thing if you use the same way as I did and not get any results then you may forget to update remote-config libraries.
You have to update the latest libraries on your build.gradle (app) file.
Currently, I don’t have access to any production app, that’s why I am using this video’s screenshots. And try to explain this. Yeah sure, you can watch this video to get a better understanding.
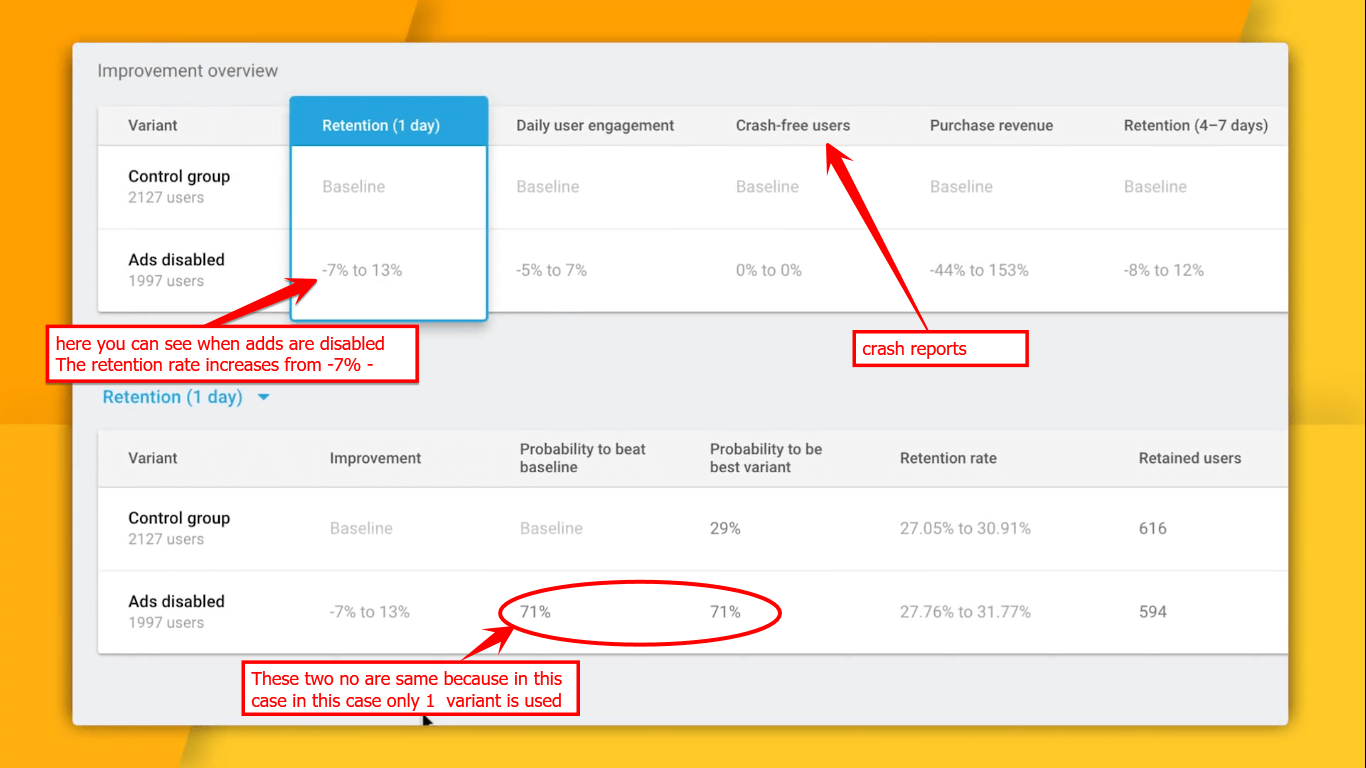
Here you can see improvement overview
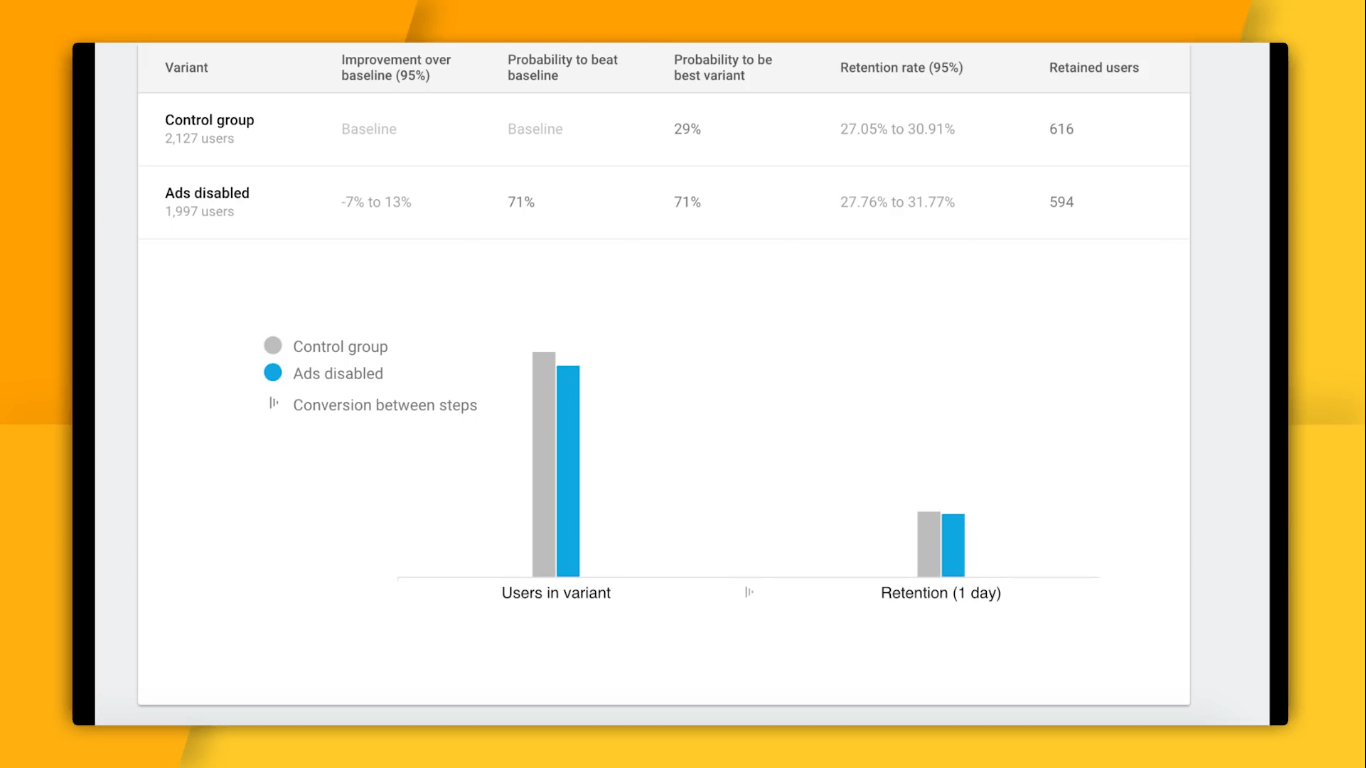
Take a look at another experiment snippet.

In some cases, you may have seen a graph. As you know that graph always is seen as good when analyzing something.
Now you can see that by removing ads people spend more time on the app.
In this way, you can collect information according to your needs.
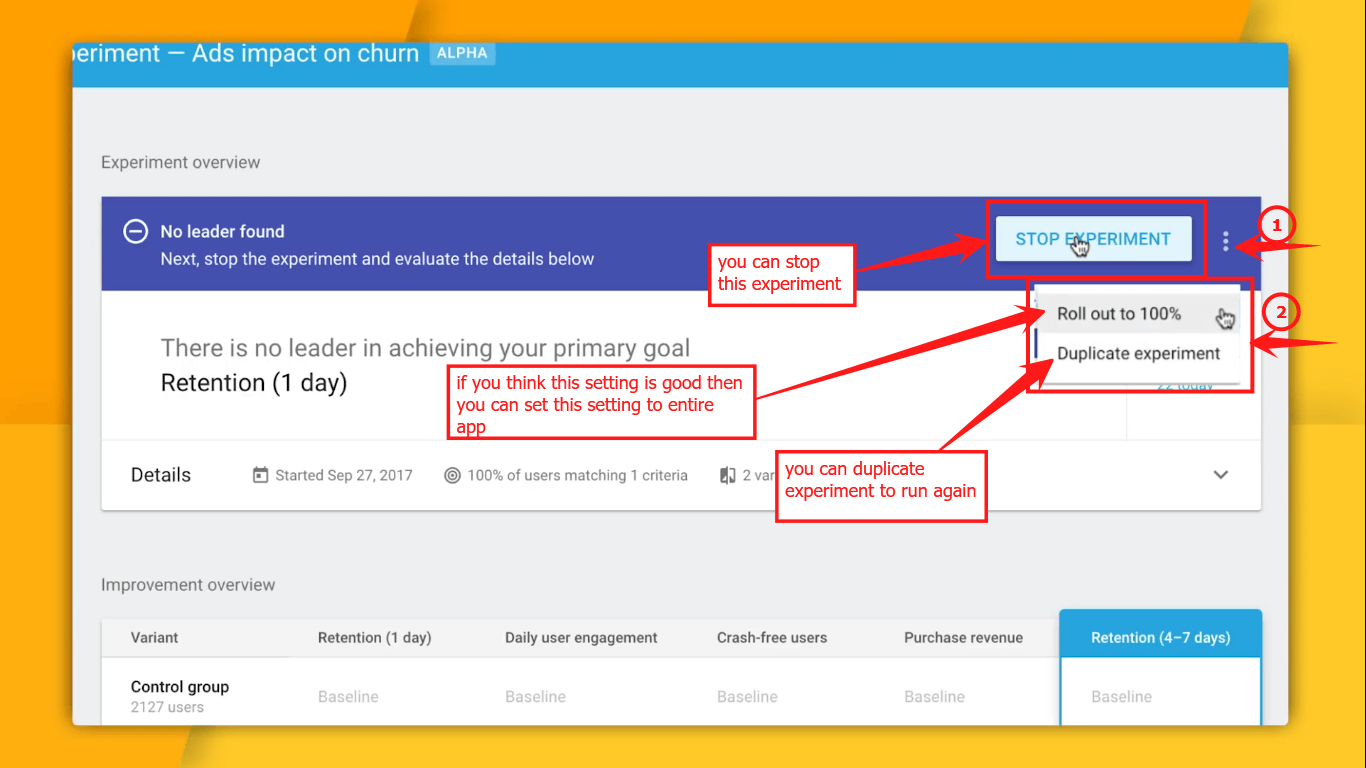
Well, you may have seen these options below. You can stop the experiment, you can duplicate the experiment, or you can roll out these settings to the entire app.
Roll-out to 100% doesn’t mean you are adding more audience.
It means you stopped this experiment, take this setting from one of the variants and make those official new values in the remote config for all your users in the app. It means you determine a winner.
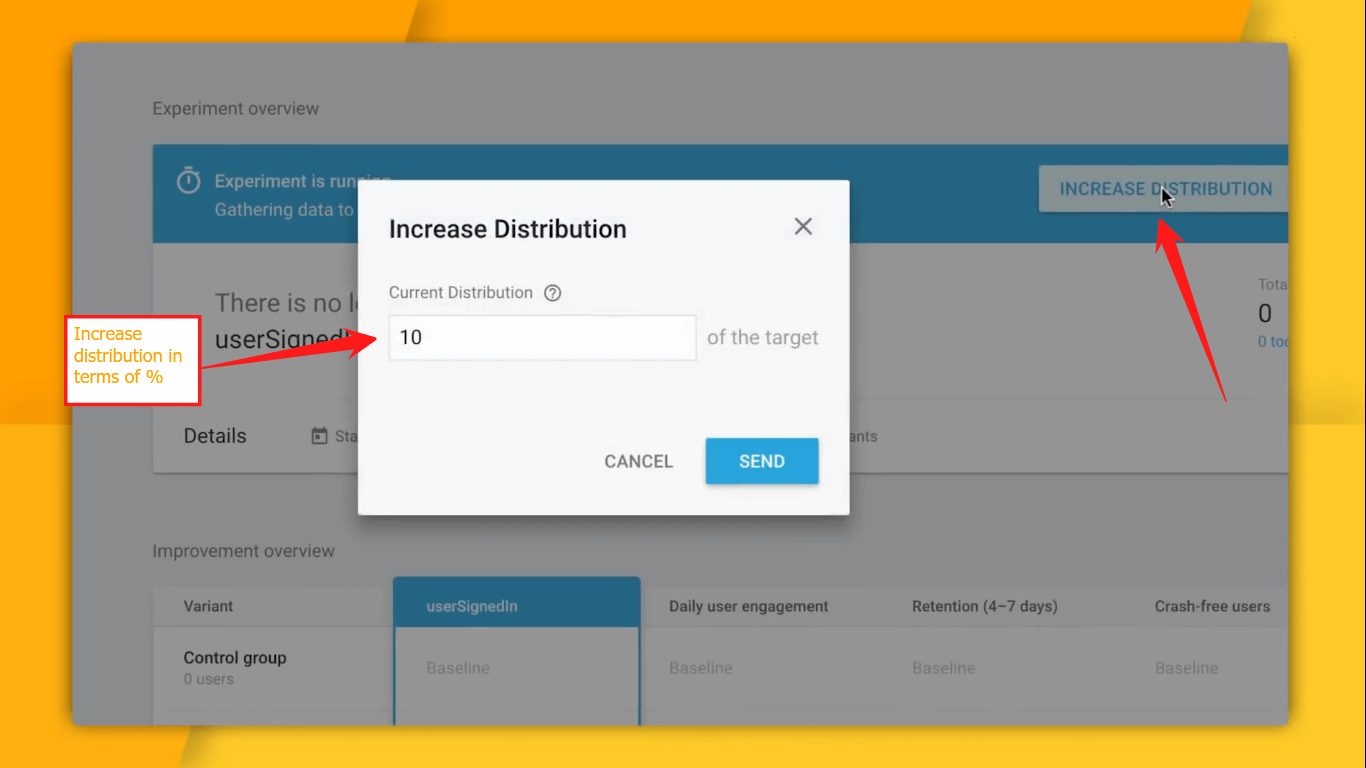
You may have seen an increase in distribution dialogue at this time.
You can increase your distribution level.
That’s it for this tutorial. I hope you enjoyed it.
Don’t forget to ask a question. I’ll reply to every person.
5 thoughts on “How to Perform A/B Test Using Firebase with Remote Config”
Comments are closed.