
Do you want to use Firebase Remote Config to force users to update your app?
Then you’ll learn something magical.
Not that magical to force your girlfriend to send you a PS5 present on your birthday. 😂
Here’s the fast forward video to know what you’ll learn in this guide.
Quick Jumps
What is Firebase?
Firebase is a mobile and web application development platform developed by Firebase, Inc in 2011. Later, it was acquired by Google in 2014.
What is Firebase Remote Config?
Firebase Remote Config is a cloud service that lets you change the behavior and appearance of your app without requiring users to download an app update.
When using Remote Config, you create in-app default values that control the behavior and appearance of your app.
Then, you can later use the Firebase console or the Remote Config REST API to override in-app default values for all app users or for segments of your user base. Cool, right?
The best part?
Before I start implementing Firebase Remote Config in Android, let me illustrate an example.
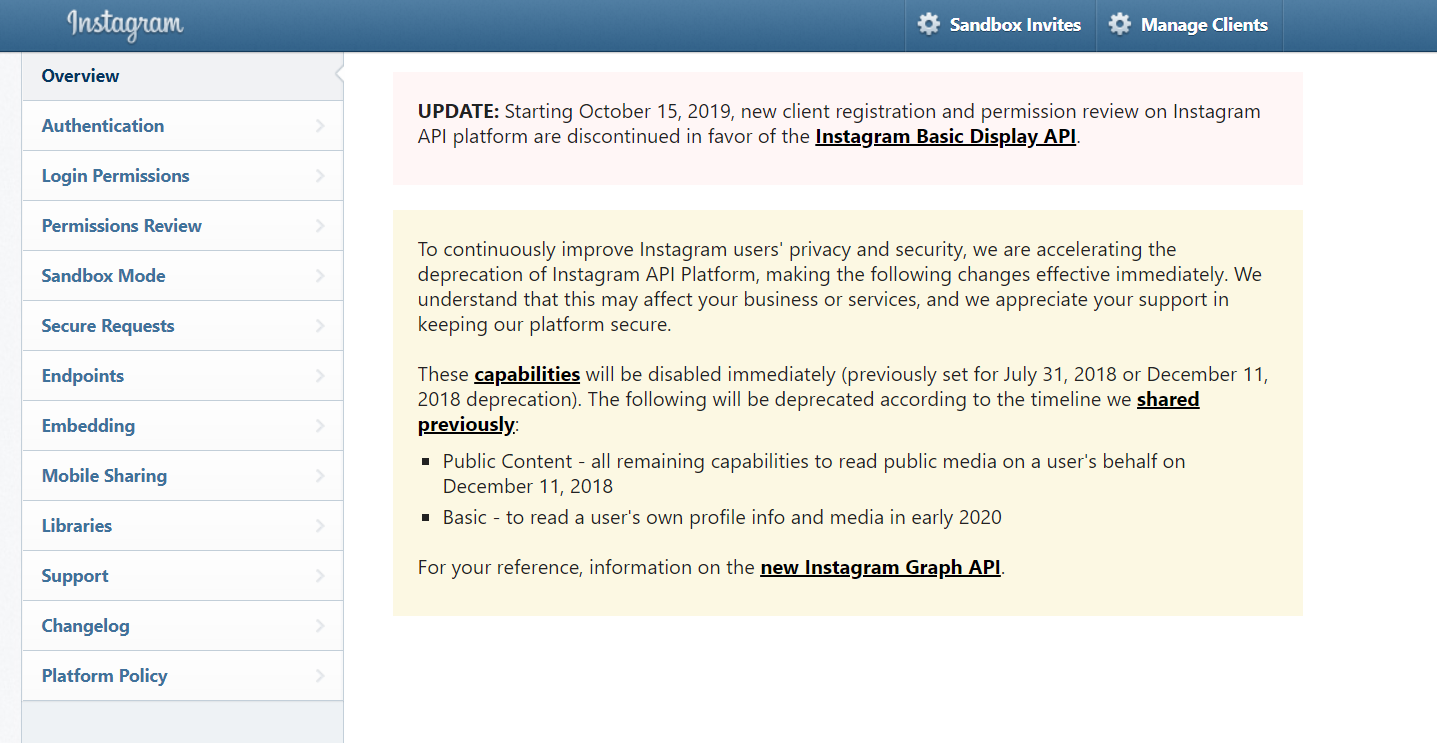
Suppose you are having an app, which uses Instagram API (just assume it) to fetch some user data and show it in the app.
Your app is working fine, all good.
You are growing with the number of users and getting a lot of positive reviews every day.
But one day, you receive an email from Instagram saying that they have made some changes to their API, please update it ASAP.
Okay, you got it, you just need a minor change in your code before the deadline.
You open Android Studio and fix that API, generate a signed APK, and roll it out to Google Play Store.
Cool, you thought everything is settled now.
But one evening, you receive a notification from your Google Play Console App saying a user wrote a bad review explaining that your app is not working or it is totally rubbish 🙁
That notification gives you goosebumps because you tested every aspect of your app to death and how could that user say that.
But when you go into further details, you see that the user is using that old version of the app where you used the old Instagram API, which is no longer working.
That’s where the problem begins -_-
You spent your whole night thinking how you could ask that user to update the app?
Now here, the Firebase Remote Config comes into action.
In this whole tutorial, I am going to show you how to implement the Firebase Remote Config to force your users to update the app.
But you can also use Firebase Remote Config in a lot of others’ way, I will explain at the end!
How will we force the user to update the app using Firebase Remote Config?
We will:
- Implement Firebase Remote Config in Android app
- Save the latest version code of an app in Remote config panel
- Fetch that value from Remote Config and check if it is greater than then-current app version code or not, if it is, then prompts the user to update the app. Otherwise, the app is already updated.
Okay, let’s start then.
Create a New Project in Android Studio
- Open Android Studio
- Click Start a new Project
- Enter application name (I entered Firebase Remote Config Tutorial)
- Enter Company Domain (androidbull.com)
- Enter Location.
- Finish the wizard with everything else, leaving the default.
My project created with the package name “com.androidbull.firebaseRemoteConfigTutorial”
Before I do some coding in Android Studio, I am going to setup Firebase Project and implement it in Android Studio
Implement Firebase SDK in Android
- Open Firebase Console
- Create a new project, name it “Firebase RemoteConfig Tutorials” – it is showing me a warning that I am having one project left, as I already created many projects
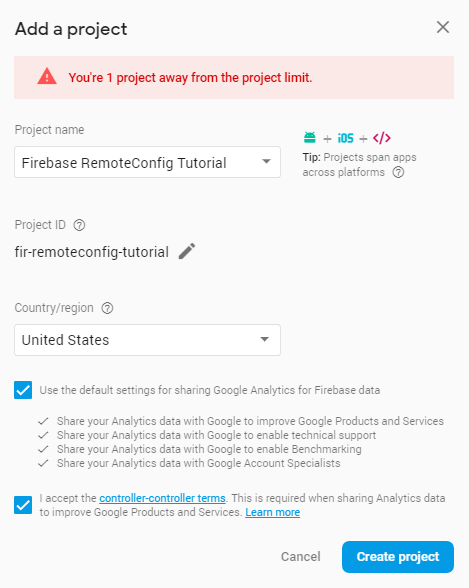
- Check the TOS checkbox and hit “Create Project.”
- Click on “Add Firebase to your Android App”
- Enter the package name (I entered “com.androidbull.firebaseremoteconfigtutorials”)
- Enter App nickname (Remote Config App)
- Click Register app – leave SHA-1 blank, it is not necessary for now
- Now, download the google-service.json file to the app directory of your project
- Click Next
- Copy and paste the dependencies, as directed
- Sync the project in Android Studio
- Click Next
- Run your app on an emulator or real device, so that Firebase could verify that you have added everything correctly. You can skip this step too, but that is not recommended
- After you install and run your app, you can continue to your console on Firebase
PS: I hope you guys are already familiar with adding Firebase and all that small stuff. So, I just explained to them thoroughly here.
Implementing Firebase Remote Config in Android
Okay, so Firebase added? Now move on to adding Firebase Remote Config
- Add Firebase Remote Config dependency to your Android project by pasting the below line of code in build.gradle(app) under the dependencies section
implementation 'com.google.firebase:firebase-config:16.0.0'
Make sure to copy the latest dependency from here.
- Open that Firebase project in Firebase Console
- In the left panel, under Grow section, click on Remote Config

- Now, you will see a form asking you to enter the Parameter Key, and Default Value.
- I will explain what these are. For now, enter “latest_app_version” for Parameter Key and enter null as a default value.
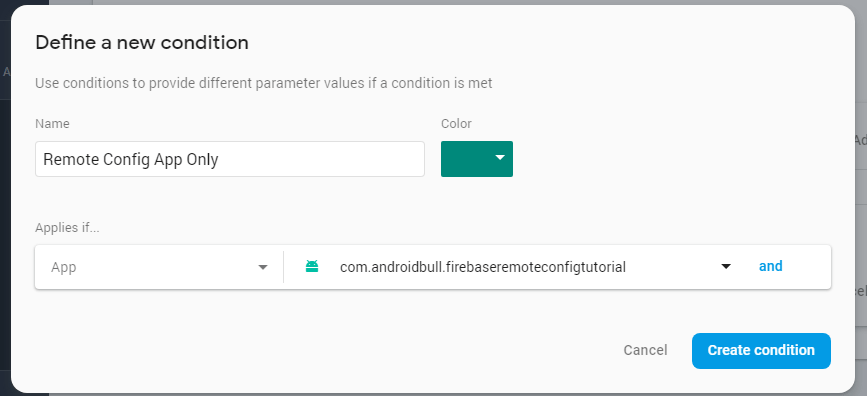
- Now, hit the top-right drop-down menu saying “Add value for Condition” and select “Define New Condition.”
- In the new dialog, enter the condition name (I entered “Remote Config App Only”)
- Select color, whatever you want.
- In Applies if, select App from the drop-down and now on the right side, select that same package name and click Create.
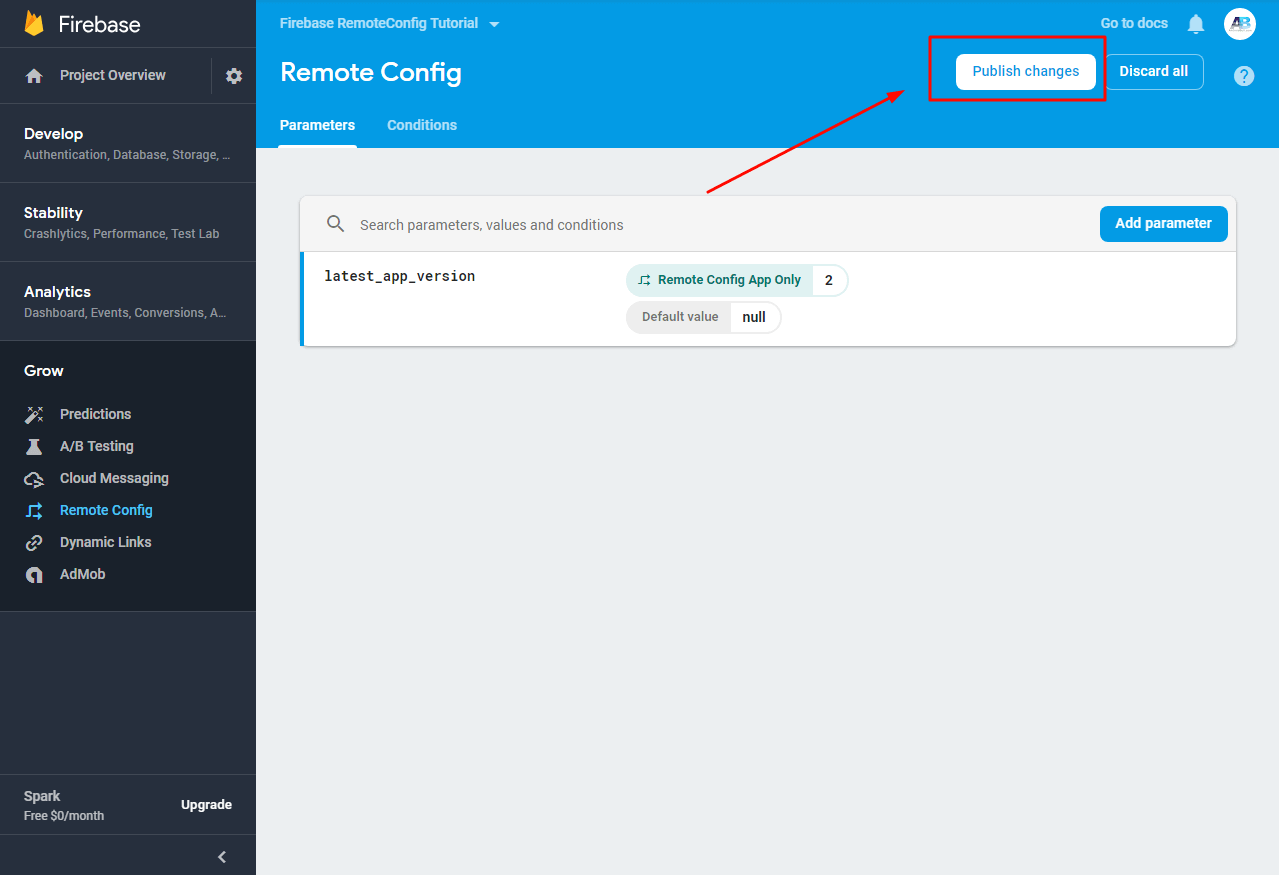
- After the condition created, you will see another text field with the title “Value for Remote Config App Only.” Enter 2 in that field. Add hit Add Parameter
- After that click on Publish Changes
What is Parameter Key and Default Value and Value for Remote Config App Only
- A parameter is a key that will be used in the app to identify that value.
- The default value is that value which will be served against that particular Parameter Key if no condition is met
- And Value for Remote Config App Only is the value that will be sent if that condition is fulfilled.
In our case, if we are requesting the value against “latest_app_version” from any other app, it will be returned null. And if we request it from the app having a package name “com.androidbull.firebaseremoteconfigtutorial” then it will return 2 – as there could be many apps under the same Firebase Project. That’s why we set that condition.
Getting Data from Firebase Remote Config in Android
Before writing code, let me explain how Firebase Remote Config works.
First, we need to get the Remote Config Singleton Object
The singleton object is used to store in-app default parameter values, fetch updated parameter values from the service, and control when fetched values are made available to your app
Then set an in-app default parameter value
You should set in-app default parameter values in the Remote Config object so that your app behaves predictably before it fetches values from the Remote Config service. You can do that by creating a default Map or XML resource file. We will be using Map
Get parameter values to use in your app
We will retrieve values from Firebase Server and use them in our app. If anything went wrong then default values will be served.
Okay, let’s start coding in Android Studio:
In MainActivity.java, create an instance of FirebaseRemoteConfig and initialize as follow
private FirebaseRemoteConfig mFirebaseRemoteConfig = FirebaseRemoteConfig.getInstance();
Now we need to create a HashMap to set defaults to Firebase Remote Config.
private HashMap<String, Object> firebaseDefaultMap;
firebaseDefaultMap = new HashMap<>();
Put the current version code of an app in the default Map against the key “latest_app_version”
String VERSION_CODE_KEY  = "latest_app_version";
firebaseDefaultMap.put(VERSION_CODE_KEY, BuildConfig.VERSION_CODE);
Now set the default HashMap to Firebase Remote Config Instance
mFirebaseRemoteConfig.setDefaults(firebaseDefaultMap);
Now we need to configure the setting of Firebase Remote Config to enable the developer mode
 mFirebaseRemoteConfig.setConfigSettings(
        new FirebaseRemoteConfigSettings.Builder().setDeveloperModeEnabled(BuildConfig.DEBUG)
            .build());
Now we need to fetch the data and add an onCompleteListener, which will be called when the fetch process is completed.
And inside that, we will check if the process was successful or not. If it was not successful, then we can call the fetch function again, or we can just show an appropriate message.
And if the task was successful, then call activate tech() to make those values available in the app. And after that, we call the function to check if the value from the server is greater than the current version of the app or not
mFirebaseRemoteConfig.fetch().addOnCompleteListener(new OnCompleteListener<Void>() {
      @Override
      public void onComplete(@NonNull Task<Void> task) {
        if (task.isSuccessful()) {
          mFirebaseRemoteConfig.activateFetched();
          Log.d(TAG, "Fetched value: " + mFirebaseRemoteConfig.getString(VERSION_CODE_KEY));
          //calling function to check if new version is available or not
          checkForUpdate();
        }else
          Toast.makeText(MainActivity.this,"Someting went wrong please try again",Toast.LENGTH_SHORT).show();
      }
    });

    Log.d(TAG, "Default value: " + mFirebaseRemoteConfig.getString(VERSION_CODE_KEY));
  }
Inside the check for update(), we compare the current value with the one we fetched from the firebase console. And if the value from Firebase is greater, then it means that a new version is available. Now we need to show the Alert Dialog asking to update the app.
 private void checkForUpdate() {
    int latestAppVersion = (int) mFirebaseRemoteConfig.getDouble(VERSION_CODE_KEY);
    if (latestAppVersion > getCurrentVersionCode()) {
      new AlertDialog.Builder(this).setTitle("Please Update the App")
          .setMessage("A new version of this app is available. Please update it").setPositiveButton(
          "OK", new OnClickListener() {
            @Override
            public void onClick(DialogInterface dialog, int which) {
              Toast
                  .makeText(MainActivity.this, "Take user to Google Play Store", Toast.LENGTH_SHORT)
                  .show();
            }
          }).setCancelable(false).show();
    } else {
      Toast.makeText(this,"This app is already upto date", Toast.LENGTH_SHORT).show();
    }
  }
That’s it.
Here is the complete code of my MainActivity.java file. I made no change in an XML file.
package com.androidbull.firebaseremoteconfigtutorial;

import android.content.DialogInterface;
import android.content.DialogInterface.OnClickListener;
import android.content.pm.PackageManager.NameNotFoundException;
import android.os.Bundle;
import android.support.annotation.NonNull;
import android.support.v7.app.AlertDialog;
import android.support.v7.app.AppCompatActivity;
import android.util.Log;
import android.widget.Toast;
import com.google.android.gms.tasks.OnCompleteListener;
import com.google.android.gms.tasks.Task;
import com.google.firebase.remoteconfig.FirebaseRemoteConfig;
import com.google.firebase.remoteconfig.FirebaseRemoteConfigSettings;
import java.util.HashMap;

public class MainActivity extends AppCompatActivity {

  private FirebaseRemoteConfig mFirebaseRemoteConfig = FirebaseRemoteConfig.getInstance();
  private HashMap<String, Object> firebaseDefaultMap;
  public static final String VERSION_CODE_KEY = "latest_app_version";
  private static final String TAG = "MainActivity";

  @Override
  protected void onCreate(Bundle savedInstanceState) {
    super.onCreate(savedInstanceState);
    setContentView(R.layout.activity_main);
//This is default Map
    firebaseDefaultMap = new HashMap<>();
    //Setting the Default Map Value with the current version code
    firebaseDefaultMap.put(VERSION_CODE_KEY, getCurrentVersionCode());

    //Setting that default Map to Firebase Remote Config
    mFirebaseRemoteConfig.setDefaults(firebaseDefaultMap);

    //Setting Developer Mode enabled to fast retrieve the values
    mFirebaseRemoteConfig.setConfigSettings(
        new FirebaseRemoteConfigSettings.Builder().setDeveloperModeEnabled(BuildConfig.DEBUG)
            .build());

    //Fetching the values here
    mFirebaseRemoteConfig.fetch().addOnCompleteListener(new OnCompleteListener<Void>() {
      @Override
      public void onComplete(@NonNull Task<Void> task) {
        if (task.isSuccessful()) {
          mFirebaseRemoteConfig.activateFetched();
          Log.d(TAG, "Fetched value: " + mFirebaseRemoteConfig.getString(VERSION_CODE_KEY));
          //calling function to check if new version is available or not
          checkForUpdate();
        }else
          Toast.makeText(MainActivity.this,"Someting went wrong please try again",Toast.LENGTH_SHORT).show();
      }
    });

    Log.d(TAG, "Default value: " + mFirebaseRemoteConfig.getString(VERSION_CODE_KEY));
  }

  private void checkForUpdate() {
    int latestAppVersion = (int) mFirebaseRemoteConfig.getDouble(VERSION_CODE_KEY);
    if (latestAppVersion > getCurrentVersionCode()) {
      new AlertDialog.Builder(this).setTitle("Please Update the App")
          .setMessage("A new version of this app is available. Please update it").setPositiveButton(
          "OK", new OnClickListener() {
            @Override
            public void onClick(DialogInterface dialog, int which) {
              Toast
                  .makeText(MainActivity.this, "Take user to Google Play Store", Toast.LENGTH_SHORT)
                  .show();
            }
          }).setCancelable(false).show();
    } else {
      Toast.makeText(this,"This app is already upto date", Toast.LENGTH_SHORT).show();
    }
  }
  private int getCurrentVersionCode() {
    try {
      return getPackageManager().getPackageInfo(getPackageName(), 0).versionCode;
    } catch (NameNotFoundException e) {
      e.printStackTrace();
    }
    return -1;
  }
}
Now, when the app runs. It will automatically check if the current version code of the app is equal to the one it fetched from Firebase Remote Config.
If it is equal, then a toast message will be shown, saying your app is already up to date. Otherwise, it will prompt the user to update the app. So, when you update your app, you just need to put the latest version code in Firebase Remote Config. That’s it.
I hope you guys understood something out of it.
You can download the complete code from this GitHub repository.
Here is the explanation of the technical terms we used above.
Why do we set a default Map FirebaseRemoteConfig instance?
It is because there could be a lot of reasons for failing a fetch process, so we don’t want the app to crash just because we couldn’t fetch the values. So, we use default values until the new values are fetched.
Why do we configure the settings to enable the developer mode?
During the development, we may want to refresh the cache more frequently (many times per hour). Otherwise, the data is fetched and cached to 12 hours. After 12 hours, the cache expires, and it fetches new values.
What is activateFetch();
After completing the fetch process and confirming that the process was successful, we need to activate fetch so that the fetched values could be made available in the app. Like if we call getString and pass the key before the activateFetch(). We will only get the default value.
Can we get other data types from Firebase Remote Config?
Yes, you can use getString(), getBoolean(), getByteArray(), getDouble(), getLong() to get the String, Boolean, ByteArray, Double and Long values respectively.
If you got any more questions. You can ask them in the comments.
Moreover, below is the explanation of things we didn’t discuss in the above small project.
Or you can watch this complete video here:
What Are Conditions in Firebase Remote Config Console?
Conditions are very useful; they help us to avail of certain values to certain users.
Like in the above example, if we have more than one app, and somehow we are using that same parameter to fetch the value, then there could be a big problem.
So we set the condition to this app package name only. Now, if any other app from that same project tries to fetch the value, then null will be returned.
On the top, left side of the parameter, you can find a Condition tab. Where you can create, delete, or modify the existing conditions.
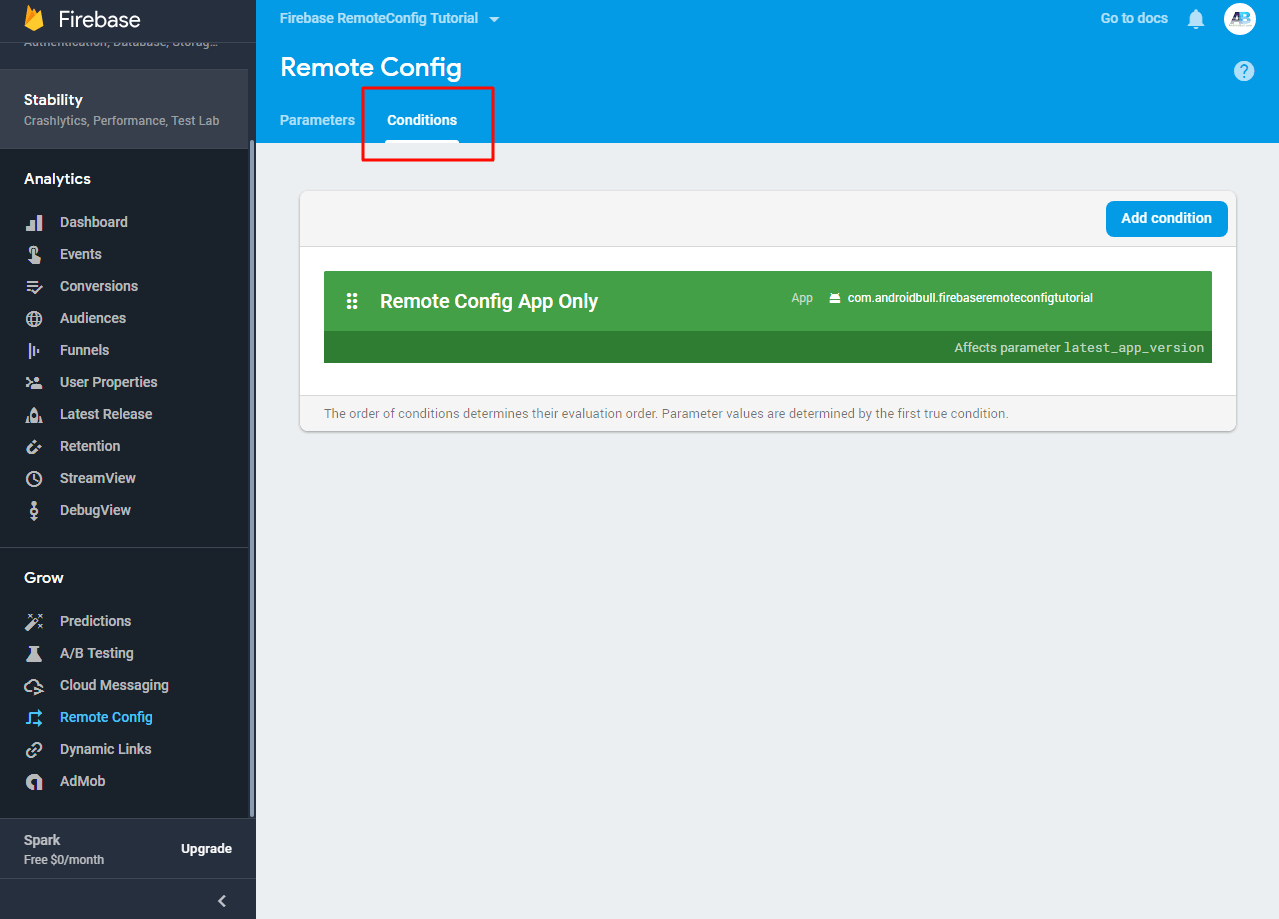
Here, you can see our existing condition. If we click the Add Condition button and check the drop-down under Applies If, we see a useful custom condition like
App: we can select the app which we want to fetch the data.
Version: After selecting the app, we can use and statement and select the particular version of that app
OS Type: We can select the OS that we want to effect, like Android or iOS if we included both version of the app in Firebase config
Device Language: we can select a particular language
Country/Region: To target a particular country
And there are much more like User audiences; we can target some audience segments we created. That’s another long topic. And User Property, User in random percentile, Prediction, etc.
We can join two or more conditions with AND or OR to make further complex conditions.
You can read more about it here.
Policies and Limits of Using Firebase Remote Config
Note the following policies:
- Don’t use Remote Config to make app updates that should require a user’s authorization. This could cause your app to be perceived as untrustworthy.
- Don’t store confidential data in Remote Config parameter keys or parameter values. It is possible to decode any parameter keys or values stored in the Remote Config settings for your project.
- Don’t attempt to circumvent the requirements of your app’s target platform using Remote Config.
Limits on Parameters and Conditions
Within a Firebase project, you can have up to 2000 parameters, and up to 100 conditions. Parameter keys can be up to 256 characters long, must start with an underscore or English letter character (A-Z, a-z), and may also include numbers. The total length of parameter value strings within a project cannot exceed 500,000 characters.
Some Other Ways to User Firebase Remote Config
- Use for A/B testing. I will soon write a detailed article about it very soon.
- Change the look of the app for paid users
- Advertise your seasonal event through the app
And a lot of other ways where you can use Firebase Remote Config
How Do I Use the Firebase Remote Config in My App? (The Trick)
I got my couple of apps on Google Play Store, but the one who is getting some downloads is New Incognito Browser – as the name suggests, it is an Incognito Browser.
So it’s happened many times with me that my AdMob account got disabled for 30 days or 21 days etc.
But I can’t wait to become my account active again. Because it costs time and money (time is money for me)
So to get rid of that. I have placed my AdMob ad unit id in Firebase Remote Config.
So, whenever there is some problem with my AdMob account.
I use one of my friend’s accounts, generate the ID, and replace it on Firebase remote config.
And the app starts showing ads from that new Ad unit id almost instantly.
If there was no Firebase Remote Config, then I have to put that Ad Unit ID in the android app and whenever there is a problem with my account.
I need to change that ID and generate a signed APK and roll it out to production. And then I have to wait for users to update my app and this could cost me a week or two to get almost all of my old users to the new app, which obviously cost lost in revenue.
So, in this way, Firebase Remote Config has helped me a lot.
Don’t forget to ask a question in the below comment, I reply to each comment.
Thanks for the comment. Yeah, you are right. That is necessary. Thank You